Hello! Welcome back to your digital art journey.
In our last lesson, we tackled the neck, learning how to construct it from a simple cylinder and the two major muscle groups that define its shape—the SCM and Trapezius. We established a core principle: breaking down complex anatomy into manageable geometric forms.
Today, we'll apply that exact same principle to one of the most notoriously difficult subjects in drawing: the hands. This lesson is designed to help you achieve the learning outcome: Construct the hand as a set of simple geometric forms (palm block and finger segments).
Instead of being intimidated by the hand's complexity, you'll learn a systematic way to build it from the ground up. This structural approach, much like building a complex application from simpler components in programming, will give you a reliable method for drawing hands from any angle.
1. The Big Idea: From Chaos to Construction
The hand has 27 bones, plus a web of muscles, tendons, and flesh. Trying to draw it by just copying contours is often a recipe for frustration. The key is to simplify.
Let's start with a short video that introduces this foundational concept.
How to Draw Hands from IMAGINATION - Step-by-Step
In 'How to Draw Hands from IMAGINATION,' Proko explains the core strategy we'll be using today. Pay attention to how he transforms the complex hand into simple, manageable shapes.
Watch from 02:28 to 03:07. The main takeaway here is the idea of simplifying the palm into a box and the fingers into cylinders or boxes.
The goal of this lesson is to be able to create structural drawings like these, which serve as the blueprint for a detailed hand.
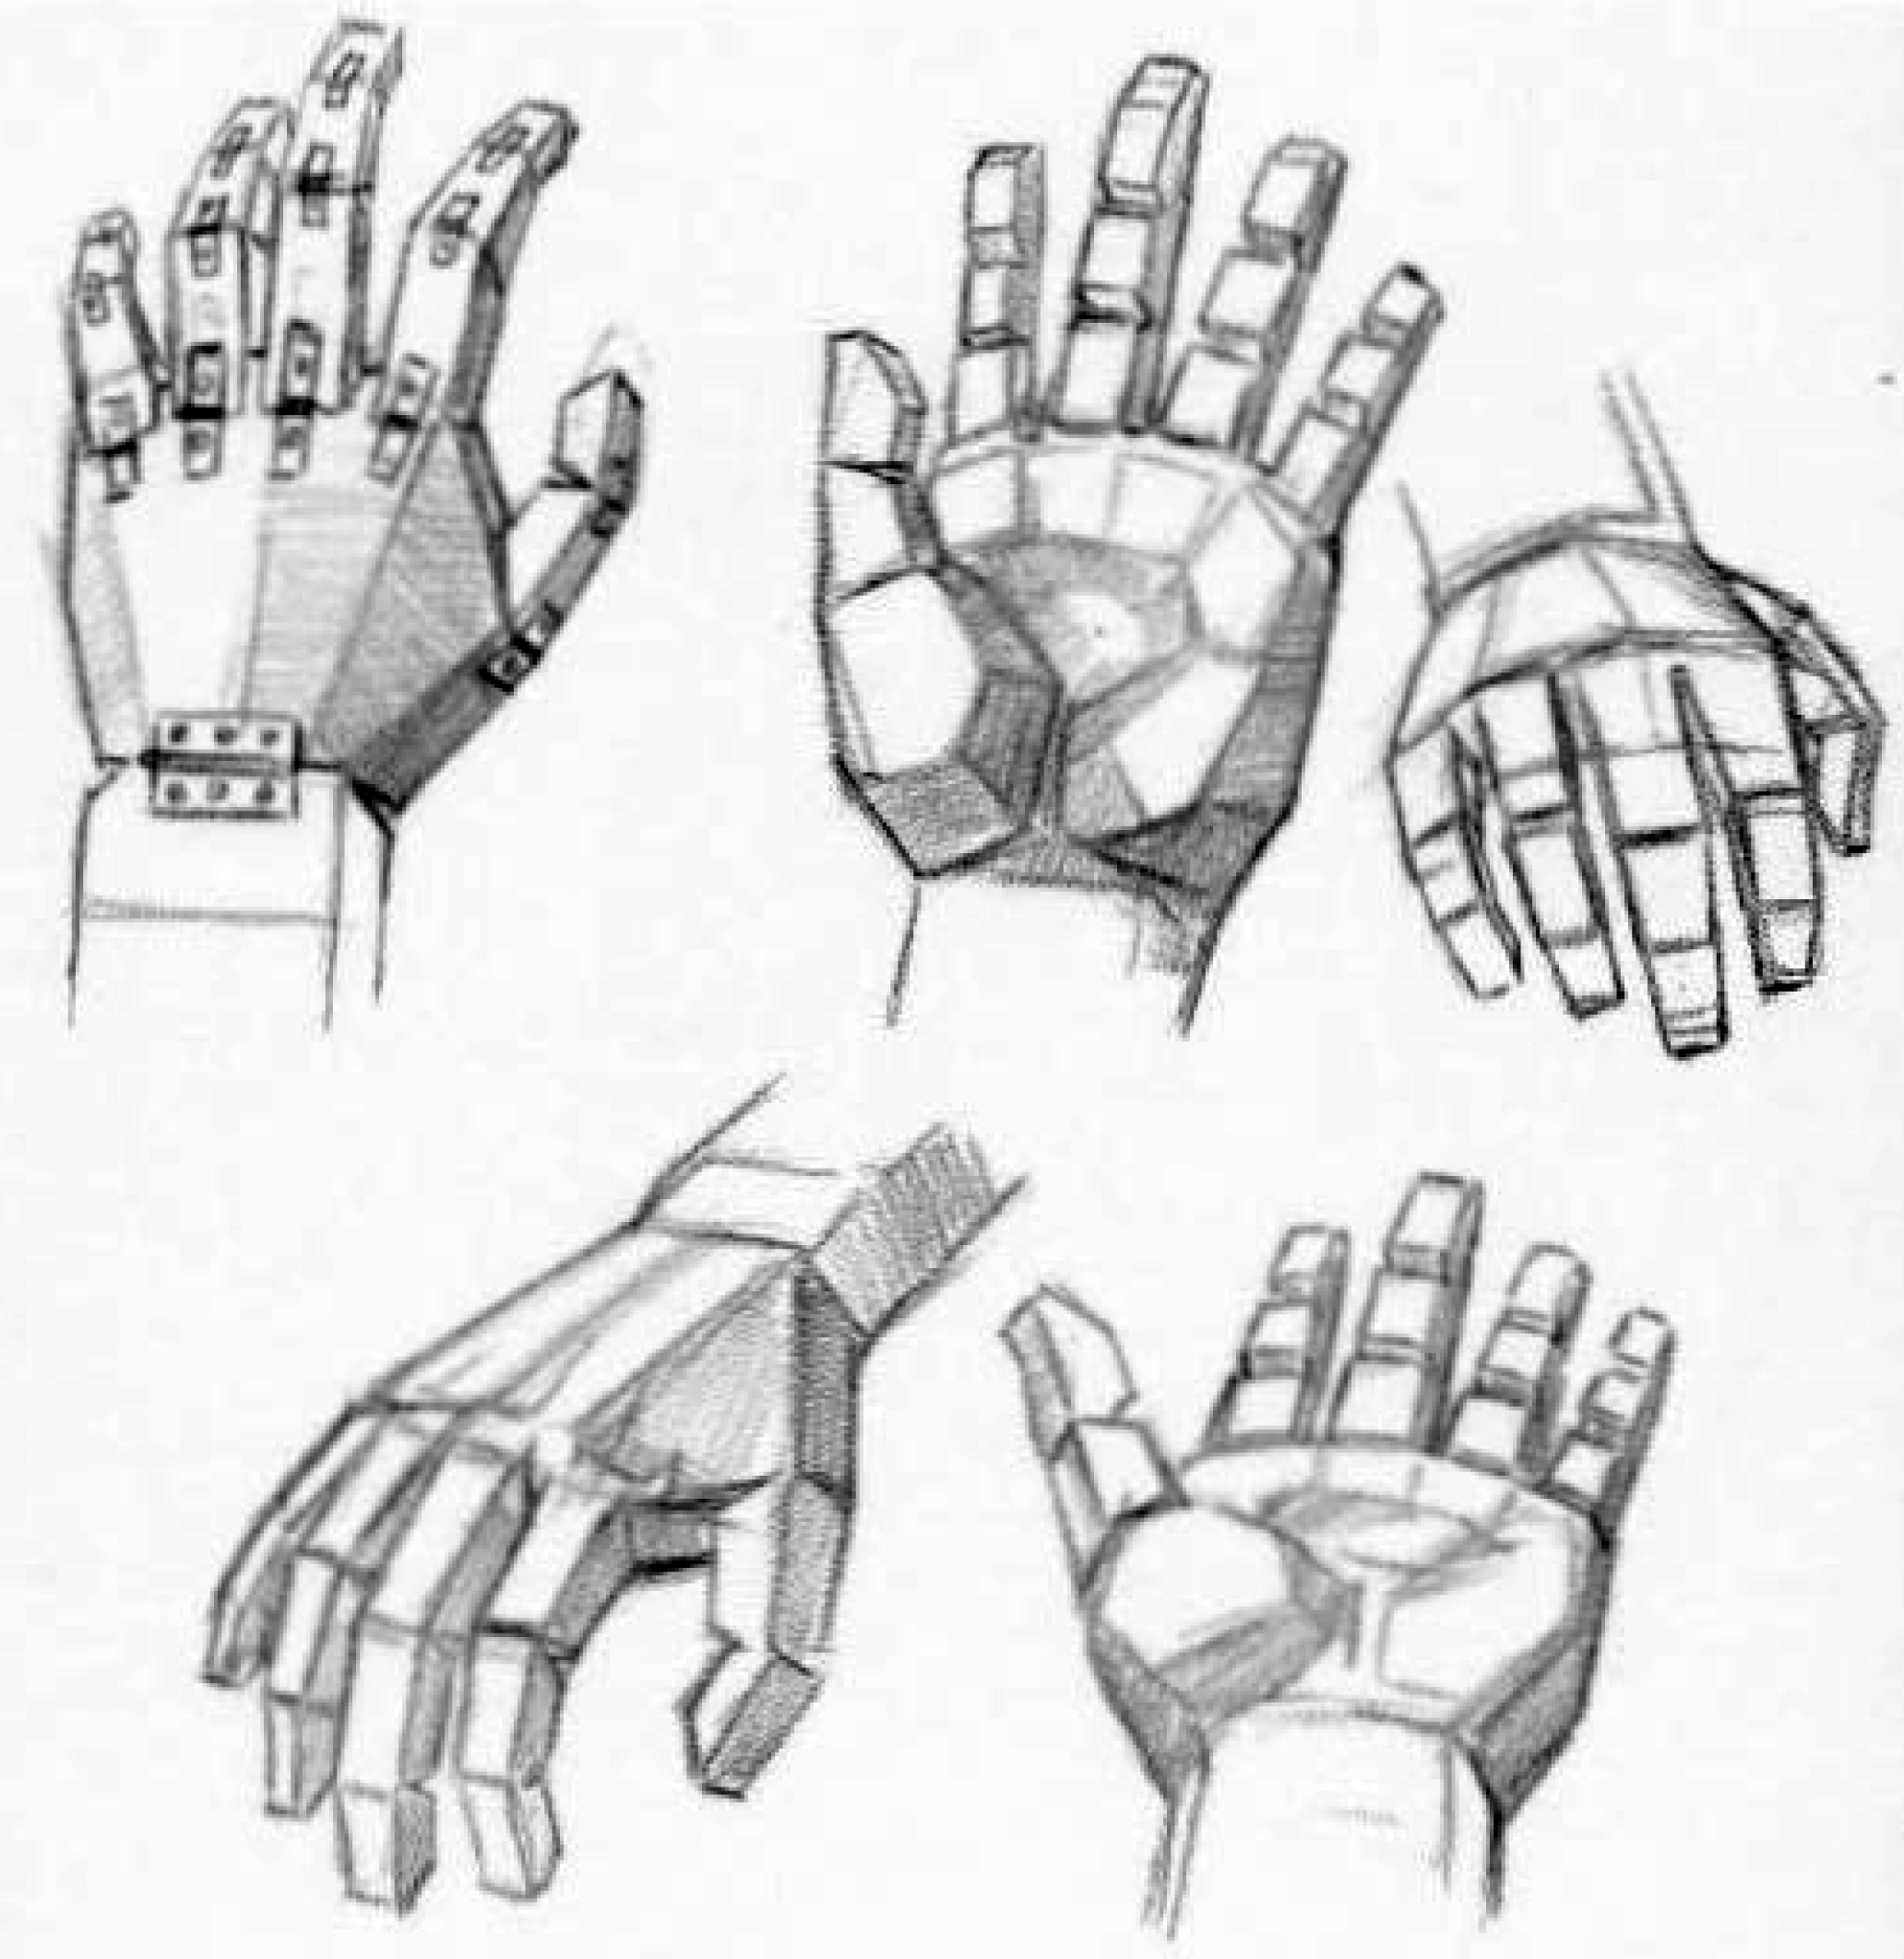
2. The Palm Block: The Foundation of the Hand
Everything starts with the palm. Getting its proportions and perspective right is the most critical first step. We will think of it as a flat, slightly curved box.
How to Draw Hands from IMAGINATION - Step-by-Step
Let's return to the Proko video to see how to construct this palm box.
Watch from 03:07 to 04:39. Notice these key details: The palm isn't a perfect square; it's slightly curved on the pinky side. He splits the front plane into four parts to mark where the fingers will attach. This is an important step for ensuring correct placement later on.
While the box is a great starting point, another artist, Marco Bucci, offers a fantastic landmark to help orient the palm correctly.
In his video 'Draw Better Hands Now,' Marco Bucci introduces a simple observation about the skeletal structure that creates a very useful landmark for drawing the palm.
Watch from 02:06 to 03:00. Focus on the concept of the 'L' shape on the thumb side of the hand versus the straighter line on the pinky side. This difference is a powerful tool for distinguishing the two sides of the palm.
By combining these ideas, you get a powerful method for the palm:
- Start with a basic square or rectangular block.
- Identify the thumb side and create the characteristic 'L' shape.
- Curve the knuckles and the pinky side slightly.
3. The Thumb and Fingers: Segments and Arcs
With the palm block in place, we can now attach the thumb and fingers. We'll construct them as a series of simple segments.
The Fingers as Cylinders
The fingers are made of three segments (phalanges), which we can simplify as three cylinders stacked on top of each other.
Human Anatomy Fundamentals: How to Draw Hands
The article 'Human Anatomy Fundamentals: How to Draw Hands' from Tutsplus provides a clear, concise guide to this cylindrical construction.
Read the section 'Basics of the Hand.' Focus on the diagram that simplifies the bone structure and the example of drawing fingers as stacks of three cylinders. This is the core technique for finger construction.
A crucial point mentioned in the article is that the finger joints are not aligned in a straight line. They follow a gentle curve. This is true for the knuckles, the middle joints, and the tips of the fingers. Keeping these arcs in mind will instantly make your hands look more natural and less robotic.
The Thumb's Unique Form
The thumb is unique because it moves independently from the fingers. Its base is a fleshy, muscular mound that we can simplify into a triangular or wedge-like shape that connects to the main palm block. The thumb itself has two segments, not three.
How to Draw Hands from IMAGINATION - Step-by-Step
Proko's video offers a straightforward way to construct the thumb.
Watch from 07:11 to 08:10. Observe how he attaches a triangular box for the base of the thumb and then adds the two segments. Notice the final segment is described as a 'trowel' or 'scooped wedge' shape.
4. Practice: Hand Construction (30 minutes)
It's time to open Procreate and put this all together. Your goal is not to create a finished, polished drawing, but to practice the construction process. Create multiple simple drawings of a hand in a relaxed, open pose.
Use the image below as a step-by-step visual guide for your exercise. It perfectly summarizes the process of starting with basic shapes and building up the form.

Follow these steps for each drawing:
- Observe Your Own Hand: Use your non-drawing hand as your primary reference. Keep it in a relaxed, mostly flat pose to start.
- Draw the Palm Block: On a new layer, lightly sketch a squarish or rectangular shape for your palm. Try to capture its perspective. Is it facing you directly or tilted away?
- Define the 'L' Shape: Indicate the 'L' shape on the thumb side to properly orient the palm.
- Attach the Thumb Base: Draw a simple wedge or triangular box for the muscular base of the thumb, connecting it to the 'L' corner of the palm block.
- Map the Fingers: On a new layer, draw the arc where the knuckles will be. Then, draw light gestural lines for each finger, making sure their tips also follow a corresponding arc.
- Construct the Segments: Following your gestural lines, build the fingers using three cylinders for each. Build the thumb using two segments. Remember that the segments get progressively shorter.
- Refine (Optional): If you have time, you can create a new layer on top and draw a slightly more organic outline based on your construction, but don't add any shading or detail. The primary goal is the block construction.
Aim to create at least 3-5 of these constructional drawings. Try slightly different angles for each one.
Conclusion
Excellent work today. You've taken on the challenge of drawing hands and equipped yourself with a logical, structural method to tackle them. This process demystifies the hand, transforming it from an overwhelming organic form into a predictable, buildable structure.
Key Takeaways:
- Simplify, Don't Copy: The most effective way to draw hands is to construct them from simple geometric forms first.
- The Palm is the Anchor: Start with a boxy shape for the palm, using the 'L' shape of the thumb-side bones as a key landmark.
- Segments and Cylinders: Build fingers from three cylindrical segments and the thumb from two.
- Embrace the Arcs: The joints of the fingers align on curves, not straight lines. Remembering these arcs is essential for creating natural-looking hands.
In our next lesson, we will put this construction method to the test. Now that you know how to build the fundamental 'scaffolding' of the hand, you will learn to draw the hand in a variety of common poses (e.g., open/relaxed, gripping, pointing).