Hello! Welcome to the first lesson in our module on Containerization & Kubernetes.
In our previous module, we focused on building resilient, high-performance applications, culminating in strategies to prevent issues like the cache stampede. Now that we have an application that is robust in its logic, we need to address how to package and deploy it in a modern, scalable way. This is a critical skill for any senior developer, especially in cloud-native environments, and a frequent topic in technical interviews.
Today, we'll start this journey by tackling a foundational task. Your learning outcome is to create an optimized, multi-stage Dockerfile for a Spring Boot application. We will move from a basic, inefficient approach to a production-grade, optimized solution, focusing on image size, build speed, and security.
1. The Problem: The Naive Dockerfile
When first starting with Docker, many developers create a simple Dockerfile that gets the job done but is highly inefficient. Let's imagine we have a standard Spring Boot application built with Maven. A first-pass Dockerfile might look something like this:
# A simple, but unoptimized, Dockerfile
FROM openjdk:17-jdk

WORKDIR /app

# Copy the entire project context
COPY . .

# Build the application using Maven inside the container
RUN ./mvnw clean package -DskipTests

# Expose the port the app runs on
EXPOSE 8080

# Run the application
ENTRYPOINT ["java", "-jar", "target/my-app-0.0.1-SNAPSHOT.jar"]
While this works, it's problematic for several reasons that would be red flags in a design discussion or interview:
- Bloated Image Size: The final image contains the full JDK, all your source code, Maven itself, and all the intermediate build artifacts (like
.classfiles). These are unnecessary for running the application and can result in an image size of 500MB or more. - Poor Build Performance: Docker builds images in layers. The
COPY . .command copies your entire project. If you change a single line of code, this layer is invalidated, and Docker must re-run themvn clean packagestep, which often involves re-downloading all dependencies. This makes iterative development very slow. - Increased Security Risk: Including build tools like Maven and the full JDK in your production image increases its attack surface. A best practice is to include only what is absolutely necessary to run the application.
To understand why this layering is so inefficient, the following video gives a great explanation.
Optimizing Spring Boot apps for Docker by Mike Thompson, Graham Charters
Watch this segment from the Devoxx talk 'Optimizing Spring Boot apps for Docker' by Mike Thompson and Graham Charters. It clearly explains Docker's layering mechanism and demonstrates why copying the entire application JAR in one go is inefficient.
Watch from 01:53 to 09:12. Focus on how the COPY command creates a single, large layer for the application and why this is bad for cache utilization during rebuilds.
2. The Solution: Multi-Stage Builds
The key to solving these problems is the multi-stage build. This feature allows you to use multiple FROM instructions in a single Dockerfile. Each FROM instruction begins a new "stage" of the build. You can selectively copy artifacts from one stage to another, leaving behind everything you don't need.
This allows us to create a "build" environment with all the necessary tools (JDK, Maven) and a separate, lean "runtime" environment that contains only the application JAR and the Java Runtime Environment (JRE).
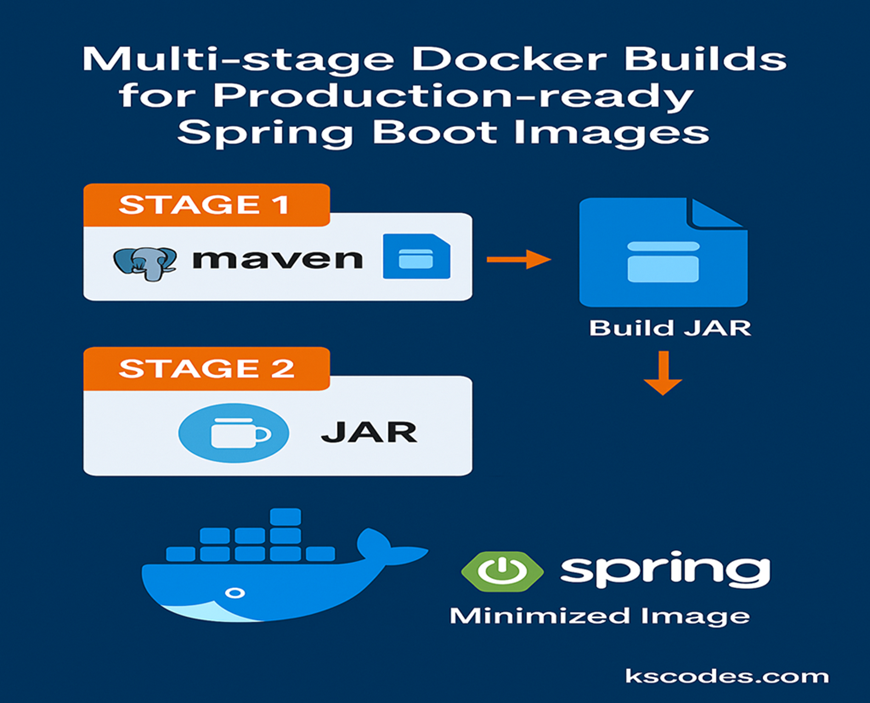
To see this in action, let's watch a detailed walkthrough.
Docker| Multi stage build | Optimize Your Java Spring Boot Application with Multi-Stage Docker Build
The video 'Docker| Multi stage build' by DGR Uploads provides a fantastic, step-by-step guide to understanding and implementing multi-stage builds for a Spring Boot application.
Watch from the beginning (00:05) to 07:43. The video will cover: The concept and benefits of multi-stage builds. An example Dockerfile with distinct 'build' and 'production' stages. A line-by-line explanation of the Dockerfile commands.
A Practical Multi-Stage Dockerfile
Based on the principles from the video, here is a well-structured, two-stage Dockerfile:
# Stage 1: The 'build' stage
# We use a Maven image which includes a full JDK to build our application.
FROM maven:3.8-openjdk-17 AS build
WORKDIR /app

# First, copy just the pom.xml to leverage Docker's layer caching.
# If pom.xml hasn't changed, Docker will use the cached dependency layer.
COPY pom.xml .
RUN mvn dependency:go-offline

# Then, copy the source code and build the application.
COPY src ./src
RUN mvn clean package -DskipTests

# Stage 2: The 'runtime' stage
# We use a lightweight JRE-only image for the final production container.
FROM eclipse-temurin:17-jre-alpine
WORKDIR /app

# Copy only the built JAR from the 'build' stage.
COPY --from=build /app/target/*.jar app.jar

EXPOSE 8080
ENTRYPOINT ["java", "-jar", "app.jar"]
Key Optimizations in this Dockerfile:
- Separation of Concerns: The
buildstage has Maven and the JDK, but the final stage does not. - Minimal Base Image: The final stage uses
eclipse-temurin:17-jre-alpine, a small image containing only the Java Runtime Environment on top of the minimal Alpine Linux distribution. This is much smaller than a full JDK. - Dependency Caching: We copy
pom.xmland runmvn dependency:go-offlinebefore copying the source code. Since dependencies inpom.xmlchange less frequently than source code, Docker can reuse the cached layer with all the downloaded dependencies, making subsequent builds much faster.
3. Advanced Optimization: Unpacking the "Fat JAR"
We can optimize even further. The app.jar we copied is a "fat JAR" containing application code and all its dependencies in one file. A single code change means we must create a new app.jar and replace the entire layer in Docker.
Spring Boot 2.3+ can create layered JARs. This structure separates the JAR into distinct layers for dependencies, Spring Boot-specific code, and your application code. By extracting these layers inside our Dockerfile, we can take full advantage of Docker's caching. Since your application code changes most frequently, only the small application layer will be rebuilt during development.
Optimizing Spring Boot apps for Docker by Mike Thompson, Graham Charters
Let's return to the Devoxx talk. This next segment explains how to leverage Spring Boot's layered JARs to achieve superior cache efficiency.
Watch from 09:12 to 13:59. Pay close attention to the docker history command output, which shows the JAR being split into multiple layers, with the small application layer at the very top.
To implement this, you first need to enable layered JARs in your pom.xml:
<project>
    <build>
        <plugins>
            <plugin>
                <groupId>org.springframework.boot</groupId>
                <artifactId>spring-boot-maven-plugin</artifactId>
                <configuration>
                    <layers>
                        <enabled>true</enabled>
                    </layers>
                </configuration>
            </plugin>
        </plugins>
    </build>
</project>
Your Dockerfile would then be modified to extract these layers instead of copying the JAR directly. Here's what the final stage of a fully optimized Dockerfile looks like:
# ... (Stage 1: 'build' remains the same)

# Stage 2: The 'runtime' stage
FROM eclipse-temurin:17-jre-alpine

# Add a non-root user for better security
RUN addgroup -S appgroup && adduser -S appuser -G appgroup
USER appuser

WORKDIR /app

# In the build stage, instead of just building, we extract the layers
# The command would be: java -Djarmode=layertools -jar target/*.jar extract

# Then we copy the layers in the optimal order
COPY --from=build /app/dependencies/ ./
COPY --from=build /app/spring-boot-loader/ ./
COPY --from=build /app/snapshot-dependencies/ ./
COPY --from=build /app/application/ ./

# The entrypoint now uses a special loader
ENTRYPOINT ["java", "org.springframework.boot.loader.JarLauncher"]
This approach is more complex, but for applications under active development, it dramatically speeds up the build-test-deploy cycle by minimizing the amount of data that needs to be rebuilt and pushed to a container registry.
Test your understanding!
You are tasked with containerizing a large, legacy Spring Boot application. The application's dependencies are stable and rarely change. However, the development team pushes small code fixes multiple times a day. Which optimization will give you the most significant improvement in CI/CD pipeline speed, and why?
Show answer
The layered JAR extraction technique will provide the most significant improvement.
Reasoning:
- A multi-stage build is essential for reducing the final image size, but it still treats the application JAR as a single, monolithic layer.
- Given that dependencies are stable but code changes frequently, separating them is key. By extracting the layered JAR, the large
dependencieslayer will be cached by Docker. - When the team pushes a small code fix, only the tiny
applicationlayer is invalidated. The CI/CD pipeline only needs to rebuild and push this very small layer, making the process much faster than pushing the entire multi-megabyte fat JAR every time.
Conclusion
You have now learned how to progress from a naive Dockerfile to a highly optimized, production-ready one for a Spring Boot application. This is a fundamental skill for building scalable and efficient microservices.
Key Takeaways:
- Avoid "fat" images: Never ship build tools like Maven or a full JDK in a production image.
- Use multi-stage builds: This is the standard pattern for separating the build environment from the runtime environment, leading to smaller, more secure images.
- Leverage layer caching: Structure your
Dockerfileto place layers that change less frequently (like dependencies) before layers that change often (like source code). - Optimize for iterative development: For frequently changing applications, use Spring Boot's layered JARs and extract them in your Dockerfile to achieve maximum cache efficiency and faster build cycles.
- Use minimal base images: Always prefer JRE-only, Alpine, or Distroless base images for your final stage.
Preview of the Next Lesson:
Creating an optimized image is the first step. The next challenge is running and managing that image at scale, ensuring it's reliable and available. In our next lesson, we will dive into Kubernetes, the industry standard for container orchestration. You will learn to explain core Kubernetes objects: Pod, ReplicaSet, Deployment, and Service, the fundamental building blocks for deploying any containerized application.