Welcome to the final lesson of our first module on hardware selection. Over the past three lessons, we have made the critical high-level decisions for our smart glasses prototype: we chose the ESP32-S3 as our project's brain, planned for a dual-camera setup for stereo vision, and outlined a power system using a LiPo battery and an efficient voltage regulator.
Now, it's time to bring all these decisions together. In this lesson, you will learn to formulate a complete bill of materials (BOM)—a detailed, costed list of every component required to build the first version of our smart glasses. We will move from abstract choices to concrete part lists, all while navigating our most important constraint: the sub-$100 total budget. This process will require us to justify every choice and understand the trade-offs we're making between cost, performance, and features.
By the end of this lesson, you will have a tangible shopping list and a clear understanding of the hardware foundation upon which we will build the rest of our project.
1. The Bill of Materials: An Engineer's Blueprint
A Bill of Materials, or BOM, is a foundational document in any hardware project. It's far more than a simple shopping list; it's a structured table that lists every single part, from the main processor down to the last screw. For each item, a good BOM includes:
- Part Name/Description: A clear identifier for the component.
- Quantity: The number of units needed.
- Estimated Unit Cost: The price per item.
- Estimated Total Cost: The total cost for that line item.
For our prototype, the BOM serves two primary purposes: it's our budget tracker to ensure we stay under the $100 target, and it's our assembly guide, ensuring we have all the necessary pieces before we start building.
2. Learning from Existing Designs
Before we create our BOM from scratch, it's wise to see what components are common in similar projects. This helps validate our choices and can reveal potential alternatives or challenges. The academic and hobbyist literature is full of examples of wearable assistive devices.
The following review paper provides an excellent, high-level overview of the sensor technologies used in this field. Pay special attention to the cost and power trade-offs.
[PDF] State-of-the-Art Review on Wearable Obstacle Detection Systems ...
This paper surveys various sensors used in obstacle detection. We'll use it to understand the landscape of available technologies and their costs.
Please focus on Table 3 within the document. You can find it by searching for the text A Summary Table. As you review it, compare the COST column for different sensor types like LIDAR, Radar, Camera, and Ultrasound. Note how the costs range from thousands of dollars for high-end sensors to just a few dollars for cameras and ultrasonic modules. This table powerfully illustrates the budget constraints that drive component selection in low-cost embedded systems.
As you can see, sensors like LiDAR are prohibitively expensive for our project. This confirms that our choice to rely on low-cost cameras is the only feasible path for a vision-based system on our budget.
Now, let's look at a BOM from a project very similar to ours. The paper below details a smart system for the visually impaired that also uses an ESP32-S3.
[PDF] Designing a Smart System for Helping Blind and Visually Impaired ...
This research paper presents a device with similar components to ours. We'll examine their BOM as a reference.
First, locate Table 1, "Bill of Components," by finding the text bill of components. Notice the components they've used: an ESP32-S3-DevKitC-1, a battery, a buzzer, and Mini vibrator motor. These are all parts we've discussed. Their system is more complex, including ultrasonic sensors and a SIM module, but the core choices are familiar. Next, briefly read the section on Material Selection to see what they used for the physical frame. Find the heading Material Selection and read the first paragraph. Their choice of PLA plastic for its low cost and light weight is a common and sensible approach for prototypes like ours.
With these reference points, we are now ready to build our own specific BOM.
3. Constructing the Smart Glasses BOM
We'll build our BOM subsystem by subsystem, justifying each choice based on our project goals and strict budget.
Core Compute & Vision
This is the heart of our system, responsible for capturing and processing visual data.
- Microcontroller: As decided in Lesson 1, we will use an ESP32-S3 development board. Its combination of a dual-core 240 MHz processor, AI instruction acceleration, and ample RAM makes it one of the most cost-effective platforms for running TensorFlow Lite for Microcontrollers.
- Cameras: We need two identical camera modules to build our stereo vision system. The OV2640 module is a popular choice. It's inexpensive, offers sufficient resolution (up to UXGA 1600x1200, though we'll likely use a lower resolution like VGA 640x480 for performance), and is well-supported by the ESP32 community.
The decision to use a powerful microcontroller like the ESP32-S3 instead of a full-fledged single-board computer (like a Raspberry Pi) is a crucial trade-off. This video explains the rationale perfectly.
ESP32 vs Arduino vs Raspberry Pi: Which Should You Use in Your Product?
This video from Predictable Designs provides a crystal-clear guide on when to choose a microcontroller versus a microprocessor for a commercial product, and the reasoning applies directly to our prototype.
Please watch these key segments: First, watch the section on the benefits of microcontrollers. The points about low power, low cost, and fast boot time are all critical for our wearable device. Next, see the discussion on the drawbacks of microprocessors like the Raspberry Pi for this type of application, including higher power consumption and cost. Finally, watch the summary on how to decide. This reinforces that for a sensor-based device, a microcontroller is almost always the right choice.
Power System
Drawing from our last lesson, this system must power the device efficiently and be rechargeable.
- Battery: A single-cell (1S) Lithium-Ion Polymer (LiPo) battery is the best choice. Based on our power budget, a capacity of around 500 mAh offers a good balance between runtime and physical size/weight.
- Charger/Regulator: We need a module that can both safely charge the LiPo battery (from a USB source) and provide a stable 3.3V to our system. An integrated board that combines a TP4056 charging IC with a 3.3V buck-boost converter is an ideal, low-cost solution.
Feedback System
This system provides alerts to the user. We will start with simple, low-cost components that can be expanded upon later.
- Haptic Feedback: Two coin-style (or "pancake") vibration motors. These are tiny, draw little power, and are perfect for embedding into the arms of the glasses frame to provide directional feedback (e.g., left motor vibrates for an obstacle on the left).
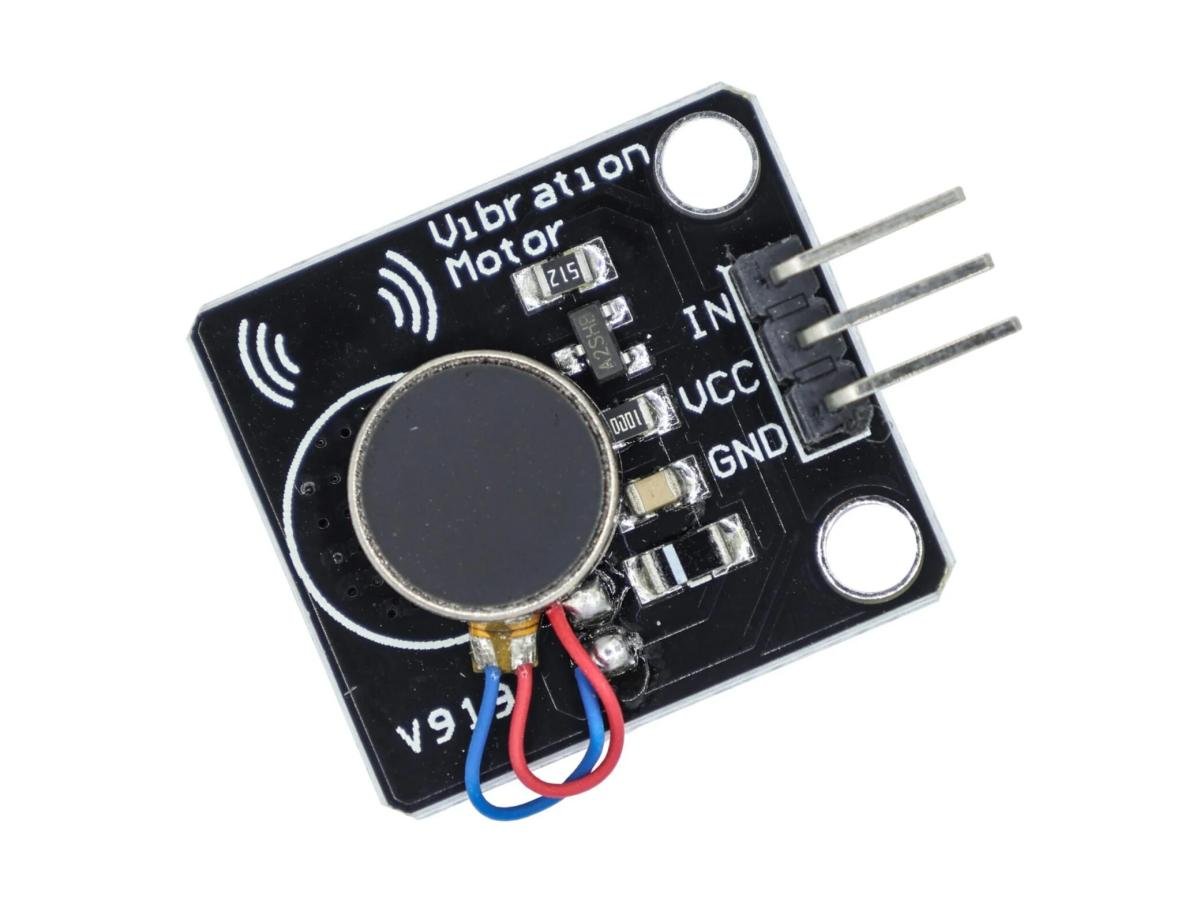
- Audio Feedback: A simple piezo buzzer. This is the most straightforward way to generate audible beeps and tones as alerts. While it's not capable of speech, it's extremely cheap and easy to control. We'll tackle more advanced Text-to-Speech (TTS) solutions in a later module.
Enclosure & Miscellaneous
These are the supporting parts that hold everything together.
- Frame: As noted in the research paper, PLA filament for 3D printing is an excellent choice for creating a custom frame to hold the cameras at a fixed distance (the "stereo baseline") and house the electronics. If you don't have access to a 3D printer, modifying a cheap pair of safety glasses is a viable alternative.
- Miscellaneous: This category is crucial and often forgotten. It includes a small slide switch to turn the device on and off, prototyping wires, and connectors. It's wise to budget a small amount for these essentials.
4. The Final Bill of Materials
Now, let's assemble everything into our final BOM and tally the cost. The prices listed are typical estimates from online hobbyist electronics retailers (like SparkFun, Adafruit, or AliExpress) and can fluctuate.
| Component | Description | Qty | Unit Cost ($) | Total Cost ($) |
|---|---|---|---|---|
| Compute & Vision | ~27 | |||
| ESP32-S3 DevKitC-1 | Main microcontroller board | 1 | 15 | 15 |
| OV2640 Camera Module | Bare camera module for stereo vision | 2 | 6 | 12 |
| Power System | ~12 | |||
| 500mAh 1S LiPo Battery | Rechargeable power source with protection | 1 | 7 | 7 |
| LiPo Charger/Regulator | TP4056 charger + 3.3V Buck-Boost module | 1 | 5 | 5 |
| Feedback System | ~4 | |||
| Coin Vibrator Motor | 10mm motor for haptic feedback | 2 | 1.5 | 3 |
| Piezo Buzzer | Simple audio alerts | 1 | 1 | 1 |
| Enclosure & Misc. | ~17 | |||
| Frame Material | PLA filament or donor safety glasses | 1 | 7 | 7 |
| Wires, Switch, etc. | Prototyping essentials kit | 1 | 10 | 10 |
| SUBTOTAL | ~$60 | |||
| Contingency (25%) | Buffer for shipping, taxes, unexpected parts | ~$15 | ||
| GRAND TOTAL | ~$75 |
Our estimated total of $75 comes in comfortably under our $100 ceiling. The 25% contingency is vital—it covers shipping costs, taxes, and the inevitable "oops, I ordered the wrong part" moment that happens in every project.
By creating this BOM, we have explicitly navigated key trade-offs:
- We chose basic feedback mechanisms (piezo, vibration motors) over more complex ones (full audio TTS) to save cost.
- We opted for bare camera modules, which require more delicate handling and wiring than integrated boards, but are significantly cheaper.
- We committed to a microcontroller architecture, gaining in cost and power efficiency while accepting its computational limits compared to a microprocessor.
Conclusion
In this lesson, you've completed the hardware design phase by translating our system architecture into a concrete, cost-effective Bill of Materials. This is the culmination of our first module and provides the practical foundation for the entire project.
Key Takeaways:
- A Bill of Materials (BOM) is an essential engineering document for budgeting, procurement, and assembly.
- Reviewing existing projects can provide valuable insights and validate component choices.
- Building hardware on a strict budget is an exercise in managing trade-offs between cost, features, and performance.
- Always include a contingency fund in your project budget for shipping, taxes, and unforeseen expenses.
You now have your complete hardware list. In the next module, we will shift our focus from hardware to software and theory. The first lesson will introduce the fundamental concept that allows us to interpret 2D images in a 3D world: the pinhole camera model. This will be our first step on the path to calculating depth from our stereo cameras.