Introduction
Welcome back! Over the last few lessons, we've designed our site's visual language, built out the layouts in Framer, and fine-tuned its performance by optimizing both images and fonts. You now have a nearly-complete, high-performance website project sitting in your Framer editor. The next logical step is to share it with the world.
Today's lesson is all about taking your project live. The learning outcome is to publish your site using a Framer subdomain and prepare for connecting a custom domain.
We will cover two key phases:
- Instant Publishing: You'll get your site online immediately using Framer's free and easy-to-use subdomain feature. This is perfect for sharing progress and getting your "documenting the journey" project started.
- Preparing for a Professional Domain: We'll walk through the entire process of connecting a custom domain (e.g.,
yourbrand.com). While you don't need to buy a domain today, you'll understand the concepts and steps involved, including DNS records, so you're ready when the time comes.
Getting your site live is the crucial step that enables us to test its real-world performance in our next lesson.
1. Instant Gratification: Publishing to a Framer Subdomain
Framer makes it incredibly simple to get your site online. With a single click, you can publish to a free subdomain provided by Framer. This will look something like yourname.framer.website. It's a fantastic way to go live without any cost or technical setup.
The process is straightforward. Let's watch the first minute of this official video from Framer to see it in action.
Publishing and connecting a domain in Framer
This video, 'Publishing and connecting a domain in Framer,' demonstrates the one-click publishing process. Pay attention to how a free subdomain is automatically generated and how you can customize it.
Watch from the start until 01:01. This section covers clicking the publish button, the automatic creation of a subdomain, and where to find the options for customizing your free domain address.
As you saw, publishing is as simple as hitting a button. When you do, you'll be presented with a choice.
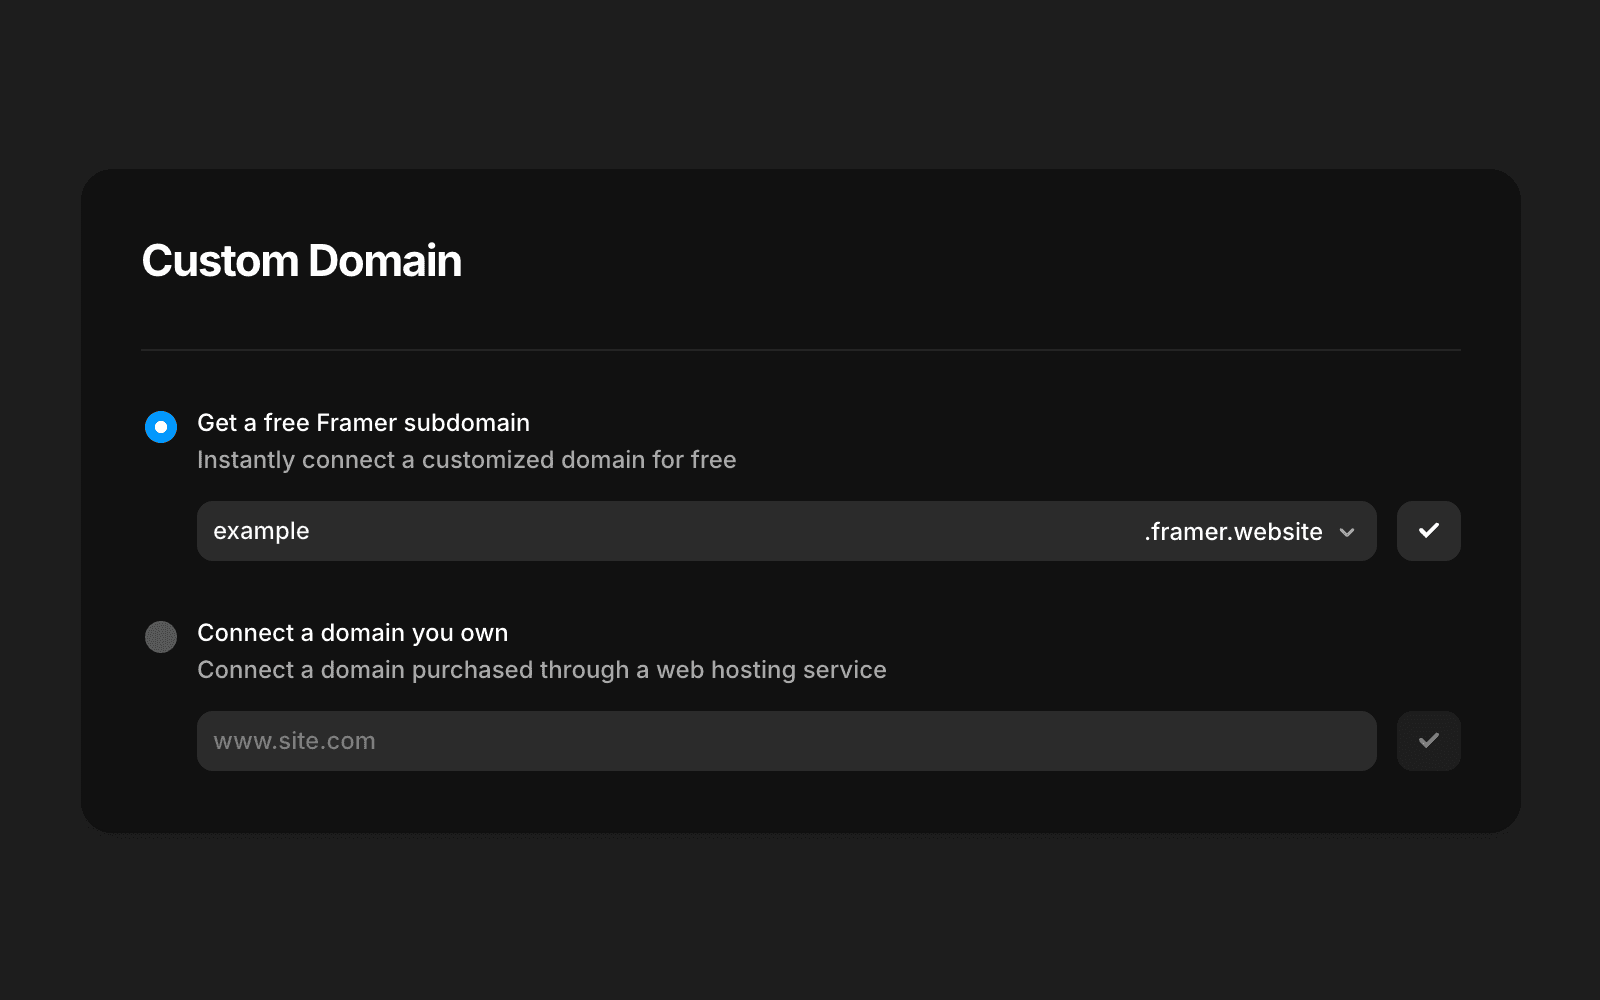
Notice that you have a few different endings to choose from (.framer.website, .framer.photos, etc.). This gives you a little flexibility in branding your free site.
Anytime you make changes to your project, you just hit the "Update" button in the same top-right corner, and your changes will be live on your subdomain almost instantly.
Activity (5 minutes)
Now it's your turn.
- Open your Framer project.
- Click the Publish button in the top right.
- Choose the "Get a free Framer subdomain" option.
- Enter a name for your site and select one of the available domain endings.
- Click Submit and visit your live website!
You now have a live URL you can use to view your site from any device.
2. The Professional Step: Connecting a Custom Domain
While a Framer subdomain is great for getting started, a custom domain (yourbrand.com) is essential for building a professional brand and a serious business. It looks more credible, is easier for people to remember, and you own it completely.
Connecting a custom domain is a three-step process:
- Purchase a domain: You buy a domain name from a company called a domain registrar.
- Configure Framer: You tell Framer which domain you want to connect.
- Configure your Registrar: You log in to your registrar and add settings that point your domain to Framer's servers.
This third step involves editing something called DNS records.
Demystifying DNS
Think of the Domain Name System (DNS) as the internet's phone book. It translates human-friendly domain names (like google.com) into computer-friendly IP addresses (like 142.250.191.78). When you connect a custom domain, you're just creating a new entry in this phone book that points your domain name to the IP address of Framer's servers.
You'll primarily deal with two types of records:
- A Record: This record maps your main domain (often called the "apex" or "root" domain, represented by
@) directly to a specific IP address. Framer requires you to set up twoArecords for stability and redundancy. - CNAME Record: This record maps a subdomain (like
www) to another domain name. Framer uses this to ensure thatwww.yourbrand.comalso correctly points to your site.
Let's see how this is done in practice.
How to connect a custom domain
The official Framer help article, 'How to connect a custom domain,' provides the exact DNS records you'll need. It's a valuable reference for the specific settings required.
Read the sections titled 'Add a third party domain you own,' 'Configure a domain,' and the list of guides for common domain registrars. Focus on the table that shows the specific DNS record values required by Framer.
The article provides the exact values you need to input at your registrar. Here is the configuration for a "naked" or "apex" domain (e.g., yourbrand.com):
| Name | Type | Value |
|---|---|---|
| @ | A | 31.43.160.6 |
| @ | A | 31.43.161.6 |
| www | CNAME | sites.framer.app |
Note: These are Framer's current static IP addresses, but you should always confirm them in your project's domain settings at the time of connection.
Now, let's watch the process of someone actually doing this. The following video walks through connecting a domain from GoDaddy, a popular registrar. Even if you choose a different registrar, the concepts are identical.
Publishing and connecting a domain in Framer
The official Framer video from earlier also includes a detailed walkthrough of connecting a custom domain. We'll watch the section that covers the DNS setup.
Watch from 01:01 to 05:08. This segment covers choosing a paid plan (required for custom domains), entering the custom domain in Framer, and then copying the A and CNAME records into the DNS settings of a domain registrar (GoDaddy in this example).
A Note on Budget and Registrars
Since you're budget-conscious, here are a few things to keep in mind:
- Framer's Offer: If you subscribe to a yearly Framer site plan, they offer a free custom domain for the first year through their partner, Hover. This can be a cost-effective option.
- Registrar Costs: Domain registrars vary in price. While GoDaddy is popular, other registrars like Porkbun or Cloudflare Registrar are often praised for more competitive, transparent pricing without a lot of upsells.
After you update your DNS records, the changes can take anywhere from a few minutes to 48 hours to "propagate" across the global internet, but it's usually quite fast. Framer's interface will show you the status of the connection.
Conclusion
You've now taken the critical step of publishing your work. You have a live site on a Framer subdomain and, more importantly, a clear, systematic understanding of how to connect a professional custom domain when you're ready.
Key Takeaways:
- Publishing to a free Framer subdomain (
yourname.framer.website) is an instant, one-click process perfect for initial sharing and testing. - Connecting a custom domain is a three-step process: buy the domain, add it in Framer, and update your DNS records at your registrar.
- The core of connecting a domain is setting up DNS records: two
Arecords to point your main domain to Framer's IP addresses, and oneCNAMErecord to handle thewwwversion. - DNS changes can take time to propagate globally, but Framer helps you track the status.
Preview of the Next Lesson:
Your website is live, but how fast is it really? Now that we have a public URL, we can use professional tools to measure its performance under real-world conditions. In our next lesson, we will audit your site's performance using Google Lighthouse and implement recommended optimizations. This will allow us to validate the work we did on images and fonts and ensure your site meets the high-performance standard you're aiming for.