Introduction
Welcome back! In our last lesson, you successfully built the data structure for your business's "homebase" by creating two linked databases in Notion: "Content & Product Ideas" and "Products". You learned how to define custom properties, which is the crucial first step in turning a blank page into a powerful organizational tool.
Right now, that data lives in a simple table. It's organized, but not very dynamic. This lesson is about bringing that data to life. Today, your learning outcome is to configure custom views (Board, Calendar, and Gallery) for a single database to display information in different ways.
You'll learn how to transform your "Content & Product Ideas" table into an interactive content pipeline, a visual publishing schedule, and a gallery for your ideas—all without duplicating a single piece of information. This is the core of a systematic workflow: maintaining a single source of truth while creating different "dashboards" to interact with it based on your current task.
1. Understanding Database Views
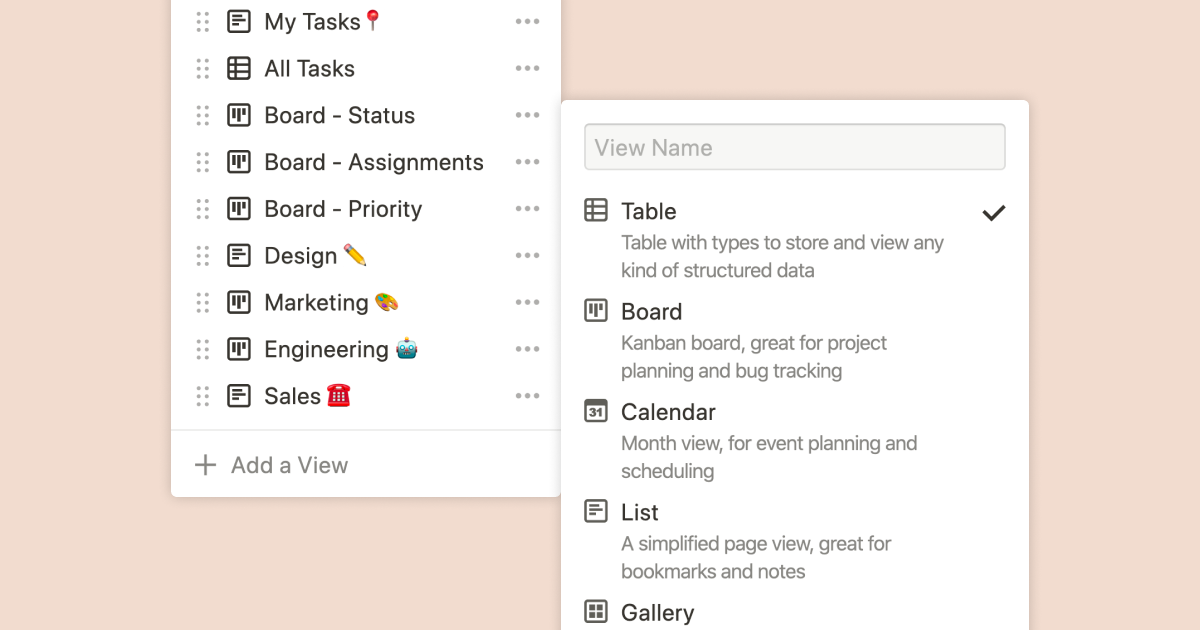
Before we dive in, it's essential to grasp what a "view" is. A view is simply a different way of looking at the same data in a database. Creating a new view doesn't create a new database or copy your information. It just applies a different layout, filter, or sort to the original data.
Think of your music library: you can view the same collection of songs sorted by artist, by album, or by genre. The songs don't change, but the presentation does. Notion views work exactly the same way.
The video below offers a great explanation of this concept.
Notion Databases - Full Course for Beginners
This clip from the 'Notion Databases - Full Course for Beginners' by Thomas Frank Explains illustrates why multiple views of the same database are so powerful for creating contextual dashboards.
Watch from 08:13 to 09:31. Pay attention to how he describes the 'notes inbox', 'favorites', and 'recent notes' as different windows into the same master database.
Now, let's start creating our own views. The default view is a Table, which you already have. We will add three new types: Board, Calendar, and Gallery.
2. The Board View: Your Content Pipeline
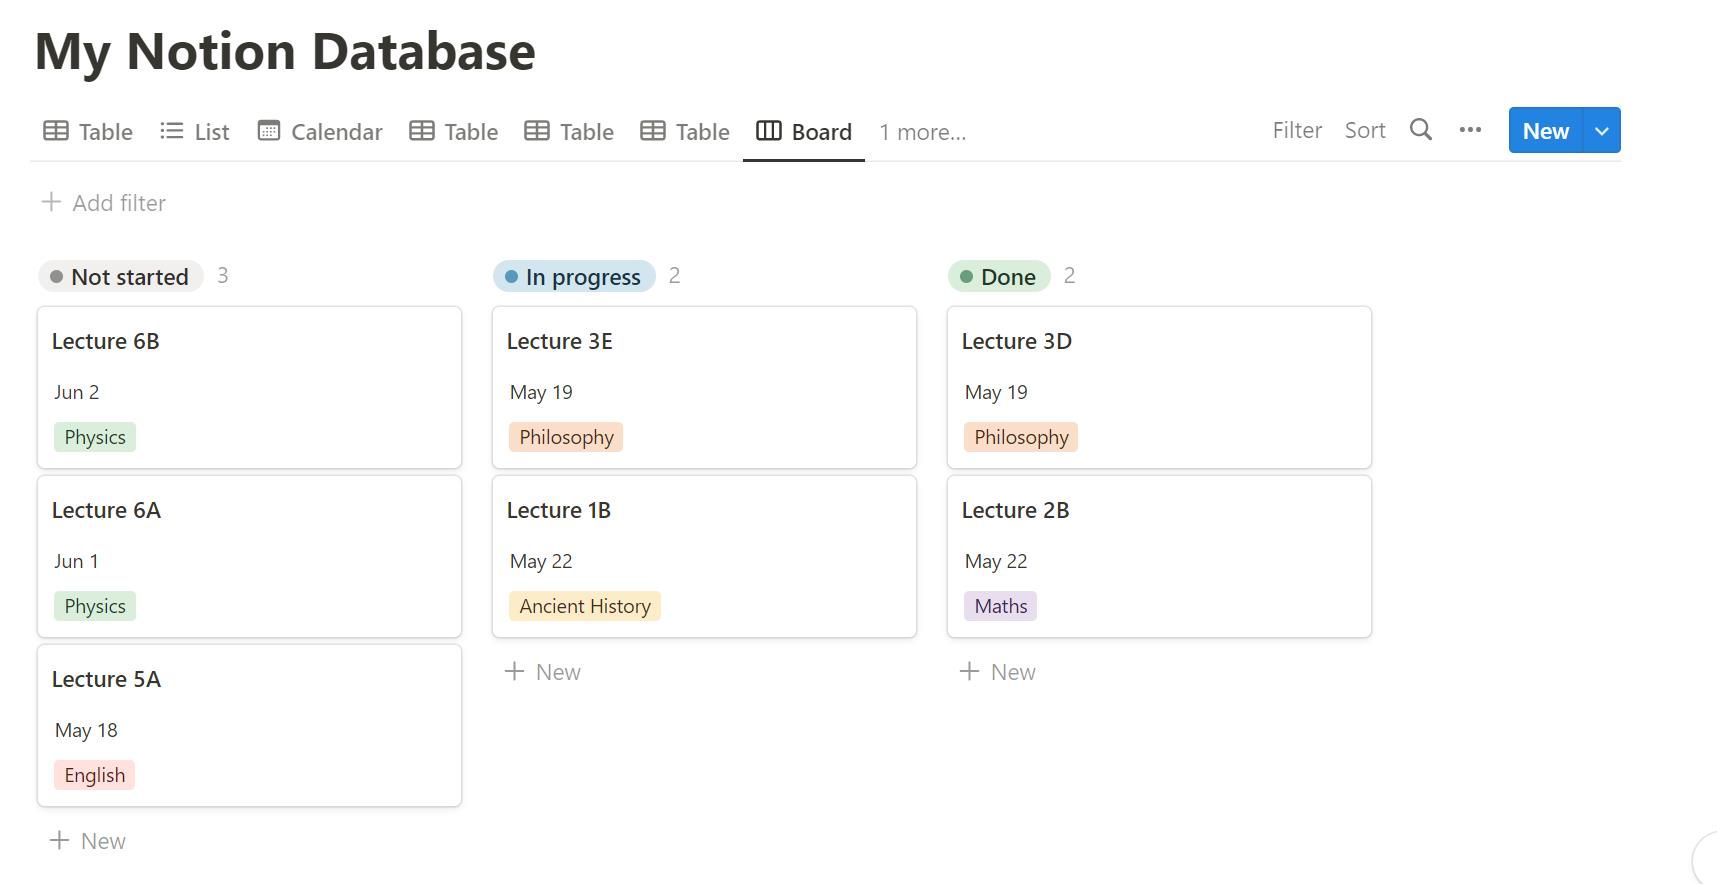
A Board view is a Kanban-style layout that groups your database items into columns based on a Select or Status property. This is perfect for visualizing a workflow and tracking progress. We'll use the Status property you created in the last lesson to build a content pipeline.
Every Notion Database View Explained
Let's see how to set up a Board view. This video from Productive Setups shows how to create one and group it by a custom 'stage' property, which is exactly what we'll do with our 'Status' property.
Watch from 01:46 to 03:23. Focus on how he changes the 'Group by' setting to use his custom 'stage' property and then reorders the columns to create a logical workflow.
Your Turn: Build Your Pipeline
Now, apply this to your "Content & Product Ideas" database.
Assignment (10 minutes):
- Next to your "Table" view tab, click the
+button to add a new view. - Select
Boardfrom the layout options and name the view "Content Pipeline". - Click the
...menu in the top-right corner of the database and selectGroup. - Change the
Group byoption from whatever is selected to yourStatusproperty. - You should now see columns for "To-do", "In progress", and "Done". Try dragging one of your idea cards from one column to another. Notice how the
Statusproperty on that item updates automatically. - Optional Customization: Click on the
Statusproperty header in your original Table view, selectEdit property, and change the options to be more specific to content creation, such as:Idea(To-do)Drafting(In progress)Designing Assets(In progress)Scheduled(Done)Published(Done)
3. The Calendar View: Your Publishing Schedule
The Calendar view displays your database items on a calendar based on a Date property. This is ideal for planning and visualizing your content schedule using the Publish Date property.
Every Notion Database View Explained
This clip from 'Every Notion Database View Explained' demonstrates how to create and use the Calendar view. It's straightforward, as long as you have a date property.
Watch from 05:48 to 06:32. Notice that you can switch between a monthly and weekly view, which is useful for both long-term and short-term planning.
Your Turn: Create Your Schedule
Let's add a calendar to your "Content & Product Ideas" database.
Assignment (10 minutes):
- Click the
+button to add another new view. - Select
Calendarfrom the layout options and name this view "Publishing Calendar". - By default, Notion will find and use your
Publish Dateproperty. If it doesn't, go to the...menu, selectLayout, and ensureShow calendar byis set toPublish Date. - Go back to your
Tableview and add some dates to thePublish Dateproperty for a few of your ideas. - Switch back to your "Publishing Calendar" view. You will now see your items appear on the calendar. You can even drag and drop them to reschedule.
4. The Gallery View: A Visual Idea Board
The Gallery view displays your database items as visual cards. This view is excellent for visually-driven products like wallpapers, icon sets, and other design assets. It can pull images from a page's cover, or from the content within the page itself.
Every Notion Database View Explained
The same video provides a clear walkthrough of the Gallery view and how to configure it to show page covers, turning your database into a mood board.
Watch from 03:47 to 04:50. The key setting here is the 'Card preview' option, which lets you choose between showing the page content or the page cover image.
Your Turn: Visualize Your Ideas
Finally, let's create a gallery for your creative ideas.
Assignment (10 minutes):
- Click the
+button one last time and add a new view. - Select
Galleryfrom the layout options and name it "Idea Board". - Open one of the idea pages in your database and click
Add cover. Choose an image that represents that idea. - Go back to your "Idea Board" gallery. Click the
...menu and selectLayout. - Change the
Card previewsetting toPage cover. Your card for that item will now display the cover image you selected. - You can also use the
Propertiesmenu to show or hide properties (likeStatusorPriority) on the gallery cards for more context at a glance.
Conclusion
Excellent work. You've now transformed a simple table of data into a multifaceted project management system with distinct, purpose-driven interfaces. You no longer have just a list of ideas; you have a visual pipeline, a content calendar, and an inspiration board.
Key Takeaways:
- One Database, Many Views: The same set of data can be viewed as a
Table,Board,Calendar, orGallery, each offering a unique way to interact with your information. - Board View for Workflows: Grouping a Board view by a
Statusproperty creates a powerful Kanban system for tracking progress. - Calendar View for Scheduling: The Calendar view is the most intuitive way to visualize any time-sensitive information linked to a
Dateproperty. - Gallery View for Visuals: The Gallery view is ideal for showcasing image-heavy content and creating mood boards for your product ideas.
Preview of the Next Lesson
Your system is becoming quite powerful, but we can make it even smarter. In the previous lesson, you linked your "Content & Product Ideas" database to your "Products" database. In the next lesson, we will build on that foundation. The learning outcome is to create relationships between databases to link and sync information across a Notion workspace. You'll learn how to use Rollup properties to pull data from one database into another automatically—for example, to see how many content pieces are planned for each product, directly on your "Products" page.