Hello and welcome back to the course!
In our last lesson, you built a custom template for a single product. You learned how to access the product object, display its details and images, and handle variants. This was a deep dive into how Shopify renders a page for one specific item.
Today, we're zooming out. We'll move from the individual product to the shelves of your store: the collection page. This lesson will teach you how to construct a collection template with a product grid and basic sorting.
A collection page is often the first place a customer starts browsing. It's the digital equivalent of an aisle in a store, and a well-designed one is crucial for guiding customers to what they're looking for. Your background in front-end development will be a great asset here, as we'll be building a dynamic grid of items and making it interactive with JavaScript.
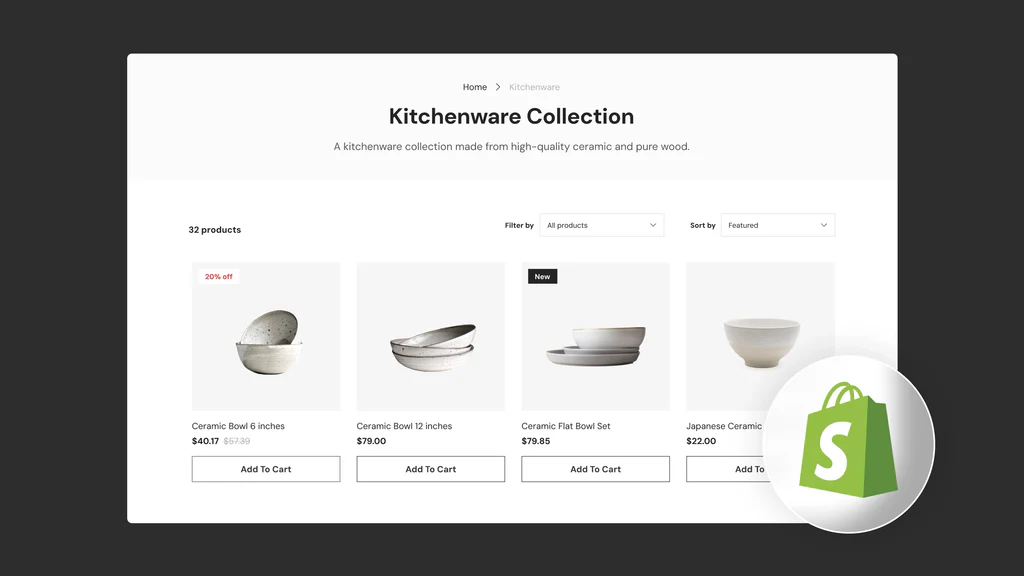
1. The Collection Template and the Product Grid
Just as your-store.com/products/my-product uses a product template, a URL like your-store.com/collections/kitchenware uses a collection template. In a modern theme, this is governed by templates/collection.json, which typically points to a primary section file like sections/main-collection.liquid.
Inside this template, Shopify gives us access to a global collection object, which holds all the information for the collection being viewed. Our main task is to loop through its products and display them in a grid.
To do this, we need to use the Liquid paginate tag. A collection can have hundreds of products, and Shopify limits you to accessing 50 at a time per page. The paginate tag handles this limitation for you.
The official Shopify documentation provides a concise overview of the collection template's purpose and structure. It also introduces the essential paginate tag.
Read the introductory text and the 'Location', 'Content', and 'Paginate products' sections. This will give you the foundational knowledge of where the template lives and how to properly loop through a collection's products.
Here is the basic structure you'll find in sections/main-collection.liquid:
{% comment %}
  The 'paginate' tag is required to loop through collection.products.
  It splits the products into pages. 'by: 24' means 24 products per page.
{% endcomment %}
{% paginate collection.products by 24 %}

  <h1>{{ collection.title }}</h1>
  <p>{{ collection.description }}</p>

  <div class="product-grid">
    {% for product in collection.products %}
      <div class="product-card">
        <a href="{{ product.url }}">
          <img src="{{ product.featured_image | image_url: width: 400 }}" alt="{{ product.featured_image.alt | escape }}">
          <h3>{{ product.title }}</h3>
          <p>{{ product.price | money }}</p>
        </a>
      </div>
    {% else %}
      <p>Sorry, there are no products in this collection.</p>
    {% endfor %}
  </div>

  {% comment %}
    This renders the pagination links (e.g., "Page 1, 2, 3...").
    We'll cover pagination styling in a later lesson.
  {% endcomment %}
  {{ paginate | default_pagination }}

{% endpaginate %}
This code does the following:
paginate collection.products by 24: Initializes pagination, making thecollection.productsvariable available as a page-sized slice of the full product list.for product in collection.products: Loops through the products for the current page.- Inside the loop: We create a simple "product card" with an image, title, and price. Notice that each element is wrapped in a link (
<a href="{{ product.url }}">) to the product's own page. else: A useful feature of Liquid'sforloop that renders if the array (collection.products) is empty.default_pagination: A filter that outputs basic "Next" and "Previous" pagination links.
2. Implementing Basic Sorting
Now, let's add sorting. A customer might want to see products from "Price, low to high" or "Newest to oldest". You might assume you'd handle this by reordering the collection.products array in Liquid. However, that's not how it works.
The Shopify Philosophy: The sorting logic is handled by Shopify's backend. We tell the backend how we want the products sorted by passing a parameter in the URL.
For example: .../collections/all?sort_by=price-ascending
Our job in the theme is to build a UI (like a dropdown) that constructs and navigates to the correct URL.
The Shopify documentation provides a perfect, self-contained example of how to build a sort-by selector. This is the standard, foundational method for implementing this feature.
Focus entirely on the section 'Sort products in a collection'. It explains the sort_by URL parameter and provides a complete Liquid and JavaScript code snippet for a working sort-by dropdown.
Let's break down the code from that resource:
The Liquid/HTML for the Dropdown:
<select id="sort-by">
  {% comment %}
    Get the current sort order, or fall back to the collection's default.
  {% endcomment %}
  {%- assign sort_by = collection.sort_by | default: collection.default_sort_by -%}

  {% comment %}
    Loop through all available sorting options for the collection.
  {% endcomment %}
  {% for option in collection.sort_options %}
    <option value="{{ option.value }}" {% if option.value == sort_by %}selected="selected"{% endif %}>
      {{ option.name }}
    </option>
  {% endfor %}
</select>
collection.sort_options: An array of available sort options (like "Best selling", "Price, ascending", etc.). Eachoptionhas anamefor display ("Price, low to high") and avaluefor the URL (price-ascending).collection.sort_by: A string that holds the value of the currently active sort order from the URL.if option.value == sort_by: This line is key for ensuring the dropdown shows the currently active selection.
The JavaScript to Make it Work:
// (This script is a simplified version from the Shopify docs)
document.querySelector('#sort-by').addEventListener('change', function(e) {
  const value = e.target.value;

  // Take the current URL and create a URLSearchParams object
  const searchParams = new URLSearchParams(window.location.search);

  // Set the 'sort_by' parameter to the new value
  searchParams.set('sort_by', value);

  // Reconstruct the URL and trigger a page reload
  window.location.search = searchParams.toString();
});
This simple script listens for a change on the dropdown, updates the sort_by parameter in the URL, and reloads the page with the new URL. Shopify's backend sees the new parameter and serves the collection.products array in the requested order.
Test your understanding!
What would happen if you included the Liquid/HTML for the <select> dropdown but completely removed the JavaScript snippet?
- The page would break.
- The dropdown would not appear.
- The dropdown would appear, but changing the selection would do nothing.
- The sorting would still work magically.
Show answer
The correct answer is 3. The dropdown would appear because it's rendered by Liquid on the server. However, without the client-side JavaScript, there is no mechanism to listen for the change event and update the URL. The user could change the selection, but the page wouldn't know it needs to reload with a new sort_by parameter. This highlights the partnership between server-side Liquid rendering and client-side JavaScript interaction.
3. Deeper Dive: Why URL Parameters?
Your developer instincts might be asking: "Why all this fuss with URLs and page reloads? Why can't I just sort the collection.products array directly in Liquid, like collection.products | sort: 'price'?"
This is a fantastic question that gets to the heart of how Liquid works. It's a templating language, not a general-purpose programming language. It primarily reads data that Shopify's backend provides; it can't easily modify the core data fetching logic.
Can we SORT collections using SORT_BY in Liquid?!
This Shopify community discussion is perfect for understanding the philosophy behind this design. It features a developer asking the exact same question and getting a detailed explanation.
Read through this forum thread. Pay close attention to the distinction made between the URL-driven sort_by property (which is read-only in Liquid) and the Liquid | sort filter. The replies clarify why Liquid works this way—it's a read-only templating engine, and the URL parameter is how you instruct the backend to change the data it provides.
Key takeaway: The ?sort_by URL parameter is the "official" way to request a sorted list of products from Shopify's backend, respecting pagination. The Liquid | sort filter can only sort the single page of products you already received, which is not what you want.
4. Professional Polish: Sorting without Page Reloads
The basic method works, but the full page reload feels dated. With your JavaScript background, you can easily implement a much smoother experience using fetch and Shopify's Section Rendering API.
The idea is simple:
- When the user changes the sort option, prevent the default behavior.
- Construct the new URL with the
?sort_by=parameter, but also add§ion_id=.... This special parameter tells Shopify to only return the HTML for ourmain-collectionsection, not the entire page. - Use
fetch()to get this partial HTML. - Replace the content of the old product grid with the new one.
- Update the browser's URL using the History API so that bookmarks and the back button still work.
This technique is identical for sorting, filtering, or anything that requires updating the product grid.
Building A Collection Storefront Filter From Scratch (Beginner Shopify Theme Development Tutorial)
This video from Bosidev demonstrates this advanced technique for dynamic filtering. The core principle of using JavaScript to fetch and replace a section's content is exactly what we need for dynamic sorting.
Watch the segment from 09:45 to 14:00. He is handling checkboxes for filters, but focus on the JavaScript logic pattern: Constructing a URL with parameters. Appending the section_id to the URL. Using fetch() to get the updated HTML for just that section. Replacing the old section content with the new content. This exact pattern can be adapted to our sort-by dropdown.
By adapting the logic shown in the video, you can elevate the simple page-reloading sort feature into a fast, modern, and professional user experience—a great skill for your freelance portfolio.
Conclusion
You've now successfully constructed a collection page, one of the most vital components of any e-commerce storefront.
Here are the key takeaways from today's lesson:
- The
collectiontemplate renders product collections, using thecollectionobject to access data like the title and products. - Looping through
collection.productsmust be done inside apaginatetag to handle large collections. - Basic sorting is implemented with a dropdown that uses JavaScript to change the
?sort_byURL parameter and reload the page. - You cannot directly modify
collection.sort_byin Liquid; it is a read-only property reflecting the URL. The URL is the source of truth. - A more advanced and professional sorting experience can be built without page reloads by using JavaScript and the Section Rendering API.
In our loop today, we wrote the HTML for the product card directly inside the main-collection.liquid section. But what if we want to show a similar product grid on the homepage? We'd have to copy-paste that code, which isn't efficient.
In our next lesson, we'll solve this by learning how to create reusable UI components using snippets. We will refactor our product card markup into a product-card.liquid snippet that we can include anywhere we need it.