Hello! Welcome back to your Shopify app development course.
In our last lesson, you successfully used the Shopify CLI to scaffold a complete Node.js application. With a single command, npm run dev, you launched a local server, created a secure tunnel, and installed a functioning app on your development store. This process automatically handled the entire OAuth 2.0 flow we had previously discussed.
Today, we're peeling back that layer of automation to satisfy your "first principles" curiosity. Our learning outcome is to implement the app installation and authentication callback routes in an Express.js server. While the CLI has already generated this code for us, our goal is to understand how it could be built from scratch. This deep knowledge is invaluable for debugging, understanding security vulnerabilities, and truly mastering the platform.
We will deconstruct the two critical endpoints that form the backbone of Shopify's app authentication mechanism.
The Two-Step Authentication Dance
The entire app installation process hinges on two of your app's server routes working in tandem. Let's use a diagram to visualize the Authorization Code Grant flow we'll be building.

This flow translates into two core routes in our Express.js application:
- The Installation Route (e.g.,
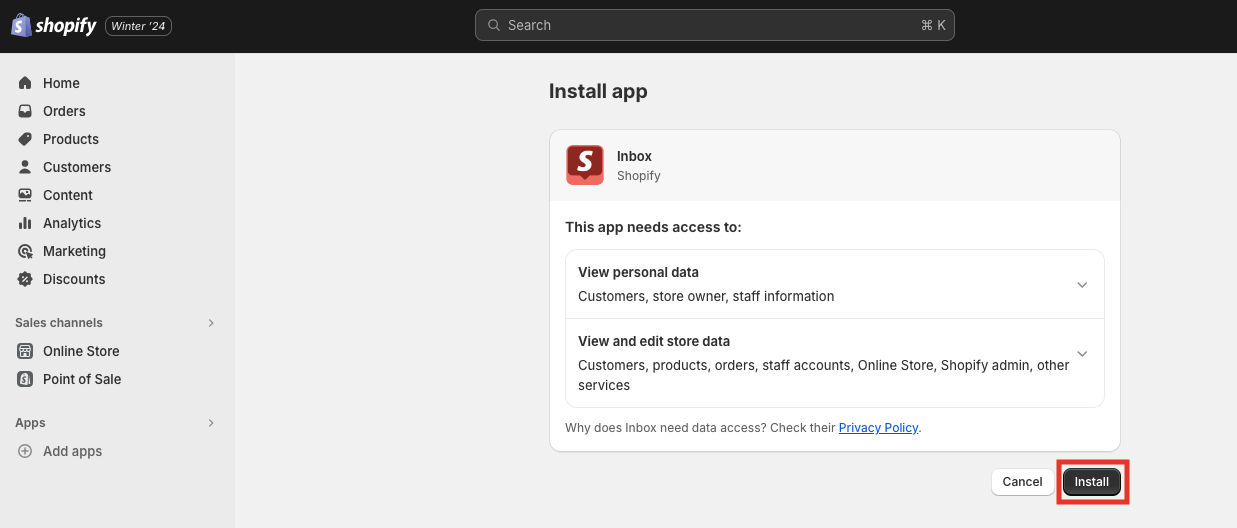
/shopify): This is the starting point. When a merchant clicks "Install" on your app, Shopify directs them to this route. Its only job is to prepare a special URL and redirect the merchant to Shopify's authorization screen. - The Callback Route (e.g.,
/shopify/callback): After the merchant approves the installation on the Shopify authorization screen, Shopify redirects them back to this route in your app. This route is where the most critical security checks and the final handshake occur.
1. The Installation Route: Kicking Off the Process
The installation route is relatively simple. Its responsibility is to construct the correct authorization URL and send the user on their way.
Let's look at how to build this in Node.js and Express.
Creating a Custom Shopify App with Node.js
The article 'Creating a Custom Shopify App with Node.js' provides a clear, practical example of building these routes from scratch. We will use its code as our reference.
In the 'Building the Node.js Server (index.js)' section, focus on the code block for the app.get('/shopify', ...) route. Notice how it constructs the installUrl and then performs a redirect.
As you saw in the article, the implementation involves these key steps:
- Get the
shopname: The initial request from Shopify will always include ashopquery parameter (e.g.,?shop=your-dev-store.myshopify.com). This is essential. - Define Scopes: You must declare what parts of a store's data your app needs to access (e.g.,
read_products,write_orders). - Construct the Authorization URL: This URL points to the Shopify admin and includes several important parameters:
client_id: Your app's public API key.scope: The permissions you are requesting.redirect_uri: The full URL of your callback route. This tells Shopify where to send the user back to after they grant permission.state: A unique, randomly generated string called a "nonce". This is a security measure to prevent Cross-Site Request Forgery (CSRF) attacks.
- Redirect: Perform a standard HTTP redirect to the constructed
installUrl.
Here is a simplified look at the Express code:
// Example Installation Route
app.get('/shopify', (req, res) => {
    const shop = req.query.shop;
    if (!shop) {
        return res.status(400).send('Missing shop parameter.');
    }

    const state = crypto.randomBytes(16).toString('hex'); // Generate a nonce
    const redirectUri = `${HOST}/shopify/callback`;
    const installUrl = `https://${shop}/admin/oauth/authorize?client_id=${SHOPIFY_API_KEY}&scope=${SHOPIFY_SCOPES}&state=${state}&redirect_uri=${redirectUri}`;

    // In a real app, you'd store the 'state' associated with the user's session to verify it in the callback.

    res.redirect(installUrl);
});
2. The Callback Route: The Secure Handshake
This is where the most important logic resides. After the merchant clicks "Install," Shopify sends them back to your redirect_uri with several query parameters, including a temporary code and an hmac.
Your callback route has two primary responsibilities: validate the request and exchange the code for an access token.
Task 1: HMAC Validation
Before you do anything else, you must verify that the request came from Shopify. This is done by validating the hmac (Hash-based Message Authentication Code).
The process, at a high level, is:
- Take all the query parameters from the request, except for
hmacitself. - Create a string from these parameters (e.g.,
code=...&shop=...&state=...). - Use the Node.js
cryptomodule to create anHMAC-SHA256hash of that string, using your app's API Secret Key as the key. - Compare the hash you just generated with the
hmacvalue provided by Shopify. If they match, the request is authentic.
Let's dive into the official documentation and the practical implementation.
Implement authorization code grant manually
The Shopify developer documentation, 'Implement authorization code grant manually', provides the authoritative guide on this security check. Then, we'll see how it's implemented in the LINK article.
First, read Step 1: Verify the installation request to understand the principle of HMAC validation. Then, review the Security checks section under Step 3: Validate authorization code.
Now, look at the code example again in the LINK article under the app.get('/shopify/callback', ...) route. Pay close attention to the HMAC validation block at the beginning. It directly implements the steps described in the Shopify documentation you just read.
Task 2: Exchange Code for Access Token
Once the request is validated, you can safely use the temporary code. This code is short-lived and can only be used once.
You must now make a secure, server-to-server POST request from your backend to Shopify's access_token endpoint. This is the "back-channel" communication we've discussed; it happens entirely on the server and is never exposed to the user's browser.
The body of this POST request must contain:
client_id: Your app's API key.client_secret: Your app's secret key.code: The temporary authorization code you just received.
If successful, Shopify will respond with a JSON object containing your prize: the permanent access_token.
Implement authorization code grant manually
Let's return to the Shopify documentation to see the official specification for this token exchange.
Read Step 4: Get an access token. Note the endpoint URL and the required parameters for the POST request. Also, look at the example response to see what an access token payload looks like.
Now, review the try...catch block within the /shopify/callback route in the LINK article. You'll see an axios.post call that performs this exact token exchange.
Task 3: Store the Token
The final step is crucial: you must save the access_token in a secure, persistent storage (like a database), associating it with the shop. The example uses a simple in-memory object for demonstration, but for a real application, this would be a database table mapping shop URLs to their access tokens.
Test your understanding!
Imagine your app installation is failing. When a merchant is redirected back to your app after clicking "Install," they see a '400 Bad Request' error that says 'HMAC validation failed'. In which of your two routes (/shopify or /shopify/callback) would you start your debugging, and why?
Show answer
You would start debugging in the /shopify/callback route. HMAC validation is the very first security check that happens in the callback route to verify the authenticity of the incoming request from Shopify. An HMAC failure means either the request was tampered with, or more likely, your server-side code is not correctly generating the hash to compare against (e.g., using the wrong API secret key or incorrectly formatting the message string). The /shopify route is not involved in this part of the process.
Putting It All Together: A Video Walkthrough
To see these concepts in action, let's watch a developer build these routes. The video uses NestJS, a framework built on top of Express, but the core logic for the installation (init) and callback (redirect) routes is identical to what we've just studied.
Ultimate Guide to Shopify Custom App & OAuth Flow | Create Shopify Custom App from Partner Account
The video 'Ultimate Guide to Shopify Custom App & OAuth Flow' demonstrates building these routes from scratch. Watching this will solidify the concepts we've just broken down.
Watch from 17:23 to 21:59. Here, the developer implements the 'init' and 'redirect' endpoints. Pay attention to how he constructs the authorization URL and then, in the redirect endpoint, prepares the POST request to get the access token. Then, watch from 23:20 to 27:57 to see him run the app, install it, and trigger the entire OAuth flow you just learned about.
Conclusion
Today you've moved beyond the automated magic of the Shopify CLI and dissected the fundamental mechanics of app authentication. You now understand how to manually implement the two-route system that underpins the entire process.
Key Takeaways:
- App installation is a two-step process handled by an installation route and a callback route.
- The installation route (
/shopify) is responsible for redirecting the merchant to Shopify's authorization consent screen. - The callback route (
/shopify/callback) is where the critical work happens:- HMAC Validation: Verifying the request's authenticity using your API secret key. This is a mandatory security step.
- Token Exchange: Making a secure, server-to-server
POSTrequest to trade the temporarycodefor a permanentaccess_token. - Token Storage: Persistently saving the access token associated with the shop.
Understanding this flow from first principles gives you the power to debug complex authentication issues and appreciate the robust security model Shopify has in place.
In our next lesson, we will address the question: "Now that I have an access token, how do I use it and manage it securely?" We will cover how to manage authenticated sessions for making secure API requests on behalf of a store, building directly on the token you've just learned how to acquire.