Hello! Welcome to your sixth and final lesson in our first module.
In our previous lesson, we mapped out the professional landscape of the Shopify ecosystem, identifying your role as a future freelance developer and the various services and revenue models available through the Partner Program.
Today, we transition from theory to action. This is a foundational, hands-on lesson where you'll set up the essential accounts and environments that will serve as your personal workshop for the rest of this course. By the end of this session, you'll have your own sandboxed Shopify store, ready for all the theme and app development projects we'll tackle.
Our learning outcome is to set up a Shopify Partner account and create a development store for hands-on work.
1. Becoming a Shopify Partner
As we discussed, the Shopify Partner Program is the official entry point for developers. It's a free program that provides access to crucial tools, documentation, and the ability to create development stores. Your first step is to create this account.
The process is straightforward, similar to signing up for any online service. The guide below walks you through the steps and reiterates the benefits.
How to Create a Shopify Development Store: A Step-by-Step Guide
The article 'How to Create a Shopify Development Store' provides a clear, step-by-step guide to setting up your Partner account. We'll use it to walk through the initial registration.
Please read the section 'Setting Up Your Shopify Partner Account'. This will guide you through the registration process. You can follow along and create your account now by navigating to the Shopify Partners website (a quick search for 'Shopify Partner Program' will take you there).
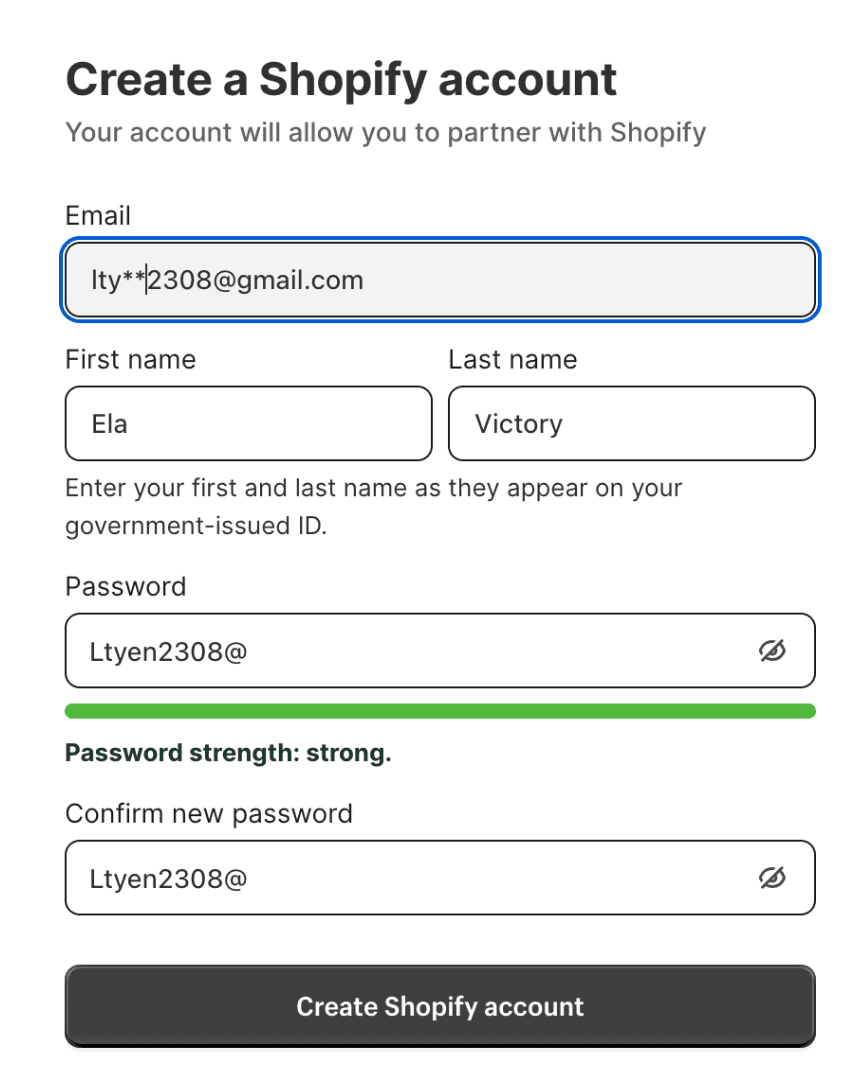
Here is what the initial sign-up form looks like. It will create a Shopify account that is linked to the Partner Program.
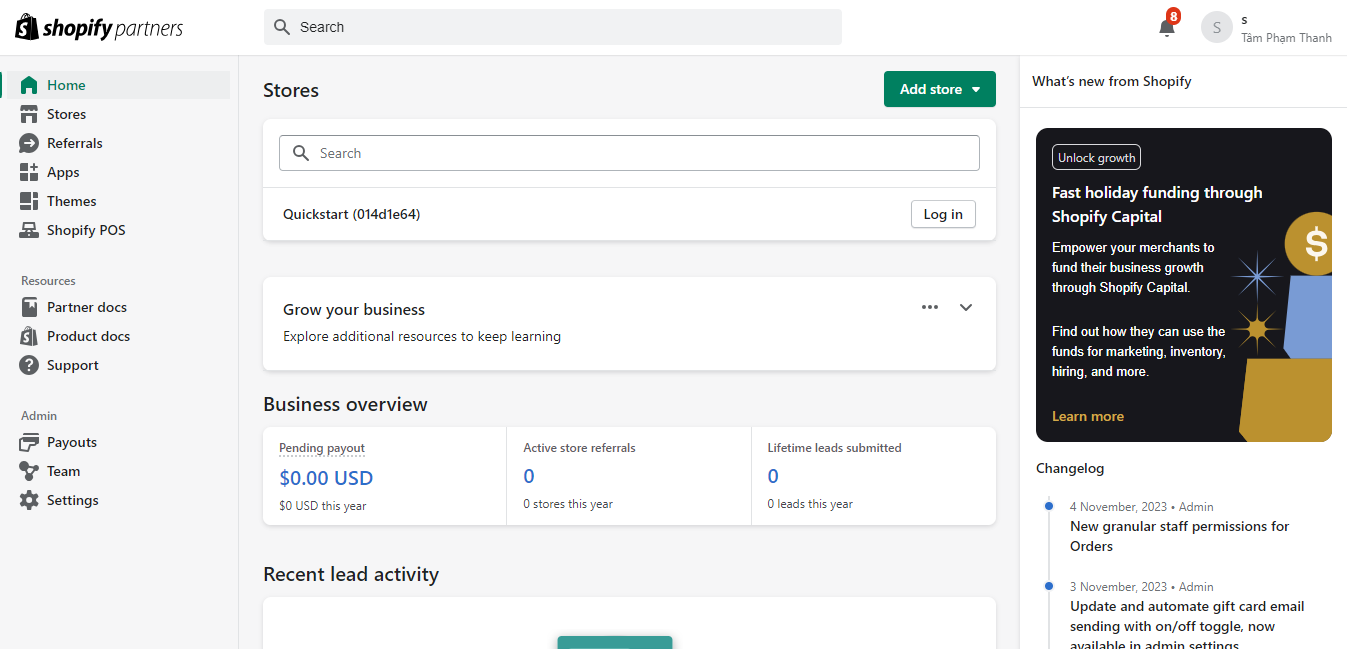
Once you have completed the sign-up process and logged in, you will land on your Shopify Partner Dashboard. This will be your central hub for managing stores, apps, themes, and your business relationship with Shopify.
2. Creating a Development Store
With your Partner account active, you can now create a development store. This is a free, fully-functional Shopify store that is password-protected and cannot process real transactions. It's the perfect sandbox environment for building and testing themes and apps without any risk or cost.
Development Stores vs. Client Transfer Stores
It's important to understand a key distinction Shopify makes. The term "development store" has historically been used for any store built by a partner. Recently, Shopify has clarified the terminology:
- Client Transfer Store: Created from the main Partner Dashboard. Its primary purpose is to be built and then transferred to a client. You earn a recurring commission from the client's subscription plan after transfer.
- Dev Store: Created from a newer interface called the Dev Dashboard. Its primary purpose is for you to test your own apps and themes. These stores are not transferable to clients.
For our course, since we're focused on building your skills and portfolio projects, the Dev Store is the most appropriate tool. It's designed specifically for the development workflow we'll be using.
The official Shopify documentation provides the most accurate guide for this.
Shopify's official documentation, 'Create dev stores', gives a concise overview of the process and the store's limitations. We'll use it to create our sandbox environment.
First, read the brief section 'Dev stores vs client transfer stores' to solidify your understanding of the difference. Then, follow the steps in the 'Create a dev store' section to create your store. Finally, read the 'Limitations' section to understand what you can and can't do with this type of store.
To summarize the creation steps from the documentation:
- From your Partner Dashboard, find the link to the Dev Dashboard. It might be under a menu or directly accessible.
- Navigate to the Dev stores section.
- Click Add dev store.
- Give your store a unique name (e.g.,
yourname-portfolio-store). - For the plan, you can choose any option; Basic is sufficient for our purposes.
- Leave the "Test a feature preview" option unselected for now.
- Click Create store.
After a few moments, your new store will be ready. You now have a complete Shopify environment to work in!
3. Setting Up Your Store for Development
An empty store isn't very useful for development. To build and test effectively, you need products, collections, and customers. Manually creating all this data is tedious. Fortunately, there are easier ways.
Populating Your Store with Test Data
When you create a new development store, Shopify often gives you the option to populate it with a set of test data. If you see this option, it's a great choice.
If not, you can easily add sample products. The blog post we looked at earlier has a great tip for this. While the article refers to a slightly different store creation process, the post-setup advice is excellent.
How to Create a Shopify Development Store: A Step-by-Step Guide
Let's revisit the ShipAid blog post for its practical advice on optimizing your new store for development.
Read the subsection titled '1. Populate Dummy Data'. It describes using a sample CSV file to quickly import a set of products. You can find sample product CSVs with a quick web search for 'Shopify sample product CSV'.
Action: Take a few minutes now to log into your new development store's admin panel, navigate to the Products section, and use the Import function to upload a sample product CSV. This will give you a realistic catalog to work with in our upcoming lessons.
Understanding Development Limitations
As you read in the Shopify docs, development stores have specific limitations. The two most important ones to remember are:
- You cannot process real transactions. To test the checkout process, you must use Shopify's Bogus Test Gateway. This simulates successful and failed transactions without any money changing hands.
- You cannot remove the storefront password. Your store will always be password-protected and not accessible to the public. You can, however, customize the password page and preview your store just as a customer would.
Test your understanding!
A prospective client is impressed with a theme you're building in your development store. They ask for the public URL so they can show it to their business partner. What do you need to provide them in addition to the store's URL, and why?
Show answer
You would need to provide them with the store's URL (e.g., your-store.myshopify.com) and the storefront password. Because development stores are always password-protected, they won't be able to see the live site without entering the password on the landing page. You can find this password in your store's Settings > Online Store > Preferences section.
Conclusion
Congratulations! You have successfully taken the first and most critical practical step in your Shopify development journey. You've established your presence in the Shopify ecosystem and created the sandbox where you'll hone your skills.
Key Takeaways:
- The Shopify Partner account is your gateway: It provides access to all the necessary tools for development.
- Development Stores are your sandbox: You now have a free, safe, and fully-featured environment to build, test, and break things without consequence.
- Preparation is key: Populating your store with test data is a crucial step that will save you significant time as we begin theme and app development.
- Know your environment's limits: Understanding that dev stores are password-protected and use a "Bogus Gateway" for payments is essential for a smooth development workflow.
This lesson concludes our first module. We've covered the "why" of e-commerce, Shopify's solution, and the opportunities for developers. We've now set the stage for the "how."
In our next lesson, we will begin Module 2: Shopify Platform & Data Architecture. We will dive into your new development store and start dissecting its structure, beginning with the core data objects that power every Shopify store: Products, Variants, and Collections.