Hello again! It's time to bring our product customizer to life.
In the last lesson, you successfully created a Theme App Extension that displays a customization form on the product page. We finished with a form that looked right but wasn't functional. If a customer fills it out and clicks "Add to Cart," their personalized choices are lost.
Today, we will fix that. Our learning outcome is to use the Ajax API to add the selected customizations to the cart as line item properties. We'll write the client-side JavaScript to intercept the form submission, package the customer's choices, and send them to the cart, all without a jarring page reload. This is a critical step in making your app's front-end feel modern and seamless.
Why the Ajax API? A Bridge to the Cart
You've already worked with the Admin API, which is a powerful, authenticated, server-to-server interface for managing store data. The Ajax API is different. It's an unauthenticated, client-side API designed specifically for interacting with the cart from the user's browser.
Its primary purpose is to enable dynamic front-end experiences. Instead of a traditional form submission that reloads the entire page, we can use JavaScript to send a request in the background. This allows us to:
- Add items to the cart.
- Update quantities.
- Remove items.
- Get the current state of the cart.
...all while the user stays on the same page. This is the foundation for features like cart drawers (or "slide-out carts") and quick-add buttons. For your background in modern web development with React and Next.js, this pattern of client-side state management and asynchronous API calls will feel very familiar.
The Key Concept: Line Item Properties
Before we write any code, let's revisit the concept of line item properties. This is the mechanism Shopify provides to attach custom information to a product when it's added to the cart.
Using JavaScript to manage a Shopify cart
The article 'Using JavaScript to manage a Shopify cart' from Nozzle Gear offers an excellent, developer-focused explanation of the nuances of the Shopify cart. It's a great 'from first principles' look at the problem we're solving.
Please read the section 'The basics'. Pay close attention to the third point: how custom properties are used to differentiate otherwise identical products in the cart. This is the exact principle our customizer relies on.
As the article explains, if you add the same product variant to the cart twice, Shopify just increments the quantity. However, if you add it with different properties, Shopify treats them as two distinct line items. This is perfect for product customizations.
In the last lesson, you built the form inputs with a specific name attribute, like this:name="properties[Engraving]"
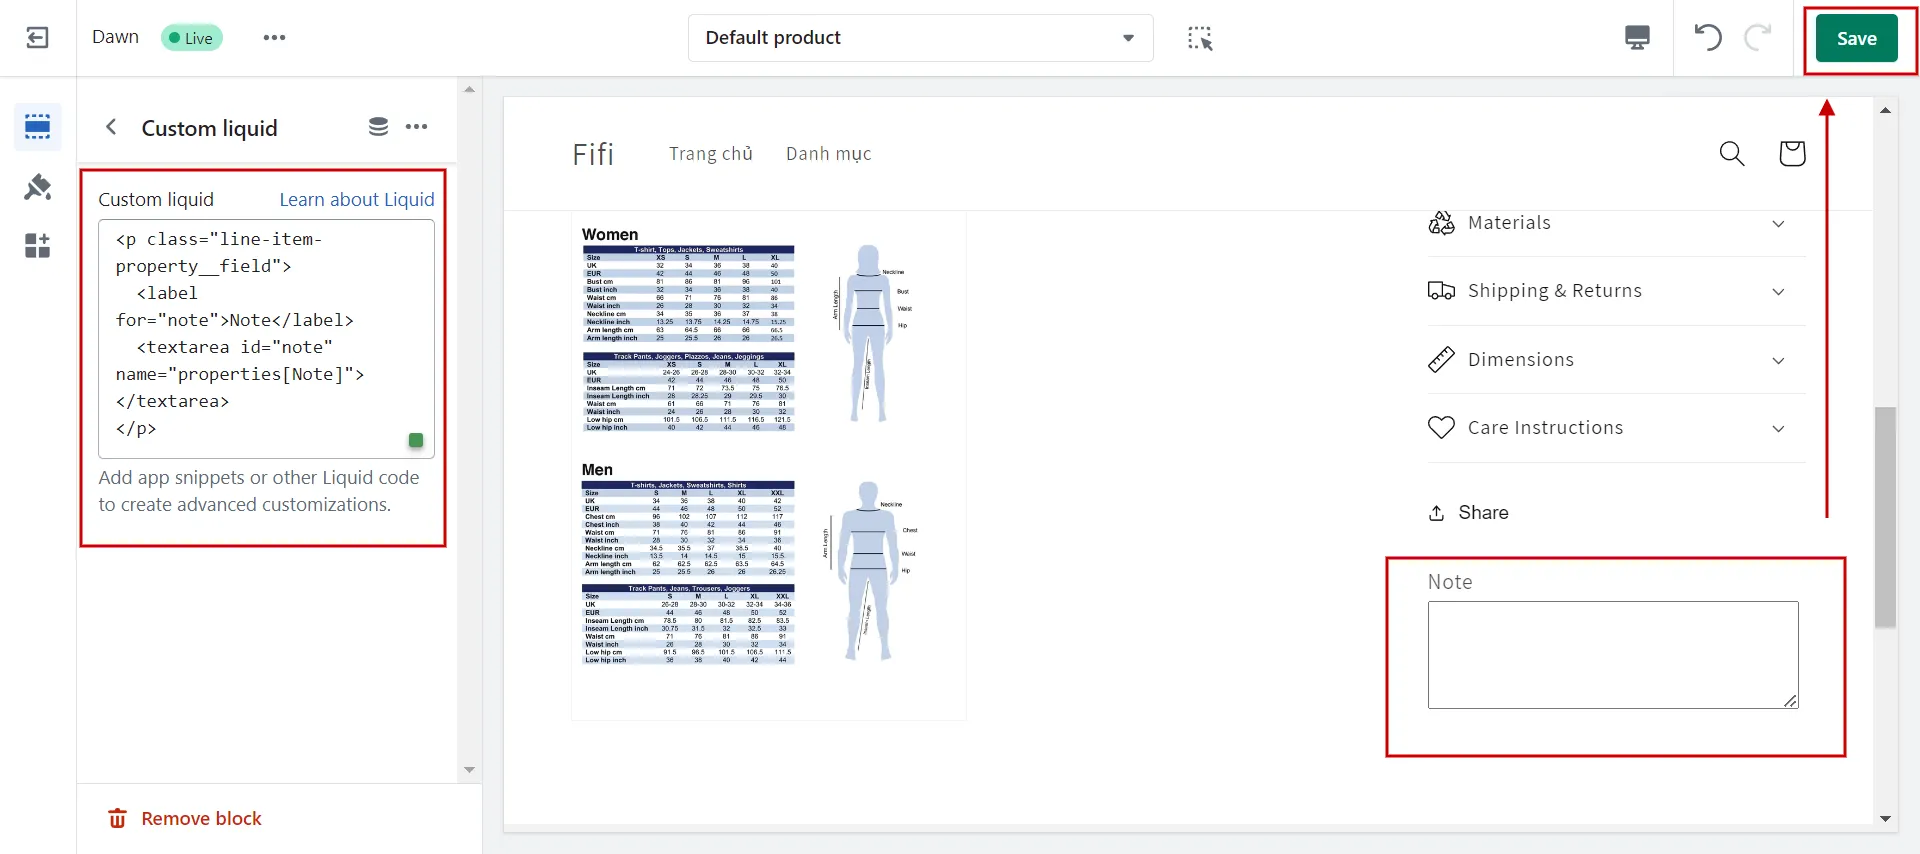
When a form with these inputs is submitted, Shopify bundles them into a properties object associated with that line item. This data is then visible to the customer in the cart and to the merchant on the order details page.
The Implementation: Adding to Cart with JavaScript
Our goal is to submit the product form using JavaScript's fetch API to the POST /cart/add.js endpoint.
The official Shopify documentation shows the exact data structure needed.
The official Cart API reference is our source of truth. It details every endpoint and the data they expect.
Focus on the subsection 'Add line item properties'. Note how the properties key is an object containing key-value pairs. This is the data structure we need to create from our form.
Now, let's translate this into a practical, hands-on implementation.
Step 1: Set Up Your JavaScript File
Navigate to the Theme App Extension directory you created in the last lesson (e.g., extensions/product-customizer-form). Open the JavaScript file located in assets/app.js. This is where we will write our logic.
In the previous lesson, your {% schema %} in customizer_form.liquid included lines for "stylesheet": "app.css" and "javascript": "app.js". This tells Shopify to automatically load these asset files whenever your App Block is rendered.
Step 2: Intercept the Form Submission
We need to add an event listener to the product form that contains our customizer. When the user clicks "Add to Cart," we'll prevent the browser's default page-reloading behavior and execute our own code instead.
Replace the content of assets/app.js with the following:
// Find the product form on the page. Shopify themes typically wrap product
// options and the add-to-cart button in a form. Our block is inside this form.
const productForm = document.querySelector('form[action$="/cart/add"]');

if (productForm) {
  productForm.addEventListener('submit', async (event) => {
    // 1. Prevent the default form submission which would reload the page.
    event.preventDefault();

    console.log('Form submission intercepted.');

    // 2. Create a FormData object from the form. This automatically
    // captures all input values, including the variant ID, quantity,
    // and our custom properties.
    const formData = new FormData(productForm);

    try {
      // 3. Send the data to the Shopify Ajax API's /cart/add.js endpoint.
      const response = await fetch('/cart/add.js', {
        method: 'POST',
        body: formData, // FormData is sent with the correct 'multipart/form-data' header.
      });

      if (!response.ok) {
        // If the API returns an error, log it.
        const errorData = await response.json();
        console.error('Error adding to cart:', errorData);
        alert(`Error: ${errorData.description || 'Could not add item to cart.'}`);
        return;
      }

      // 4. Handle the successful response.
      const cartData = await response.json();
      console.log('Item added to cart:', cartData);

      // For now, let's just redirect to the cart page to see the result.
      // In a more advanced implementation, you would update the UI
      // (e.g., open a cart drawer) without a redirect.
      window.location.href = '/cart';

    } catch (error) {
      console.error('An unexpected error occurred:', error);
      alert('An unexpected error occurred. Please try again.');
    }
  });
}
Breaking down the code:
event.preventDefault(): This is the crucial first step that stops the browser from doing a full page reload.new FormData(productForm): This is a powerful browser API. It iterates over all the fields in the form and creates akey/valuedataset. Because you named your customizer fieldsproperties[Label],FormDatawill correctly format them in a way that the Shopify API understands.fetch('/cart/add.js', ...): We send aPOSTrequest to the Ajax API endpoint. We don't need to set theContent-Typeheader ourselves; the browser does it automatically when thebodyis aFormDataobject.- Success Handling: After a successful API call, we simply redirect the user to the cart page (
/cart) to see their customized product.
Step 3: Test Your Implementation
With your shopify app dev server running, it's time to test.
- Navigate to the product page where you've added your "Product Customizer" block.
- Open your browser's developer tools and switch to the Console tab.
- Fill out the customization fields (e.g., enter text for an engraving, select a dropdown option).
- Click the "Add to Cart" button.
- Observe the console. You should see "Form submission intercepted." followed by "Item added to cart:" with the JSON response from the API.
- You will then be redirected to the cart page.
- Crucially, verify that the product in the cart now displays the custom information you entered. It should appear as small text underneath the product title.
Test your understanding!
A merchant reports that when two customers order the same product with different custom engravings, the orders are correct. However, if a single customer tries to add the same product to their cart twice with two different engravings, the cart only shows one item with the second engraving and a quantity of 1. What is the most likely cause of this bug in the app.js file?
Show answer
The most likely cause is that the JavaScript is not correctly capturing and sending the properties with the Ajax request. If the properties object is missing or empty for both "add to cart" actions, Shopify sees two identical requests for the same variant ID. It will simply overwrite the first one with the second, resulting in a single line item. The developer should check how FormData is being constructed and ensure the custom input fields have the correct name="properties[...]" attribute in the HTML.
Polishing the User Experience (Optional Challenge)
Redirecting to the cart page works, but it's not the polished experience users expect today. A better approach is to update the UI without a full navigation, for instance by opening a "cart drawer".
Given your experience with React, the concept of an event-driven UI will be natural. The video below demonstrates this exact pattern: after the fetch call succeeds, instead of redirecting, it dispatches a custom event. Another part of the code (the cart drawer component) listens for this event and re-renders itself with the new cart data.
Shopify Cart API Full Guide For Shopify Theme Developers (Beginner Friendly Tutorial)
The video 'Shopify Cart API Full Guide' from Bosidev provides an excellent, in-depth tutorial on building a fully dynamic Ajax cart. The pattern he uses is a great example of professional front-end development on Shopify.
Watch the section from 14:59 to 23:45. Focus on the pattern: Intercept form submit (event.preventDefault). Use fetch to add the item, but this time requesting a section to be re-rendered. On success, dispatch a custom event (new CustomEvent(...)). A separate component listens for that event and updates the DOM with the new HTML received from the API. You don't need to implement this now, but understand the pattern as it's a powerful technique for your freelance toolkit.
Conclusion
Fantastic progress! You have now connected the front-end user input to Shopify's cart, completing a major part of the user-facing functionality of your capstone project.
Key Takeaways:
- The Shopify Ajax API is used for client-side cart manipulation, enabling dynamic experiences without page reloads.
- Line Item Properties are the standard mechanism for attaching custom data to products as they are added to the cart.
- The implementation pattern involves intercepting form submissions with JavaScript (
event.preventDefault()), packaging form data usingnew FormData(), and sending it to the/cart/add.jsendpoint viafetch. - The
name="properties[Key]"HTML attribute is essential for theFormDataobject to be correctly interpreted by the Shopify API.
Next Steps
The customer's choices are now successfully being added to the cart and will carry through to the final order. But how does the merchant see this information when they need to fulfill the order?
In our next lesson, we will solve this final piece of the puzzle. We'll build a backend process to retrieve and display order customizations for the merchant, likely within your app's main interface. This will involve using Shopify Webhooks to be notified of new orders and the Admin API to read the order data, including the line item properties you just saved.