Hello! Welcome back to our journey of building your AI web application.
In our last lesson, you learned the powerful technique of rendering HTML templates with dynamic data from your Python backend. You can now pass information from your Flask app to your user's browser. Today, we're going to learn how to do the reverse: how to get data from the user back to your Flask app.
This is the core mechanism that will power your final project. When a user types text into a box and clicks a button like "Summarize" or "Correct Grammar," the process you learn today is what sends that text from their browser to your server for processing.
The Client-Server Data Flow
At a high level, the process looks like this:
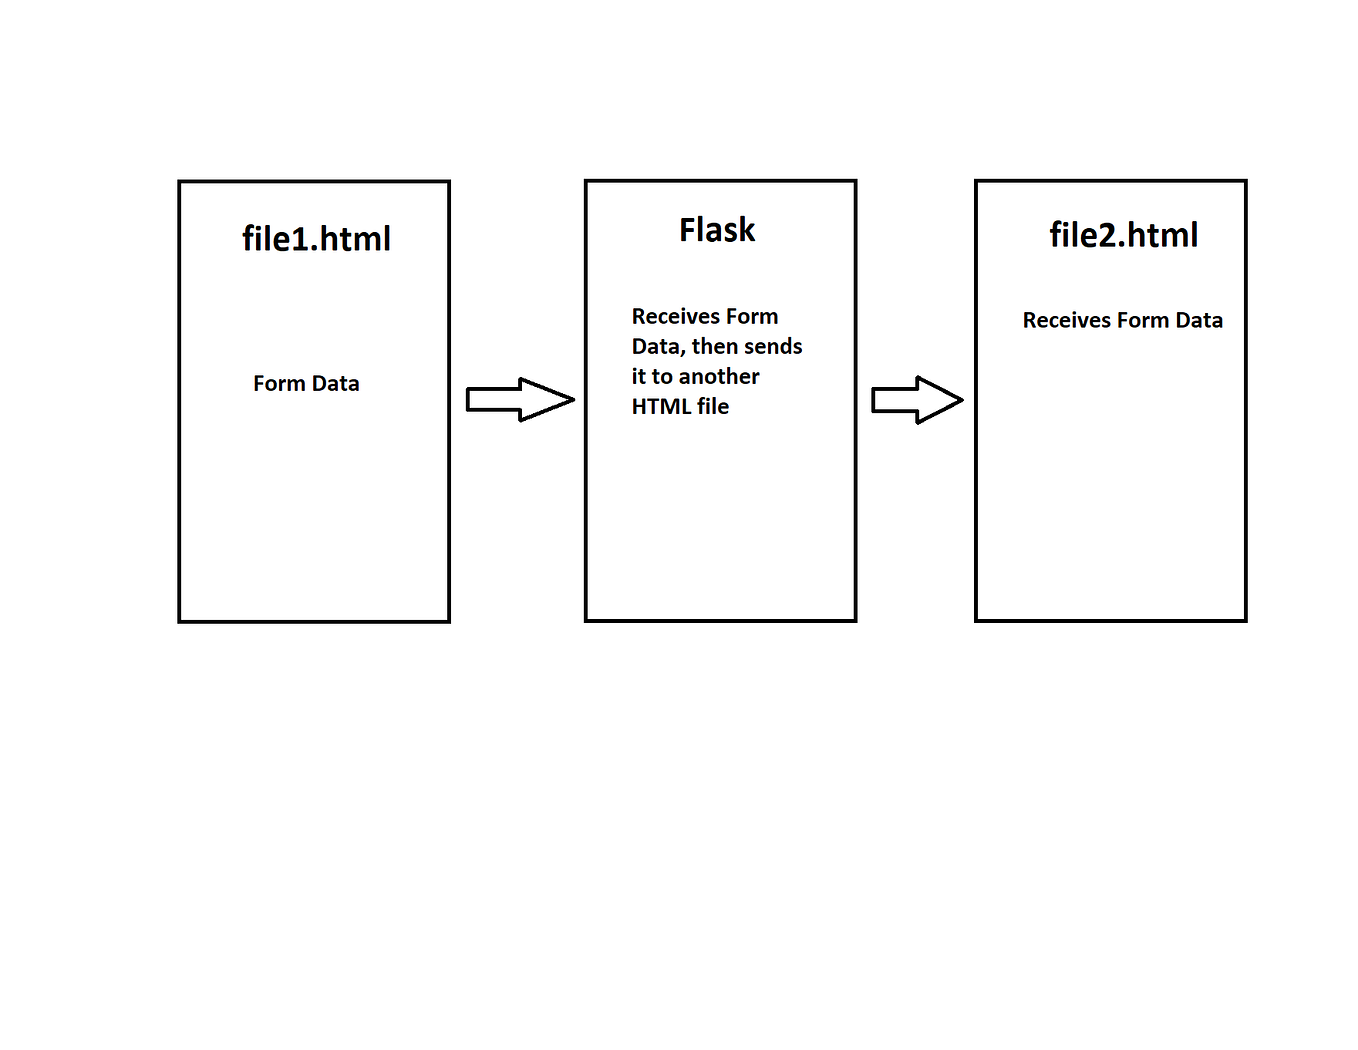
- A user fills out a form in their web browser (the "client").
- They click "Submit," sending the form's data to your Flask application (the "server").
- Your Flask application receives and processes this data.
- Your app then sends a response back to the user, perhaps a new page showing the results.
This diagram illustrates the flow:
Step 1: Sending Data with an HTML <form>
The journey begins in your HTML file. To send data, you use the <form> element. Two attributes are critical here:
method="POST": This tells the browser to send the form data in the body of the request, hidden from the URL. This is the standard and secure way to send data that will modify something or that is sensitive.action="/your-target-url": This specifies the URL on your server where the form data should be sent.
Inside the form, you'll have input fields. The name attribute of each <input> is essential. This name becomes the key you'll use in Flask to retrieve the value the user entered.
Let's look at a simple form that asks for a user's name:
<!-- This would be in a file like 'templates/form.html' -->

<form action="/process" method="POST">
    <label for="username">Name:</label>

    <!-- The 'name' attribute is 'username'. This is the key we'll use in Flask. -->
    <input type="text" id="username" name="username">

    <button type="submit">Submit</button>
</form>
Step 2: Receiving Data in Flask
When the user submits this form, the browser sends a POST request to the /process URL on your server. Your Flask application needs to be ready to catch it.
To do this, we use the global request object from Flask. This object contains all the information about the incoming request from the browser.
request.method: This tells you if the request was aGETor aPOST. We can use this to show the form on a GET request and process the data on a POST request.request.form: This is a special dictionary-like object that holds all the data from a submitted form. You can access the data using thenameattributes from your HTML inputs as keys.
For example, to get the data from the form above, you would use:user_input_name = request.form['username']
Now, let's see this whole process in action.
A Complete Example
The following video from Tech With Tim provides a clear, step-by-step walkthrough of creating a form and handling the submitted data in Flask. It covers everything we just discussed.
Flask Tutorial #4 - HTTP Methods (GET/POST) & Retrieving Form Data
This video will guide you through the complete process of handling form data. It clearly explains the difference between GET and POST requests and shows you how to access the submitted data in your Flask route.
Please watch from 04:09 to 10:20. Pay close attention to: How the HTML form is constructed with method="POST". (04:09 - 06:49) How request.method is checked in the Python code. (07:30 - 08:10) How the data is retrieved using request.form. (08:10 - 09:02) How the app redirects to a new page with the data. (09:02 - 10:20)
For a textual reference that you can follow along with, this article from DigitalOcean is excellent. It covers the same concepts with clear code examples.
How To Process Incoming Request Data in Flask
This article provides a written guide to processing form data in Flask. It's a great resource to read alongside or after the video to solidify your understanding.
Please read the section titled 'Using Form Data'. It demonstrates how to create a route that handles both GET and POST requests, shows the HTML for the form, and explains how to access the form data using request.form.
Let's consolidate what you've learned into a single, clean example.
Assume you have this project structure:
my-ai-app/
|-- app.py
|-- templates/
    |-- form.html
    |-- result.html
1. templates/form.html
This file contains the form for the user to fill out. When the user visits /data-entry, this is what they will see.
<!DOCTYPE html>
<html>
<head>
    <title>Enter Data</title>
</head>
<body>
    <h1>What text do you want to analyze?</h1>
    <form action="/data-entry" method="POST">
        <textarea name="user_text" rows="4" cols="50"></textarea>
        <br>
        <button type="submit">Submit Text</button>
    </form>
</body>
</html>
Notice we're using a <textarea> which is better for long text, but it works the same way with a name attribute.
2. templates/result.html
This page will display the text that the user submitted.
<!DOCTYPE html>
<html>
<head>
    <title>Submitted Data</title>
</head>
<body>
    <h1>You submitted the following text:</h1>
    <p style="border: 1px solid #ccc; padding: 10px; background-color: #f9f9f9;">
        {{ submitted_text }}
    </p>
    <a href="/data-entry">Submit another text</a>
</body>
</html>
3. app.py
This is where the magic happens. The /data-entry route now handles two scenarios.
from flask import Flask, render_template, request

app = Flask(__name__)

@app.route('/data-entry', methods=['GET', 'POST'])
def data_entry():
    # Check if the request is a POST request (i.e., the form was submitted)
    if request.method == 'POST':
        # Get the text from the textarea, which has name="user_text"
        text = request.form['user_text']

        # Now, render the result page, passing the submitted text to it
        return render_template('result.html', submitted_text=text)

    # If it's a GET request, just show the form page
    return render_template('form.html')

if __name__ == '__main__':
    app.run(debug=True)
Run this app.py file and navigate to http://127.0.0.1:5000/data-entry. You'll see the form. Type something in the box and click submit. You will be taken to the result page, which displays the text you entered!
Test your understanding!
Modify the example above to create a simple Mad Libs-style game.
- In
form.html, add two more input fields: one for a noun (withname="noun") and one for a verb (withname="verb"). Keep the originaltextareafor a sentence. - In
app.py, update thedata_entryfunction to retrieve all three pieces of data (noun,verb, anduser_text) fromrequest.formwhen a POST request is made. - In
result.html, display a funny message that combines all three inputs. For example: "The quick brown [noun] decided to [verb] over the lazy dog." (Replace the bracketed words with the user's input).
Show answer
1. Updated templates/form.html
<!DOCTYPE html>
<html>
<head>
    <title>Enter Data</title>
</head>
<body>
    <h1>Mad Libs!</h1>
    <form action="/data-entry" method="POST">
        <label for="noun">Noun:</label><br>
        <input type="text" id="noun" name="noun"><br><br>

        <label for="verb">Verb (ending in 'ing'):</label><br>
        <input type="text" id="verb" name="verb"><br><br>

        <label for="user_text">Adjective:</label><br>
        <input type="text" id="user_text" name="user_text"><br><br>

        <button type="submit">Create Story</button>
    </form>
</body>
</html>
2. Updated app.py
from flask import Flask, render_template, request

app = Flask(__name__)

@app.route('/data-entry', methods=['GET', 'POST'])
def data_entry():
    if request.method == 'POST':
        # Get all three values from the form
        noun = request.form['noun']
        verb = request.form['verb']
        adjective = request.form['user_text']

        return render_template('result.html', noun=noun, verb=verb, adjective=adjective)

    return render_template('form.html')

if __name__ == '__main__':
    app.run(debug=True)
3. Updated templates/result.html
<!DOCTYPE html>
<html>
<head>
    <title>Your Story</title>
</head>
<body>
    <h1>Your silly story:</h1>
    <p>
        The <strong>{{ adjective }}</strong> <strong>{{ noun }}</strong> was busy <strong>{{ verb }}</strong> by the river.
    </p>
    <a href="/data-entry">Play again</a>
</body>
</html>
Conclusion
Excellent work! You now understand the complete round-trip of data in a web application: sending data from a client's browser and receiving it on your server. This is a fundamental skill for any web developer.
Key Takeaways:
- HTML
<form>s withmethod="POST"are used to send data to the server. - The
nameattribute of an<input>or<textarea>is the key for accessing its data. - In Flask, a route must specify
methods=['GET', 'POST']to handle form submissions. - You can check
if request.method == 'POST'to run specific logic for submitted forms. - The form data is available in the
request.formdictionary-like object.
In the next lesson, we will refine this process. Instead of having the server send back a whole new HTML page, we will create an API endpoint. This is a special URL that returns just raw data (in a format called JSON), not a full webpage. This technique is what allows modern web apps to feel fast and interactive, updating parts of a page without a full reload. It's the final piece we need before we can connect your user interface to the Gemini AI.