Hello! Welcome to the next stage of our project.
In the last module, you successfully built the complete communication loop between a web browser (the client) and your Flask application (the server). Your app can now handle user input, show a loading state, and display both successful results and user-friendly error messages. This is a huge milestone!
Now, we're going to make our backend application much more powerful. We'll start integrating the Gemini AI, which is the core of the AI writing assistant you want to build. This module, "Integrating the Gemini AI API," is all about connecting our Python code to this external service.
Our very first step, and the focus of today's lesson, is one of the most important security practices in modern development. We will learn what an API key is and how to handle it securely using environment variables. Before we can ask the Gemini API to do anything for us, we need to prove who we are and that we have permission to use it. This lesson covers exactly that.
What is an API Key?
Think of an API (Application Programming Interface) like a restaurant's kitchen. Your application is a waiter that takes an order (a request) to the kitchen. The kitchen (the API) prepares the dish (the data or result) and gives it back to the waiter to serve.
But the kitchen won't just take orders from anyone off the street. It needs to know which restaurant the waiter works for. An API key is like your application's unique ID badge. It's a long, secret string of text that you send with every request to identify your application.
To get a clear overview of what API keys do, please watch the first part of this video.
What Are API Keys, And Why Are They So Important? | System Design Interview Basics
The video 'What Are API Keys, And Why Are They So Important?' explains the role of an API key in identifying and authorizing your application.
Watch the segment from the beginning until 01:45. The video covers why API keys are used for identification and authorization, and how they help protect services.
As the video explained, API keys serve several key functions:
- Authentication: They prove the request is coming from a known application.
- Authorization: They determine if your application has permission to access the specific data or feature it's asking for.
- Usage Tracking & Billing: They allow the service provider (in our case, Google) to track how much you use the API. This is important for enforcing usage limits (rate limiting) and for billing if it's a paid service.
For a more detailed summary, you can read the first two sections of this article.
What Is an API Key: Meaning, Use Cases, and Best Practices
The article 'What Is an API Key: Meaning, Use Cases, and Best Practices' provides a great text summary of the purpose of API keys.
Read the sections 'What Is an API Key?' and 'Why Are API Keys Essential?'. This will reinforce the concepts from the video.
The #1 Security Risk: Never Hardcode Your Secrets
Since an API key is a secret credential, it is extremely important that you keep it private. The biggest mistake a new developer can make is to "hardcode" the key, which means writing it directly into the code like this:
# WARNING: DO NOT DO THIS! THIS IS INSECURE.
import google.generativeai as genai

# Hardcoding the API key directly in the code
api_key = "sk-THIS_IS_A_VERY_LONG_AND_SECRET_KEY_12345"
genai.configure(api_key=api_key)

# ... rest of your code
If you save this file and share your project online (for example, on a site called GitHub, which we'll discuss later), your secret key is now public. Malicious bots constantly scan these sites for exposed keys. If someone finds your key, they can use the Gemini API on your behalf, potentially leading to a very large bill.
This video segment calls this a "rookie mistake" for a good reason—it's common but very dangerous.
What Are API Keys, And Why Are They So Important? | System Design Interview Basics
Let's revisit the 'What Are API Keys' video to hear a clear warning about the dangers of exposing your keys.
Watch from 02:11 to 03:08. The video explicitly warns against embedding keys in your code and explains the recommended alternative.
The Secure Solution: Environment Variables
So, if we can't put the key in our code, where does it go? The answer is environment variables.
An environment variable is a variable that is stored outside of your application's source code, as part of the operating system's environment. Your Python code can then read this variable from the environment when it runs.
This is the perfect solution: your code can access the key, but the key itself isn't written in any of your project files. For local development, the standard way to manage these variables is by using a special file called .env.
Let's walk through how to set this up for our project.
Step 1: Install the python-dotenv Library
We need a helper library to automatically load variables from our .env file into the environment. The most popular one is python-dotenv.
You'll install this using pip, Python's package manager. Open your terminal (the same command-line interface you use to run your Flask app) and run this command:
pip install python-dotenv
Step 2: Create a .env File
In the root directory of your project (the same folder that contains your app.py file and the templates folder), create a new file and name it .env. The name is important—it must start with a dot.
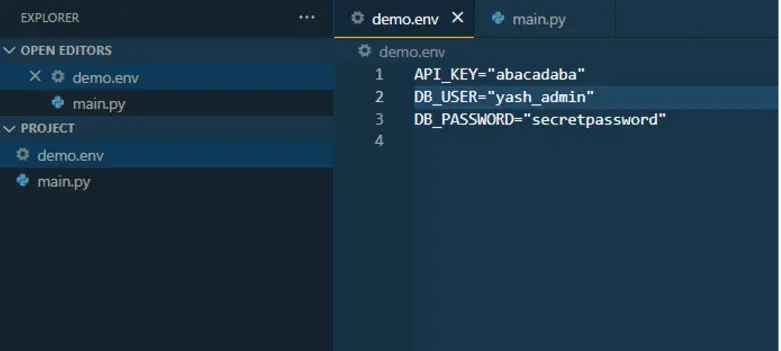
Inside this file, you will store your key. The format is VARIABLE_NAME="your-secret-value". For our project, let's name our variable GEMINI_API_KEY.
(Note: You don't have a real Gemini API key yet. We will get one in a future lesson. For now, we'll just use a placeholder.)
Your .env file should look like this:
GEMINI_API_KEY="placeholder-this-is-not-a-real-key-yet"
Step 3: Load the Key in Your Python Code
Now, we can modify our app.py to securely load and use this key. We'll use two Python libraries: os (which comes with Python) to access environment variables, and dotenv to load our .env file.
At the top of your app.py file, add these imports and the command to load the file:
# app.py

import os
from flask import Flask, render_template, request, jsonify
from dotenv import load_dotenv

load_dotenv() # This line loads the variables from .env

# Now you can access the key using os.getenv()
gemini_api_key = os.getenv("GEMINI_API_KEY")

# You can add a check to make sure it loaded
if not gemini_api_key:
    print("Warning: GEMINI_API_KEY is not set.")

# --- rest of your Flask app setup ---
app = Flask(__name__)

# ... your routes go here ...
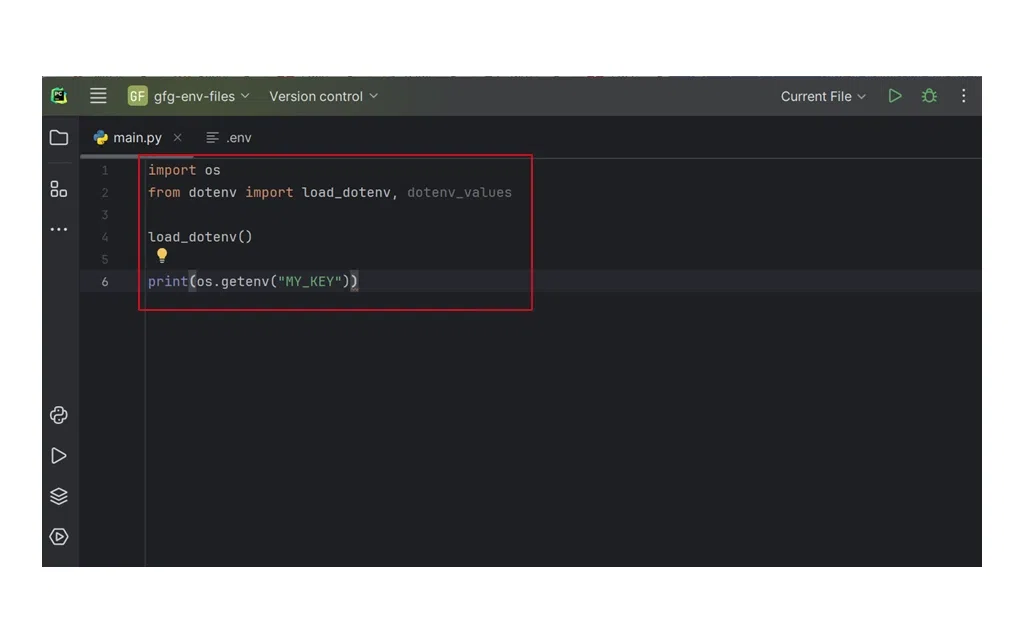
This video provides a complete, practical walkthrough of these exact steps, from installing the package to loading the variables in a script.
How to Use Python Environment Variables
To see this process in action, watch this tutorial 'How to Use Python Environment Variables'. It demonstrates every step we just discussed.
Watch from the beginning to 03:24. Follow along as the video shows how to create a .env file, install python-dotenv, and use os.getenv() to access the variables in a Python script.
The Most Important Step: Add .env to .gitignore
We've successfully separated our secret key from our code. But there's one final, critical step. We must tell our version control system (Git) to ignore the .env file. This ensures we never accidentally upload our secrets to an online repository like GitHub.
To do this, create another file in your project's root directory named .gitignore. Inside this file, add a new line with the name of the file you want to ignore:
# .gitignore file

.env
That's it! Git will now completely ignore the .env file. Your secrets are safe on your local machine, your code is clean and portable, and you're following one of the most important security best practices.
This article provides an excellent summary of the entire process, including the crucial .gitignore step.
Setting Up API Keys Securely | Env Setup
The guide 'Setting Up API Keys Securely' provides a concise, text-based walkthrough of everything we've covered, with a strong focus on Python.
Read the sections 'Using .env Files for Local Development' and 'The Most Important Step: .gitignore'. This will solidify your understanding of the full workflow.
Test your understanding!
You are about to share your project with a collaborator using Git and GitHub. To keep your GEMINI_API_KEY safe, you've correctly used a .env file and a .gitignore file.
Which of these two files will your collaborator see when they download the project from GitHub, and why?
Show answer
Your collaborator will see the .gitignore file, but they will not see the .env file.
This is because the .gitignore file tells Git to ignore the .env file, so the .env file is never uploaded to GitHub. The .gitignore file itself is part of the project and is shared, so that all collaborators use the same rules and also don't accidentally upload their own .env files. Your collaborator will need to create their own .env file with their own API key.
Conclusion
Great job! This lesson covered a concept that is absolutely fundamental to building modern applications. While it might seem like a lot of setup before we get to the "fun" part of using the AI, starting with strong security practices is what separates hobby projects from professional ones.
Key Takeaways:
- An API key is a secret credential that identifies your application to an API service.
- You must never write API keys or other secrets directly in your code (hardcoding).
- The secure standard is to use environment variables.
- For local development, manage environment variables using a
.envfile and thepython-dotenvlibrary. - The most critical step is to add your
.envfile to your.gitignorefile to prevent it from ever being committed to a public repository.
Now that we have a secure way to handle our credentials, we are ready to start interacting with the Gemini API. In the next lesson, we will install the Google AI Python library and write the code to establish our first connection to the Gemini service.