Hello! Welcome back to your course on affiliate marketing.
In the last lesson, you took a crucial step by installing the Google Analytics tracking code on your WordPress site using the Site Kit plugin. You've essentially placed a sensor on your website. Now, it's time to make sure that sensor is switched on and sending back the right signals.
This lesson is dedicated to a single, vital outcome: to verify that Google Analytics is collecting visitor data correctly.
This "trust, but verify" step is critical. Without it, you might spend weeks creating content, only to discover that your analytics were never working and you have no data to guide your decisions. We will cover two primary methods to get immediate confirmation that your setup is working as expected.
Why Verification is Non-Negotiable
Before we dive in, let's briefly touch upon why this is so important. Imagine you're trying to figure out which of your articles is most popular, but your tracking is broken. You'd be making decisions based on guesswork, not data.
How to check if Google Analytics 4 is working
The video "How to check if Google Analytics 4 is working" from Analytics Mania opens by perfectly explaining the problem you can avoid by performing this check.
Watch the first 45 seconds of this video (00:00 - 00:45). The presenter highlights the risk of finding your reports empty or filled with nonsense data after a week, which is exactly what we want to prevent.
By verifying your setup now, you gain the confidence that every piece of data you look at in the future is reliable.
Method 1: Using the Real-time Report
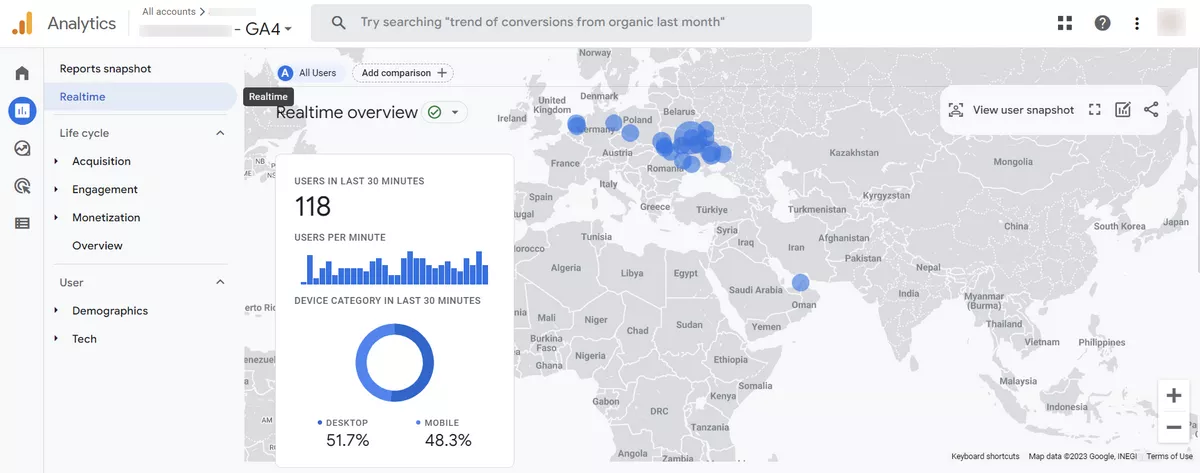
The quickest and easiest way to confirm your analytics are working is with the Real-time report. This report shows you activity on your website as it happens.
The process is simple: you'll visit your own website and then check if Google Analytics "sees" you.
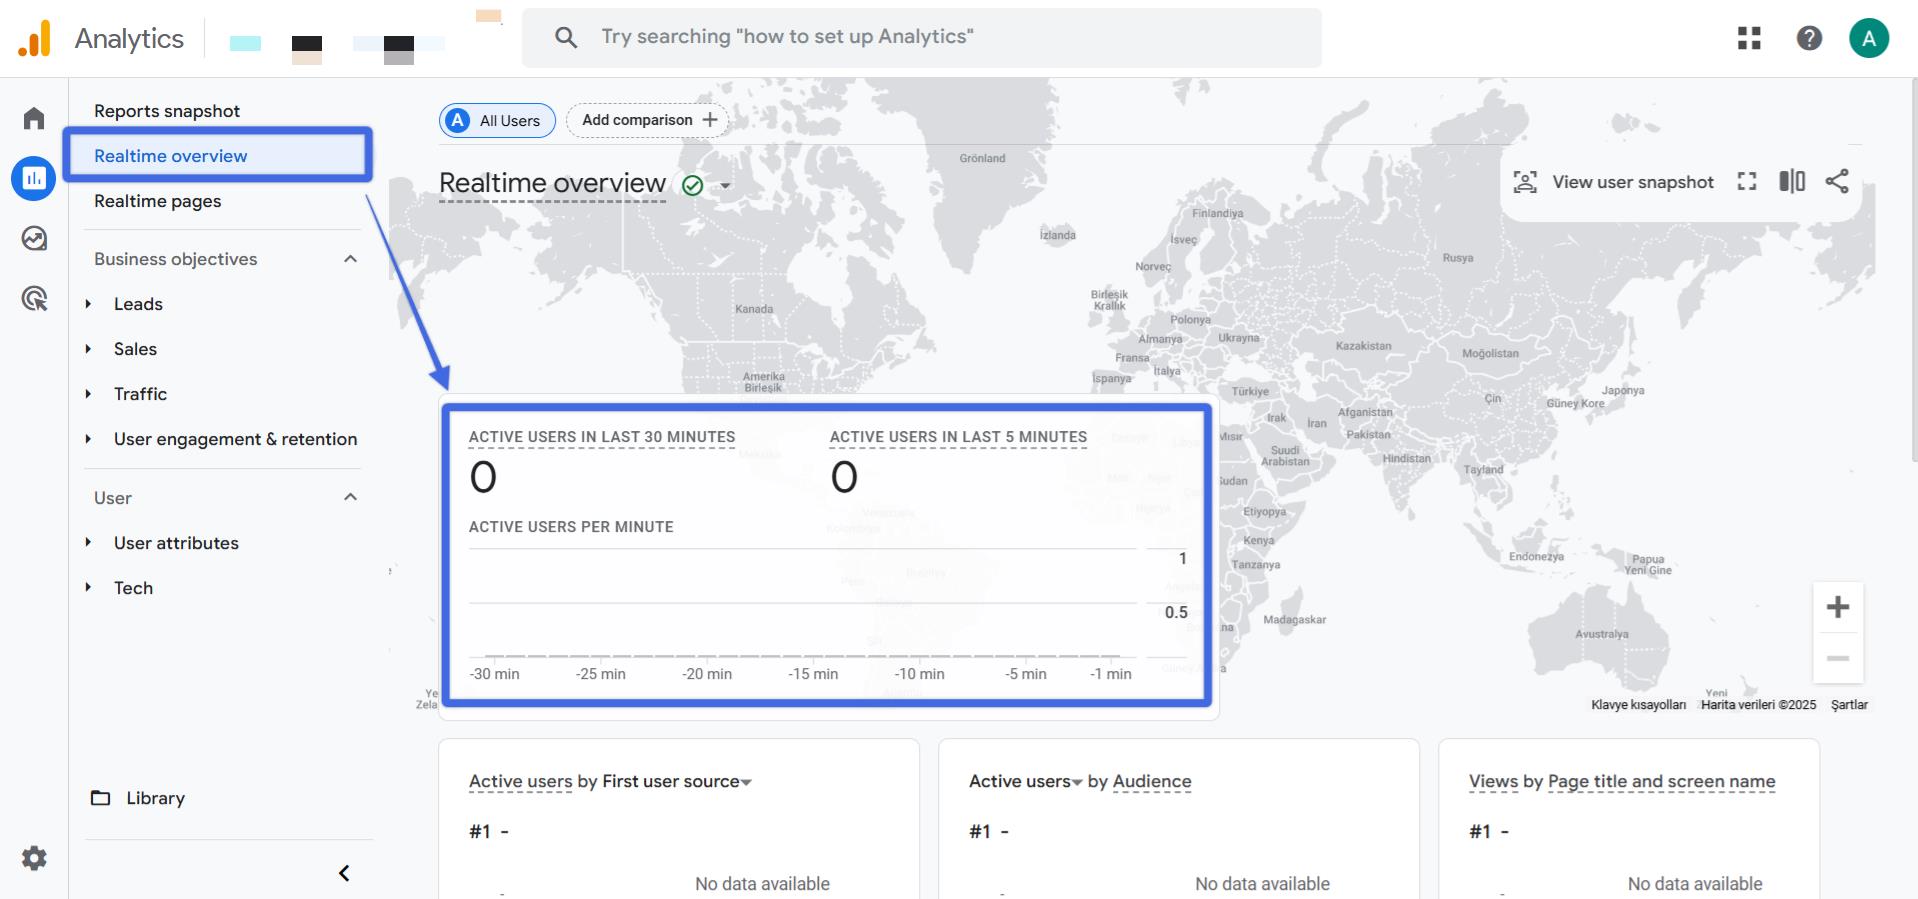
Now, let's walk through the process of triggering and seeing your own visit.
How to Install Google Analytics on WordPress | Google Analytics 4 Tutorial
The video "How to Install Google Analytics on WordPress" by Stewart Gauld includes a very clear and concise demonstration of exactly this process.
Watch the clip from 08:35 to 10:12. Follow these steps along with the video: In your Google Analytics account, navigate to Reports > Realtime. In a separate browser tab, open your own website and click on a few pages or links. Switch back to the Real-time report tab in Google Analytics. You should see the 'Users in last 30 minutes' counter change to '1' (or more). You may also see your geographical location appear on the map.
If you see your visit appear in the report, congratulations! Your Google Analytics tracking code is installed and collecting data correctly.
Method 2: Using the DebugView
While the Real-time report is perfect for a quick check, Google Analytics has a more powerful tool for detailed testing called DebugView. It provides a granular, event-by-event stream of data from your browser, making it invaluable for testing more complex tracking in the future (like tracking clicks on a specific affiliate link).
To use DebugView, you need to enable a "debug mode" for your browser session. The easiest way to do this is with a free Chrome extension from Google.
GA4 Data Accuracy: 7 Steps to Verify Collection
The article "GA4 Data Accuracy: 7 Steps to Verify Collection" provides a clear, written guide on how to install and use the necessary extension.
Read the sections titled '1. Set up GA4 Debugger Extension' and '2. Turn on Debug Mode in GA4'. Follow the instructions to install the 'GA Debugger' extension from the Chrome Web Store.
Once you have the extension installed, you can perform a more detailed test.
Your Action Step: Test with DebugView
- Navigate to your website.
- Click the GA Debugger extension icon in your Chrome toolbar so that the icon shows an "ON" label.
- In your Google Analytics account, navigate to Admin (the gear icon in the bottom-left), and then under the 'Data display' column, click on DebugView.
- Switch back to your website tab and refresh the page or navigate to another page.
- Return to the DebugView tab. You should see a timeline of events start to appear. Look for events like
page_view,session_start, andscroll. Clicking on an event will show you all the specific data parameters that were collected with it.
Seeing events in DebugView is definitive proof that your setup is working and communicating detailed information to Google Analytics.
Troubleshooting: What if You Don't See Any Data?
If you've tried the steps above and don't see your visit in either the Real-time report or DebugView, don't panic. This is a common situation for beginners, and the fix is usually simple.
Google Analytics 4 Tutorial for Beginners (2026)
The "Google Analytics 4 Tutorial for Beginners" from Analytics Mania has an excellent troubleshooting section that covers the most common reasons for data not appearing.
Read the section titled 'Troubleshooting the Initial GA4 Installation'. While it mentions Google Tag Manager (GTM), the core issues are relevant to any installation method.
Here is a summary of the most likely culprits for a beginner using the Site Kit plugin:
- Browser Extensions: Ad blockers or privacy-focused extensions are the #1 reason tracking fails. They often block Google Analytics scripts.
- Solution: Try again using an Incognito window in Chrome, which typically runs without extensions enabled.
- Website Caching: If you have a caching plugin, it might be serving an old version of your site before the tracking code was added.
- Solution: Go to your caching plugin's settings in WordPress and find the option to "Clear" or "Purge" the cache.
- Site Kit Connection: It's rare, but the connection might have failed.
- Solution: In your WordPress dashboard, go to the "Site Kit" menu. Ensure it says "Analytics is connected" and shows the correct Property ID.
- A Simple Delay: Sometimes even real-time data can have a minute or two of lag.
- Solution: Be patient. After visiting your site, give it a couple of minutes before checking the report again.
Finally, remember that only the Real-time and DebugView reports show data instantly. The standard reports in Google Analytics (like Audience, Acquisition, etc.) can take 24-48 hours to process and display new data. It is completely normal for those reports to be empty right now.
Conclusion
You have now successfully installed and verified your website's analytics. This is a massive step forward. You've built the foundation for a data-driven affiliate business, ensuring that you can measure your performance, understand your audience, and make smart decisions to grow your income.
Key takeaways from this lesson:
- Verifying your analytics setup is a crucial step to ensure data reliability.
- The Real-time report offers the quickest way to confirm that tracking is active.
- DebugView, used with the GA Debugger extension, provides a more granular view for detailed testing.
- If data doesn't appear, troubleshoot common issues like browser extensions and caching before assuming the setup is broken.
Preview of the next lesson:
Now that you're confident data is flowing into your account, what do you do with it? In the next lesson, we'll begin to answer that question. You will learn how to navigate the basic Google Analytics reports to find audience and traffic source data, turning raw numbers into actionable insights about who your visitors are and how they find you.