Hello! Welcome back.
In our last lesson, we established why building an email list is one of the most critical long-term strategies for a successful affiliate marketing business. We talked about owning your audience, building trust, and creating a sustainable asset that isn't dependent on unpredictable algorithms.
Now, we shift from the "why" to the "how." To manage an email list, you need a specialized tool called an Email Marketing Service (EMS). This lesson will guide you through the practical, hands-on process of getting started. Our goal is to set up an account with an email marketing service (we'll use MailerLite) and create your first subscriber list. By the end of this lesson, you will have the basic infrastructure in place to start collecting email addresses.
1. Signing Up for Your Email Marketing Service
An Email Marketing Service (EMS) is the command center for your email operations. It's software that helps you:
- Store and manage your subscriber list legally.
- Design and send emails to hundreds or thousands of people at once.
- Comply with anti-spam laws (like providing an unsubscribe link).
- Automate email sequences.
We will use MailerLite for this course. It's an excellent choice for beginners because its free plan is very generous (free for up to 1,000 subscribers) and its interface is clean and user-friendly.
Your first task is to create your free MailerLite account. The signup page looks like this:
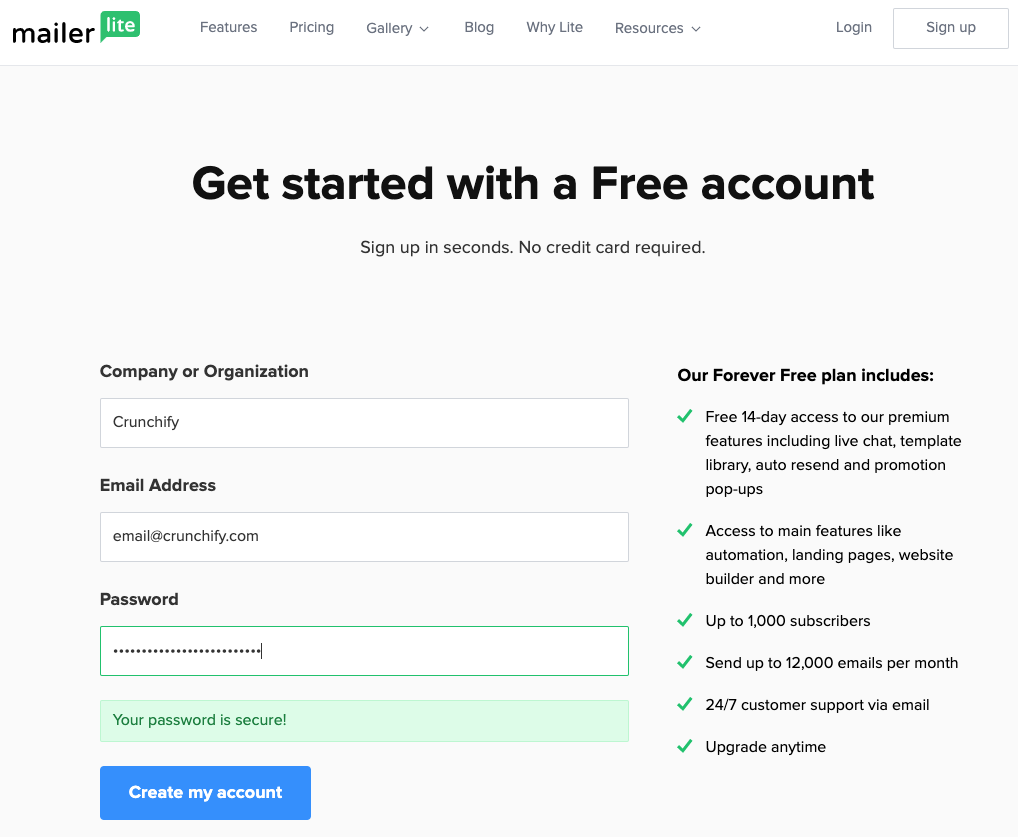
The following video provides a clear, step-by-step walkthrough of the entire signup and verification process. Please follow along and complete these steps to create your own account.
MailerLite Tutorial for Beginners 2026 - Step by Step Email Marketing Guide
This video, 'MailerLite Tutorial for Beginners' from Metics Media, will guide you through the initial account creation, email verification, and profile completion. It also explains the crucial account approval process.
Watch from the beginning until 04:26. Follow the presenter's instructions to sign up, verify your email, and complete your profile. Pay close attention to the information you need to provide for the account approval.
A Note on the Approval Process:
As you saw in the video, MailerLite manually approves new accounts to prevent spam. This is standard practice for reputable email services. To ensure your account is approved quickly, be as thorough and honest as possible when completing your profile.
- If you already have your website: Provide the URL. Make sure you have your legal pages (Privacy Policy, etc.) and an 'About' page set up, as we will cover in a later module. This shows MailerLite you are a legitimate business.
- If you don't have a website yet: That's perfectly fine. As the video suggests, you can select "Other" and clearly describe the business you intend to build. For example: "I am building an affiliate marketing blog in the [your niche] niche. I will be providing weekly tips and product reviews related to [niche topic]."
The approval process can take anywhere from an hour to a day. While you wait, you can continue with the next steps in this lesson.
2. Authenticating Your Domain (A Look Ahead)
The video you just watched continues by discussing the importance of using a professional email address (e.g., contact@yourdomain.com instead of yourname@gmail.com). This is a crucial step for two reasons:
- Professionalism: It builds trust with your audience.
- Deliverability: It significantly reduces the chance of your emails landing in the spam folder.
This process, called domain authentication, connects your website's domain name to MailerLite.
Since we haven't built your website yet (that's in Module 4), you don't need to complete this step right now. However, I want you to understand the concept.
MailerLite Tutorial for Beginners 2026 - Step by Step Email Marketing Guide
Watch this next segment from the same video to understand what domain authentication is and why it's important. You will come back and implement this after you've registered your domain name in Module 4.
Watch from 04:26 to 07:10. You don't need to follow the steps, just focus on understanding the difference between a free email address and a professional one, and why authenticating your domain is a best practice.
For now, MailerLite will send emails using your signup email address via their own servers. Once you have your domain, you'll return to your MailerLite Account Settings > Domains to complete this important step.
3. Creating Your First Subscriber List (Group)
Now that your account is set up, you need a container to hold your future subscribers. In MailerLite, these containers are called Groups.
Think of Groups as folders for your contacts. You can create different groups for different purposes. For example:
- A group for people who subscribed from your blog.
- A group for people who downloaded a specific checklist (we'll cover this soon).
- A group for customers who purchased a product through your link.
Organizing subscribers into groups allows you to send targeted, relevant emails, which is the key to effective email marketing. For now, we will create one general group to get started.
To create your first group:
- From your MailerLite dashboard, click on Subscribers in the left-hand navigation menu.
- At the top of the Subscribers page, click the Groups tab.
- Click the orange Create group button on the right.
- Give your group a name. Since you're just starting, something like "Newsletter Subscribers" or "General Interest" is a good choice.
- Click Create.
That's it! You now have your first group, ready to receive subscribers.
Groups vs. Segments
As you explore MailerLite, you'll also see the term Segments. It's useful to understand the difference early on.
- Groups are static: You manually add subscribers to a group (or they are added automatically when they fill out a specific form). A subscriber stays in that group unless you move them.
- Segments are dynamic: A segment is a list of subscribers created automatically based on rules you set. The list constantly updates. For example, you could create a segment of "Subscribers who opened my last email" or "Subscribers who live in Canada."
The following short clip provides a great explanation of this difference.
MailerLite Tutorial for Beginners 2026 - Step by Step Email Marketing Guide
To solidify your understanding, watch this final clip. The presenter clearly explains the strategic difference between using static Groups and dynamic Segments to organize your list.
Watch from 11:00 to 12:35. Focus on understanding how segments can be used to filter your subscribers based on their location or behavior.
For now, we will focus on using Groups as our primary way to organize the list. As your list grows, you'll find Segments to be a powerful tool for sending highly targeted campaigns.
Conclusion
Congratulations on taking a huge practical step forward! You've moved from theory to action by setting up the foundational tool for your email marketing efforts.
Key Takeaways:
- An Email Marketing Service (EMS) like MailerLite is essential for managing a subscriber list professionally and legally.
- The account approval process is a standard quality-control step; providing clear information about your planned business helps ensure a smooth approval.
- Domain authentication is a critical future step for professionalism and email deliverability that you will complete after setting up your website.
- In MailerLite, Groups are the primary way to organize your subscribers into different lists.
Preview of the next lesson:
Your MailerLite account is ready and you have a group waiting for subscribers. But how do you convince people to sign up? In the next lesson, we'll answer that question by learning how to outline and create a simple lead magnet—an irresistible freebie that people will gladly exchange their email address for.