Hello! Welcome to the next lesson in our FastAPI course.
In the previous module, we laid the groundwork for database interaction by setting up SQLAlchemy, defining our models and schemas, and creating endpoints to read data (list and retrieve). Now, we're ready to start modifying our data.
This lesson focuses on the "C" in CRUD: Create. You will learn how to build a POST endpoint that accepts JSON data from a client, validates it, and uses it to create a new record in your database. This is a fundamental operation for any web application, from creating a new user account to logging the results of an AI model's prediction.
The Anatomy of a "Create" Endpoint
Before we write the code, let's establish the key components of an endpoint designed for creating new resources.
-
HTTP Method: We use the
POSTmethod. Conventionally,POSTis used to create a new resource within a collection (e.g., create a new item in the/itemscollection). The server is responsible for generating the unique identifier (like a primary keyid) for the new resource. -
Request Body: The data for the new resource is sent in the request's body, typically as a JSON object. In FastAPI, we use a Pydantic model—what we've been calling a "create schema" (e.g.,
ItemCreate)—to define the expected structure and automatically validate this incoming data. -
Status Code: A successful creation should return an
HTTP 201 Createdstatus code. This is more specific than the default200 OKand clearly communicates that a new resource has been created as a result of the request. -
Response Body: It's a common and helpful practice to return the full representation of the newly created resource in the response body. This allows the client to immediately get the server-generated data, most importantly the new
id.
Implementing the Create Endpoint
Let's translate these concepts into code. We will continue building upon the application structure from the previous module, where we already have our database session dependency (get_db), SQLAlchemy models (e.g., models.Item), and Pydantic schemas (e.g., schemas.ItemCreate and schemas.Item).
The process of creating a new record involves four main steps inside our path operation function:
- Create an instance of your SQLAlchemy model using the data from the request body.
- Add that instance to the database session.
- Commit the transaction to save the record to the database.
- Refresh the instance to fetch the newly created data (like the auto-generated
id) from the database.
The following short video provides a clear, step-by-step demonstration of this entire process. While the video uses a synchronous session for simplicity, the core logic (add, commit, refresh) is identical. We will adapt it for our asynchronous setup.
How to Build a FastAPI SQLite REST API in Python | CRUD Operations | SQLAlchemy | in Just 14 Minutes
Please watch this section from the video by Tisfoulla Academy. It demonstrates exactly how to build a POST endpoint to create a new user, which is the same pattern we will follow.
Watch the segment from 06:09 to 08:41. Pay close attention to how the Pydantic model is used to receive data, how the SQLAlchemy model instance is created, and the sequence of db.add(), db.commit(), and db.refresh().
Now, let's write the code for our create_item endpoint, adapting the pattern from the video to our asynchronous setup.
Here is the complete path operation for creating a new item:
# In your main.py or relevant router file

from fastapi import Depends, HTTPException, status
from sqlalchemy.ext.asyncio import AsyncSession

import models
import schemas
from database import get_db


# ... (your existing app setup and read endpoints) ...

@app.post("/items/", response_model=schemas.Item, status_code=status.HTTP_201_CREATED)
async def create_item(item: schemas.ItemCreate, db: AsyncSession = Depends(get_db)):
    """
    Create a new item in the database.
    """


    # Create a SQLAlchemy model instance from the request body data
    db_item = models.Item(**item.dict())


    # Add the new ORM object to the session
    db.add(db_item)


    # Commit the transaction to the database
    await db.commit()


    # Refresh the object to get the new data from the database, like the ID
    await db.refresh(db_item)

    return db_item
Let's break down the key lines:
-
@app.post("/items/", response_model=schemas.Item, status_code=status.HTTP_201_CREATED):@app.post("/items/"): Registers this function to handlePOSTrequests to the/items/path.response_model=schemas.Item: Tells FastAPI to serialize the return value using ourItemschema, ensuring the response includes theid.status_code=status.HTTP_201_CREATED: Sets the default success status code to 201.
-
async def create_item(item: schemas.ItemCreate, db: AsyncSession = Depends(get_db)):item: schemas.ItemCreate: FastAPI validates the request body against this Pydantic model. The validated data is available in theitemvariable.db: AsyncSession = Depends(get_db): Our familiar dependency that provides an asynchronous database session.
-
db_item = models.Item(**item.dict()): This is an elegant way to create the SQLAlchemy model instance.item.dict()converts the Pydantic model to a dictionary, and the**operator unpacks it into keyword arguments that match the attributes of ourmodels.Itemclass. -
db.add(db_item): Stages the newdb_itemobject to be inserted into the database. -
await db.commit(): Persists all pending changes within the current transaction (in this case, our new item) to the database. Since our database driver is asynchronous, this is anawait-able operation. -
await db.refresh(db_item): This is a crucial step. After committing, thedb_itemobject in our code doesn't yet have theidthat the database just generated.db.refresh()updates the object with the data from the database, populating theidand any other server-side defaults.
Testing with the Interactive Docs
With the code in place, run your application with Uvicorn and navigate to /docs. You will see your new POST /items/ endpoint.
- Expand the endpoint. You'll see an "Example Value" for the request body, generated from your
schemas.ItemCreatemodel. - Click "Try it out".
- Modify the JSON in the "Request body" text area.
- Click "Execute".
You should receive a 201 Created response, and the response body will contain the JSON for your new item, complete with its database-generated id.
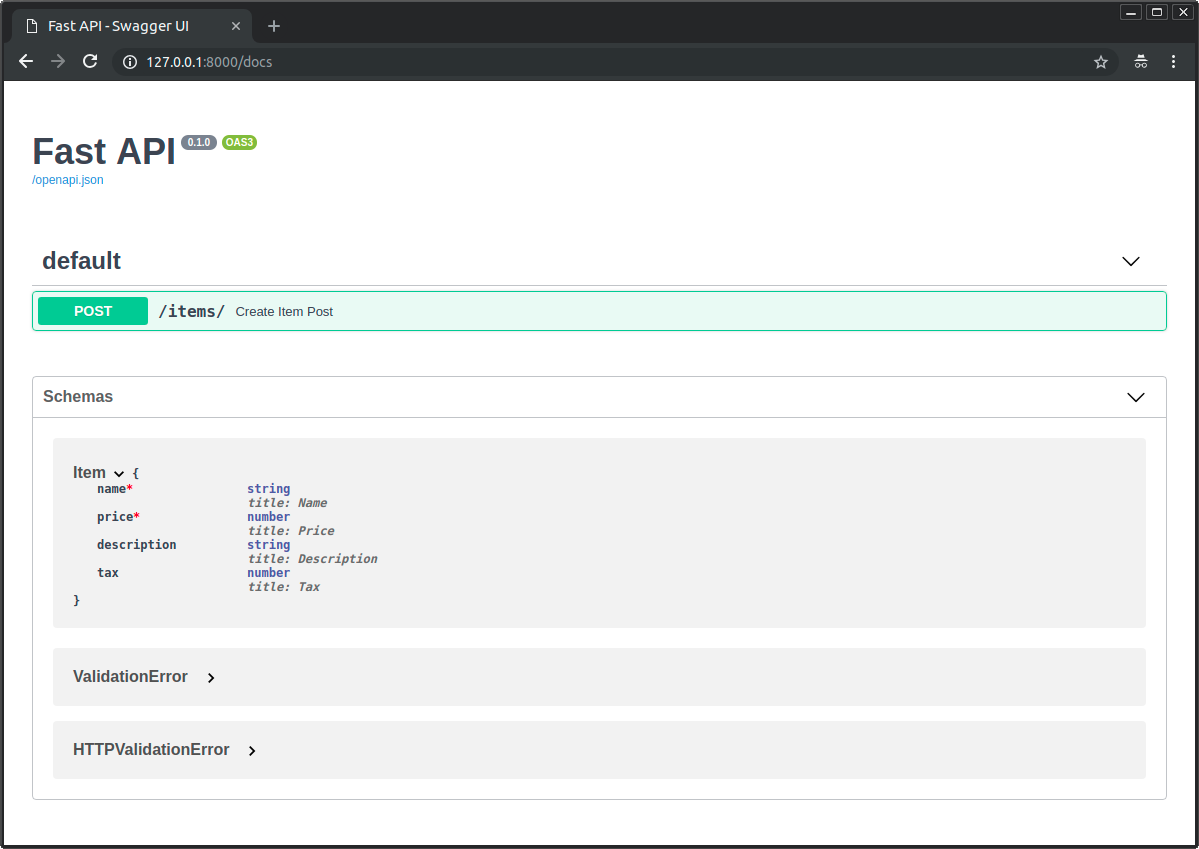
For a more detailed walkthrough of the implementation and refactoring process, including separating Pydantic schemas and using session.refresh(), the following article is an excellent read.
Building A Simple CRUD Application With FastAPI
The "Create" and "Declaring Response Models" sections of this GormAnalysis article provide a great text-based explanation of the concepts we've just implemented.
Please read the section titled Create (under CRUD Operations) and the subsection titled Declaring Response Models. The code uses a synchronous session, but focus on the logic: defining a Pydantic model for the request, creating a SQLAlchemy instance, and the explanation of why session.refresh() is needed to return the created object.
Conclusion
In this lesson, you have successfully implemented the create functionality for your API. You now have a POST endpoint that can receive, validate, and persist new data. This is a massive step forward, transforming your API from a read-only service to a dynamic application that can manage data.
Key Takeaways:
POSTrequests are used to create new resources.- The request body, validated by a Pydantic "create" schema, contains the data for the new resource.
- The
HTTP 201 Createdstatus code signals a successful creation. - The core database logic involves
db.add(),await db.commit(), andawait db.refresh(). await db.refresh()is essential for retrieving database-generated values like the primary keyidbefore returning the object to the client.
In the next lesson, we will complete our set of CRUD operations by implementing the update and delete functionalities, giving you full control over your data lifecycle through the API.