Hello! In our last lesson, we successfully set up a complete testing environment using pytest and created a TestClient fixture. With that solid foundation in place, we're ready to move from setup to execution.
This lesson focuses on the core of API testing: verifying that your endpoints behave exactly as you expect. We'll learn how to write unit tests that send requests to your API, then check—or assert—that the HTTP status codes and the data in the response body are correct. This is the most fundamental skill for ensuring your API is reliable and bug-free.
By the end of this lesson, you will be able to confidently write unit tests for your endpoints, asserting both status codes and response content.
1. The Anatomy of an API Test
Most API tests follow a simple, predictable pattern often called "Arrange-Act-Assert":
- Arrange: Prepare everything for the test. In our case, the
clientfixture we created in the last lesson handles most of this. For some tests, we might also prepare input data, like a JSON payload. - Act: Perform the action you want to test. This means using the
TestClientto make an HTTP request to one of your endpoints (e.g., aGETorPOSTrequest). - Assert: Check if the outcome was what you expected. This involves inspecting the
responseobject returned by the client and asserting that itsstatus_codeand JSON content are correct.
Let's see this pattern in action.
2. Writing Your First Tests: GET Endpoints
We'll start with the simplest case: testing a GET endpoint. Imagine you have a file app/main.py with the following basic FastAPI application:
# app/main.py
from fastapi import FastAPI

app = FastAPI()

@app.get("/")
def read_root():
    return {"message": "Hello World"}

@app.get("/items/{item_id}")
def read_item(item_id: int, q: str | None = None):
    return {"item_id": item_id, "q": q}
Now, in your tests/test_main.py file, you can write tests for these endpoints. The following reading provides a clear guide on how to structure these tests.
Using FastAPI TestClient for Unit Tests
The article 'Using FastAPI TestClient for Unit Tests' provides excellent, concise examples for testing basic endpoints. Focus on how it uses the TestClient to make requests and assert to check the results.
First, read the section under 'Setting Up the TestClient' (starting from # test_main.py) to see how to test the root / endpoint. Then, read the section 'Testing Path and Query Parameters' to understand how to test an endpoint like /items/{item_id}.
Based on the examples in the reading, your tests/test_main.py would look like this:
# tests/test_main.py
# The 'client' fixture is automatically provided by pytest from conftest.py

def test_read_root(client):


    # 2. Act
    response = client.get("/")


    # 3. Assert
    assert response.status_code == 200
    assert response.json() == {"message": "Hello World"}

def test_read_item(client):
    item_id = 42


    # 2. Act
    response = client.get(f"/items/{item_id}")


    # 3. Assert
    assert response.status_code == 200
    assert response.json() == {"item_id": 42, "q": None}

def test_read_item_with_query_param(client):
    item_id = 42
    query = "test_query"


    # 2. Act
    response = client.get(f"/items/{item_id}", params={"q": query})


    # 3. Assert
    assert response.status_code == 200
    assert response.json() == {"item_id": 42, "q": "test_query"}
Notice a few key details:
- Each test function accepts the
clientfixture as an argument. - Path parameters are included directly in the URL using an f-string:
f"/items/{item_id}". - Query parameters are passed as a dictionary to the
paramsargument. - We assert the
status_codeis200(OK) and thejson()content matches our expectation.
3. Testing Endpoints with Request Bodies (POST)
Testing endpoints that accept data, like a POST request, is just as straightforward. This is particularly relevant to your goal of serving ML models, where you'll be posting input features for prediction.
Let's add a POST endpoint to our app/main.py:
# app/main.py (additions)
from pydantic import BaseModel

class Item(BaseModel):
    name: str
    price: float

@app.post("/items/")
def create_item(item: Item):
    return {"item_name": item.name, "item_price": item.price}
To test this, we'll use client.post() and pass our payload using the json argument.
The following video gives a great, fast-paced overview of testing GET, POST, and other methods. Pay close attention to how the POST request is constructed.
Python Unit Testing | FastAPI with Pytest Tutorial (fast & easy)
This clip from 'Python Unit Testing | FastAPI with Pytest Tutorial' by Eric Roby demonstrates testing a full suite of CRUD endpoints. Focus on the patterns for each HTTP method.
Watch from 04:07 to 06:44. This segment covers testing a GET endpoint and then a POST endpoint. Notice how the POST test includes a json payload and asserts the response content.
4. Testing for Expected Errors: Input Validation
A crucial part of building a robust API is ensuring it handles invalid input gracefully. FastAPI and Pydantic automatically handle validation, returning a 422 Unprocessable Entity status code when the request body doesn't match the Pydantic model. We must test for this behavior.
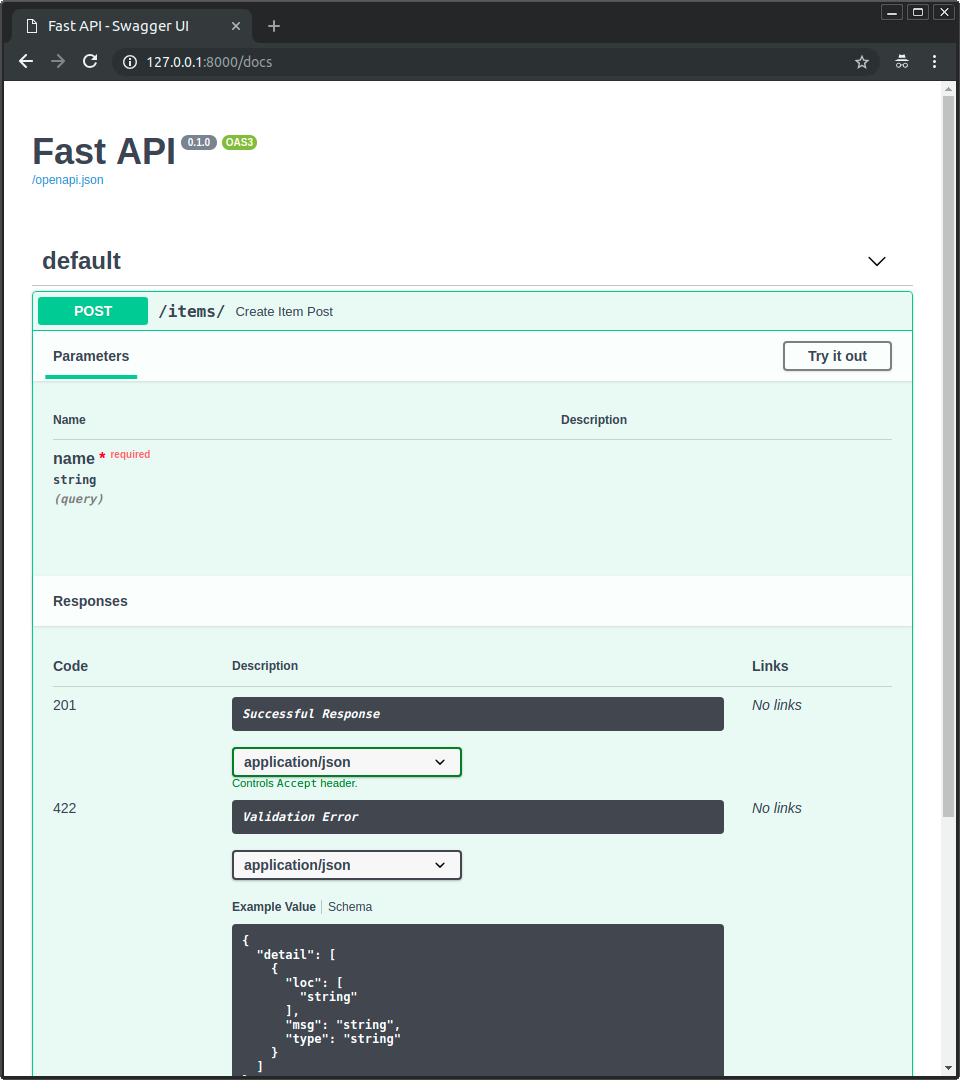
Let's write two tests for our create_item endpoint: one for a successful creation (the "happy path") and one for a validation error.
# tests/test_main.py (continued)

def test_create_item_success(client):


    # 1. Arrange
    item_data = {"name": "Test Item", "price": 9.99}


    # 2. Act
    response = client.post("/items/", json=item_data)


    # 3. Assert
    assert response.status_code == 200
    assert response.json() == {"item_name": "Test Item", "item_price": 9.99}

def test_create_item_invalid_payload(client):


    # 1. Arrange - missing the 'price' field
    invalid_data = {"name": "Incomplete Item"}


    # 2. Act
    response = client.post("/items/", json=invalid_data)


    # 3. Assert
    assert response.status_code == 422
The second test confirms that our API correctly rejects malformed data, preventing it from ever reaching our business logic. As you can see, testing for errors is as simple as testing for success—you just change the expected status_code.
The codesignal.com resource provides further excellent examples of this, particularly how to use pytest.mark.parametrize to test multiple error conditions with a single test function.
Testing FastAPI Applications with pytest
This article from CodeSignal Learn, 'Testing FastAPI Applications with pytest', has a great section on verifying error handling.
Read the section 'Testing Error Handling Scenarios'. It demonstrates a powerful technique for testing multiple invalid inputs (missing field, wrong data type, invalid value) and asserting the 422 status code for each.
5. Practical Exercise
Now it's time to put it all together. Let's assume you have the following complete app/main.py:
# app/main.py
from fastapi import FastAPI, HTTPException
from pydantic import BaseModel
from typing import Dict

app = FastAPI()


# A simple in-memory database
db: Dict[int, str] = {}
next_id = 0

class Message(BaseModel):
    content: str

@app.get("/")
def read_root():
    return {"status": "online"}

@app.post("/messages/", status_code=201)
def create_message(message: Message):
    global next_id
    db[next_id] = message.content
    created_message = {"id": next_id, "content": message.content}
    next_id += 1
    return created_message

@app.get("/messages/{message_id}")
def read_message(message_id: int):
    if message_id not in db:
        raise HTTPException(status_code=404, detail="Message not found")
    return {"id": message_id, "content": db[message_id]}
Your task is to create a tests/test_main.py file and write tests for the following scenarios:
- Test the root
GET /endpoint. It should return a200status code and a JSON body{"status": "online"}. - Test the
POST /messages/endpoint with a valid payload. It should return a201status code and the created message object. - Test the
POST /messages/endpoint with an invalid payload (e.g., an empty JSON{}). It should return a422status code. - Test the
GET /messages/{message_id}endpoint for a message that exists. It should return200and the correct message. (Hint: you'll need to create a message first within the same test function). - Test the
GET /messages/{message_id}for a message that does not exist. It should return a404status code.
Take a few minutes to write these tests. Once you're done, you can compare your work against the solution below.
Click to see the solution
# tests/test_main.py

def test_read_root(client):
    response = client.get("/")
    assert response.status_code == 200
    assert response.json() == {"status": "online"}

def test_create_message_success(client):
    response = client.post("/messages/", json={"content": "hello test"})
    assert response.status_code == 201
    data = response.json()
    assert data["content"] == "hello test"
    assert "id" in data

def test_create_message_invalid_payload(client):
    response = client.post("/messages/", json={}) # Missing 'content'
    assert response.status_code == 422

def test_read_existing_message(client):


    # First, create a message to ensure it exists
    create_response = client.post("/messages/", json={"content": "find me"})
    assert create_response.status_code == 201
    message_id = create_response.json()["id"]


    # Now, try to read it
    read_response = client.get(f"/messages/{message_id}")
    assert read_response.status_code == 200
    assert read_response.json() == {"id": message_id, "content": "find me"}

def test_read_nonexistent_message(client):


    # Try to read a message ID that is unlikely to exist
    response = client.get("/messages/99999")
    assert response.status_code == 404
Conclusion
Congratulations! You've just learned the fundamental workflow for writing automated tests for a FastAPI application. This practice is the bedrock of building reliable, maintainable, and professional-grade APIs.
Key Takeaways:
- API tests follow a simple Act-Assert pattern: make a request, then check the response.
- The
TestClientprovides methods that mirror HTTP verbs:client.get(),client.post(), etc. - Path parameters go in the URL string, while query parameters are passed via the
paramsdictionary. - Request bodies are sent using the
jsonargument in methods likeclient.post(). - You must test for both success cases ("happy paths") and expected error cases (like
422validation errors or404not found errors).
In our next lesson, we will tackle a more advanced and powerful testing concept: overriding dependencies during testing to mock external services like databases. This will allow us to test our application logic in complete isolation, making our tests faster and even more reliable.