Hello! In our previous lesson, we explored the crucial difference between synchronous and asynchronous route handlers, a key factor in building high-performance APIs. Now that we know how to write efficient endpoints, our next step is to ensure they are correct, reliable, and robust.
Welcome to the world of automated testing! In software development, especially for backend services that power applications, having a solid test suite is not a luxury—it's a necessity. It allows you to make changes with confidence, catch bugs before they reach users, and document how your API is supposed to behave.
This lesson addresses the learning outcome: Set up a testing environment with pytest and FastAPI's TestClient. We will lay the groundwork for writing tests by configuring the necessary tools and establishing a clean, standard project structure.
1. The Essential Tools for Testing
To test a FastAPI application, we need two main components:
- A Test Runner (
pytest): This is a framework that discovers and runs our tests.pytestis the de-facto standard in the Python community due to its simplicity, powerful features (like fixtures, which we'll see shortly), and extensive plugin ecosystem. - A Test Client (
TestClient): This is a utility provided by FastAPI that allows you to send HTTP requests directly to your application in your Python code, without needing to run a live server. It acts like a programmable browser or Postman client, letting you simulate user interactions and inspect the responses.TestClientis built on top of thehttpxlibrary, so we'll need that as well.
Let's start by installing these tools. Open your terminal in your project's virtual environment and run:
pip install pytest "httpx>=0.23.0,<0.26.0"
(Note: We pin httpx to a compatible version range as TestClient depends on it.)
2. A Standard Project Structure for Tests
A well-organized project makes testing much more manageable. The standard convention is to place all test code in a dedicated tests directory at the root of your project.
Here's a typical structure:
my_fastapi_project/
├── app/
│   ├── __init__.py
│   └── main.py
└── tests/
    ├── __init__.py
    └── test_main.py
app/main.py: Contains your FastAPI application code.tests/: A directory that holds all your test files.tests/__init__.py: An empty file that tells Python to treat thetestsdirectory as a package. This helps with imports.tests/test_main.py: A file where you'll write tests for yourmain.pyapplication.
pytest automatically discovers test files that are named test_*.py or *_test.py, and within those files, it runs functions that are named test_*().
The following video provides a great walkthrough of setting up this structure and introduces a key concept: the conftest.py file.
Testing A FastAPI App With Pytest
Watch this segment from the video 'Testing A FastAPI App With Pytest' by Ssali Jonathan to see how to organize your project for testing.
Watch from 04:27 to 05:54. Focus on how the tests folder is created and why the conftest.py file is introduced. We will explore conftest.py in the next section.
3. Using Fixtures and conftest.py for a Clean Setup
In testing, you often need to perform setup and teardown actions for your tests, like creating a test client or setting up a database connection. A Pytest fixture is a function that provides a fixed baseline for your tests to run on. You can think of it as a reusable setup utility.
As the video mentioned, fixtures that are used across multiple test files are best placed in a file named conftest.py within your tests directory. pytest automatically finds this file and makes the fixtures defined within it available to all your tests without needing to import them.
Creating a TestClient Fixture
Let's create our most important fixture: one that provides a TestClient instance for our tests. This avoids the need to create a new client in every single test function.
The next segment of the video explains this process perfectly.
Testing A FastAPI App With Pytest
This part of the video demonstrates how to create a reusable TestClient fixture in conftest.py. It's a foundational pattern for testing FastAPI applications.
Watch from 05:38 to 10:27. The key takeaways are: What a pytest fixture is and how it's defined with the @pytest.fixture decorator. How to import the TestClient and your app instance into conftest.py. How the fixture yields a client that can be used in test functions.
Handling Asynchronous Code
Since our FastAPI application uses async and await, we need to tell pytest how to handle asynchronous test functions. We do this by adding a special fixture to our conftest.py file.
Getting started with FastAPI tests - Teclado
The article 'Getting started with FastAPI tests' from Teclado explains this requirement clearly. Please read the following short sections.
Read the sections 'What is a Pytest fixture?' and 'Running async tests with Pytest'. This will clarify the role of fixtures and introduce the anyio_backend fixture, which is essential for our setup.
4. Assembling Your conftest.py
Now, let's put everything together. Based on what we've learned, your tests/conftest.py file should look like this. This file will serve as the complete setup for our testing environment.
Assume your FastAPI app instance is in app/main.py and is named app.
# tests/conftest.py

import pytest
from typing import Generator

from fastapi.testclient import TestClient
from app.main import app  # Import your app instance


@pytest.fixture(scope="session")
def anyio_backend():
    """
    Fixture to specify the async backend for pytest.
    'session' scope means this runs once per test session.
    """
    return "asyncio"


@pytest.fixture()
def client() -> Generator:
    """
    Pytest fixture to create a TestClient instance for making requests to the app.
    The 'yield' makes it a generator, allowing setup/teardown code if needed.
    """
    with TestClient(app) as test_client:
        yield test_client
With this conftest.py in place, any test function in your tests directory can now accept client as an argument, and pytest will automatically provide it with a ready-to-use TestClient instance.
5. Running Your (Empty) Test Suite
Even though we haven't written any actual tests yet, we can run pytest to verify that our environment is set up correctly.
In your terminal, from the root directory of your project, simply run:
pytest
If everything is configured properly, you should see output indicating that pytest ran but found no tests to execute. It might look something like this:
========================= test session starts ==========================
platform linux -- Python 3.10.12, pytest-8.1.1, pluggy-1.4.0
rootdir: /path/to/my_fastapi_project
collected 0 items

======================== no tests ran in 0.01s =========================
If you see a "no tests ran" message without any errors, congratulations! Your testing environment is ready. If you were to add a test file like tests/test_main.py with a function like def test_read_main(client): pass, pytest would collect and pass this empty test.
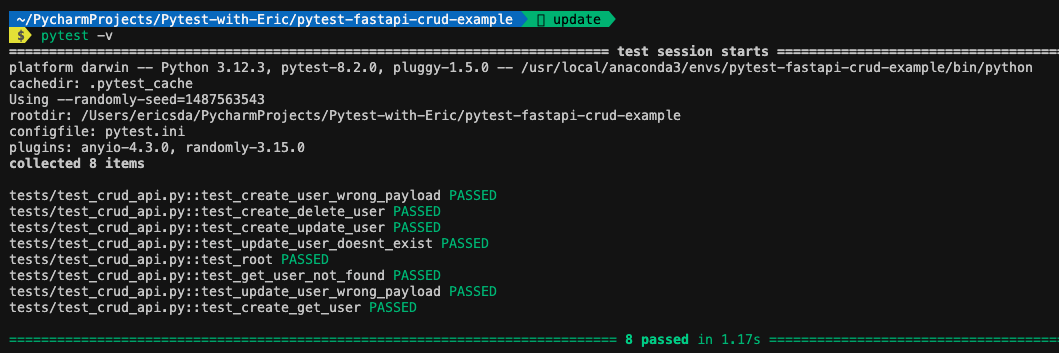
Here is an example of what a successful test run with actual tests looks like:
Conclusion
In this lesson, we successfully established a professional testing environment for our FastAPI application. We didn't write any logic yet, but this setup is the crucial foundation upon which all our future tests will be built.
Key Takeaways:
- Automated testing is essential for creating reliable APIs.
- The primary tools for testing FastAPI are
pytestfor running tests andTestClientfor making requests to the application. - A standard project structure involves a
testsdirectory alongside your main application code. - Pytest fixtures are reusable functions for test setup, and they are best defined in a
conftest.pyfile to be shared across tests. - The
anyio_backendfixture is necessary inconftest.pyto enablepytestto run asynchronous tests correctly.
In our next lesson, we will build directly on this foundation. We will write our first unit tests for our endpoints, asserting status codes and response content to verify that our API behaves as expected.