Hello and welcome to your first lesson! I'm excited to guide you on your journey to mastering Notion.
This course is designed to take you from the fundamentals to building and selling your own professional templates. We'll start with the absolute basics and progressively build towards the complex project management and content creation systems you're interested in.
Today, we'll focus on the very first step: getting oriented. The goal of this lesson is to help you navigate the Notion interface with confidence, including the sidebar, the main workspace, and the powerful search function. Think of this as learning the layout of your new workshop—before you can build anything, you need to know where your tools and materials are.
1. Understanding the Notion Workspace: Your Digital Canvas
At its core, the Notion interface is beautifully simple and can be broken down into two main areas:
- The Sidebar: This is your primary navigation tool. It lives on the left side of your screen and holds all your pages, settings, and search functions.
- The Editor: This is the large, open area to the right of the sidebar. It's a blank canvas where you'll create, write, and organize all of your content.

This simple division is the foundation for everything you'll do in Notion.
To get a formal introduction to these concepts, please read the first part of the following article from Notion's Help Center.
Intro to workspaces – Notion Help Center
This brief reading from the official Notion Help Center will solidify your understanding of the sidebar and editor.
Please read the section titled 'Workspace basics' to understand the fundamental split between the sidebar and the editor.
2. The Sidebar: Your Navigation Command Center
The sidebar is your map and table of contents for your entire Notion workspace. As you start building your project and content management systems, it will become essential for keeping everything organized.
To get a comprehensive tour of the sidebar's features, let's watch a video directly from the Notion team. It provides a clear, visual walkthrough of all the key components.
This official Notion video, 'Navigating the sidebar', provides an excellent tour of the sidebar's functions, from organizing pages to accessing settings.
Please watch the video from the beginning up to the 04:48 mark. Focus on how pages are organized into different sections (like Private and Shared) and the purpose of the tools like Search, Updates, and Trash.
Let's break down the key functions you just saw in the video.
Key Sidebar Components:
-
Hiding and Resizing: For focused work, you can hide the sidebar by clicking the
<<icon or using the shortcutCtrl+\(orCmd+\on Mac). You can also click and drag its edge to resize it. -
Top Control Panel:
- Workspace Switcher: The menu with your name/workspace name at the top. This lets you switch between different Notion workspaces if you have more than one (e.g., one for personal use, one for a client).
- Search: Your workspace's GPS. We'll look at this more closely in a moment.
- Updates (or Inbox): This is your notification center. You'll see updates when colleagues mention you, assign you tasks, or make edits to pages you follow.
-
Page Organization Sections: This is how Notion separates pages based on who can see them.
Favorites: A place to pin your most frequently used pages for quick access. You can favorite any page by clicking the ⭐ icon at the top right of the page.Private: This section is for your eyes only. Any page you create here is not visible to anyone else, making it perfect for personal notes, drafts, or tasks.Shared: This section appears when you share a private page with specific people. It's for content that isn't meant for your whole team but isn't strictly private.Teamspaces: (On paid plans) These are dedicated areas for specific teams (e.g., Marketing, Engineering). All members of a teamspace can see its pages.
-
Bottom Tools:
New Page: Creates a new page.Settings & Members: Where you can customize your Notion account, notifications, and manage workspace members.Trash: Deleted pages go here and can be restored if needed.
Test your understanding!
You're drafting a new content idea for a blog post that you're not ready to share with anyone yet. Where in the sidebar should this new page live?
Show answer
The page should live in the Private section. This ensures that only you can see it while it's a work in progress. When you're ready to get feedback, you could then share it with a colleague (which would move it to the Shared section) or move it to a teamspace.
3. The Search Function: Finding Anything, Instantly
As your template systems grow, you might have hundreds of pages for projects, tasks, and content pieces. Scrolling through the sidebar to find something becomes inefficient. This is where Notion's search comes in.
The quickest way to open search is with the keyboard shortcut: Ctrl + P (or Cmd + P on Mac).
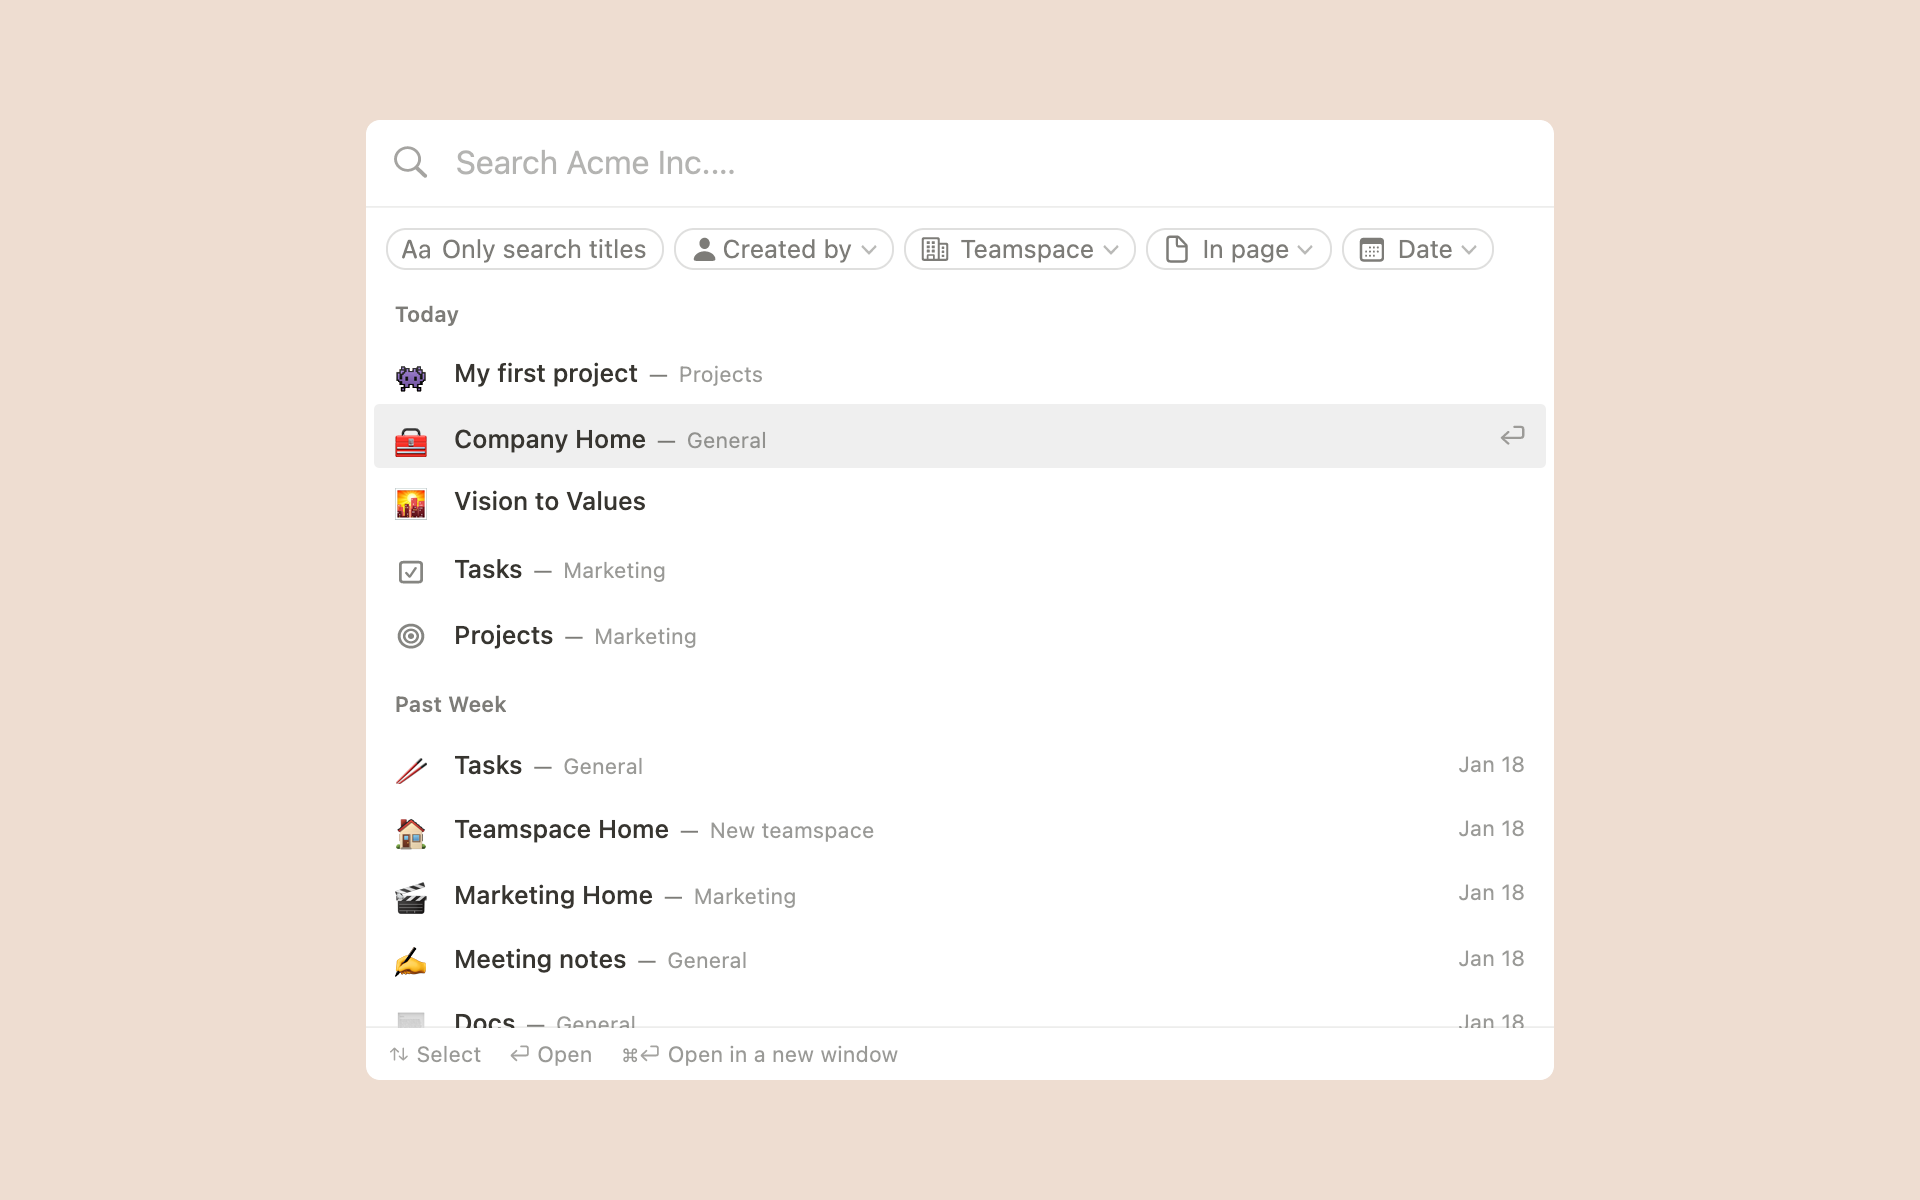
Let's see a quick demonstration of this in action.
In this short clip from his 'Notion Tutorial for Beginners', Kevin Stratvert quickly demonstrates how to pull up the search bar and find a specific page.
Watch from 25:08 to 25:37 to see the search function in use. Pay attention to the keyboard shortcut mentioned.
The search tool is incredibly powerful. You can not only find pages by their title but also search for text inside your pages. Learning to rely on the search shortcut will dramatically speed up your workflow, which is essential when designing and testing complex templates.
✍️ Your First Steps in Notion
Now it's time to get hands-on and practice navigating your own workspace. Open Notion and complete the following tasks.
- Use the
<<button to hide the sidebar, then bring it back by clicking the☰menu icon. - Practice hiding and showing the sidebar with the keyboard shortcut
Ctrl+\(orCmd+\). - Click the
New Pagebutton at the bottom of the sidebar to create a new page. Name it "Test Page 1". - Notice that "Test Page 1" appears in your
Privatesection. - Click the ⭐ icon at the top right of "Test Page 1" to add it to your
Favorites. - Open the search window using the keyboard shortcut (
Ctrl+PorCmd+P). - Type "Test Page 1" to find the page you just created.
- Hover over the page in your sidebar, click the
•••icon, and selectDeleteto move it to the Trash.
Lesson Summary and Next Steps
Great work on completing your first lesson! You've taken the essential first step in your Notion journey.
Key Takeaways:
- The Notion interface consists of two main parts: the sidebar for navigation and the editor for content.
- The sidebar organizes your pages into sections based on permissions:
Private,Shared, andTeamspaces. - The
Favoritessection gives you one-click access to your most important pages. - The Search function (
Ctrl/Cmd + P) is the fastest and most efficient way to find anything in your workspace.
Now that you're comfortable with the layout of Notion, you're ready to start creating. In our next lesson, "Create, organize, and customize pages using nesting, icons, and covers," we will shift our focus to the editor and begin bringing your first pages to life with content and style.