Hello! Welcome to the final lesson of our "Automation Fundamentals" module.
In our last session, you learned the theoretical foundation of no-code automation: how workflows are built visually using nodes (the steps) and connections (the pathways for data and logic).
Today, we move from theory to practice. The goal of this lesson is to get you set up and comfortable inside a real automation tool. By the end of this hour, you will have created a free account in a leading no-code platform and learned how to navigate its main interface. This is the last, crucial step before we start building your very first automated workflow in the next module.
Choosing Your Automation Tool
There are many great no-code tools available, but for this course, we'll focus on two of the most popular and powerful options that offer excellent free plans: Make.com and n8n.
- Make.com: Known for its highly visual and intuitive interface. Many beginners find it easy to get started with. Workflows in Make are called "Scenarios."
- n8n: A very powerful and flexible tool with a strong community. It's built to be easily extendable. Workflows in n8n are called "Workflows."
Both are fantastic choices. For our main walkthrough today, we will use Make.com as the primary example because it provides a very gentle introduction. However, I will also provide parallel instructions for n8n in a collapsible section at the end if you'd prefer to start there. Feel free to choose the one that appeals to you most.
Part 1: Setting Up Your Make.com Account
Let's begin by creating your free Make.com account. The process is straightforward. The video below will walk you through the signup process.
Make.com Tutorial for Beginners 2026 (Full Guide)
Watch this short clip from the 'Make.com Tutorial for Beginners' by Metics Media. It will guide you through the sign-up page and the initial questions you'll be asked.
Watch from 01:14 to 02:13. Follow the steps shown to create your own account. You can use your Google account or a standard email and password.
Once you complete the sign-up process, you will land on your main Dashboard. Congratulations, you're in!
Part 2: Navigating the Make.com Interface
Now that you have your account, let's take a tour of the main areas you'll be using. Getting familiar with this now will make building workflows much easier later.
The video below gives an excellent, clear overview of the most important parts of the interface.
Learn 80% of Make.com In 22 Minutes
This video, 'Learn 80% of Make.com In 22 Minutes' by Rick Mulready, provides a concise tour of the dashboard and the main navigation menu. We'll watch a key segment that covers everything you need to know for now.
Watch from 01:32 to 05:02. The presenter will walk you through the main sections accessible from the left-hand menu. Pay close attention to these three key areas: Scenarios: This is where all your automations live. It's the most important tab. Templates: A library of pre-built scenarios you can use for inspiration or as a starting point. Connections: Where you manage your logins to other apps (like Google Sheets, Gmail, etc.).
To summarize, here are the key areas you just saw:
- Organization/Dashboard: Your main homepage. It gives you a high-level view of your account usage and recent activity.
- Scenarios: This is your library of automations. As you build more workflows, they will all be listed here.
- Connections: To allow Make to access your data in other apps (like reading your Google Calendar or sending an email), you first need to authorize it. This section securely stores those authorizations.
- The Scenario Canvas: This is the visual editor where you will build your automations using the nodes and connections we discussed in the last lesson. To get to the canvas, you click the "Create a new scenario" button, as shown in the video.
A First Look at Troubleshooting and Seeking Help
One of your primary goals is to learn how to solve problems when they arise. Professional automation tools have built-in features to help with this. Even though we haven't built anything yet, it's valuable to know where these features are.
The video below explains three critical concepts for troubleshooting in Make:
- Testing a workflow.
- Reading the Execution Log to see what happened.
- Using the built-in AI Assistant to get help with errors.
Learn 80% of Make.com In 22 Minutes
Continuing with the same video from Rick Mulready, let's look at the features designed to help you test and debug your scenarios.
Watch from 13:18 to 17:38. Focus on understanding these concepts: Run Once: How to test the entire scenario. Run this module only: How to test a single step (node). Log: The history of every time your scenario ran, which is crucial for finding errors. AI Beta: The help button that can explain error messages.
This is incredibly important. When an automation fails, your first step will always be to check the execution history or log to see which node failed and why. We will come back to this again and again throughout the course.
Explore on your own! (Optional activity)
Now that you're in your Make.com account, take 5-10 minutes to click around.
- Click the Scenarios tab.
- Click the Create a new scenario button in the top right.
- On the canvas, click the big plus sign. A list of apps will appear. Scroll through it or search for an app you use every day, like "Google Sheets" or "Gmail". Don't set anything up yet—just get a feel for the options available.
- Go back to the main dashboard and click the Templates tab. Find a template that looks interesting and click on it to see how it's built. This is a great way to see what's possible.
Alternative Path: Getting Started with n8n
If you'd prefer to use n8n, here are the equivalent steps to get you set up.
1. Set Up Your n8n Cloud Account
For beginners, the easiest way to start with n8n is using their cloud service, which has a free plan.
The Complete Beginner's Guide to n8n: Your First Workflow
This article, 'The Complete Beginner's Guide to n8n', explains the difference between using n8n's cloud service and hosting it yourself. We will use the cloud option.
Read the section titled 'n8n Cloud vs. Self-Hosted: Choosing Your Starting Environment'. This will confirm why the n8n Cloud option is the right choice for getting started quickly. Then, go to the n8n website to sign up for a free cloud account.
The sign-up form will look something like this:

2. Navigating the n8n Interface
Once your account is ready, you'll land on the main dashboard. The following resource explains the key areas you'll interact with.
The Complete Beginner's Guide to n8n: Your First Workflow
This next section of the same article provides a perfect overview of the n8n interface.
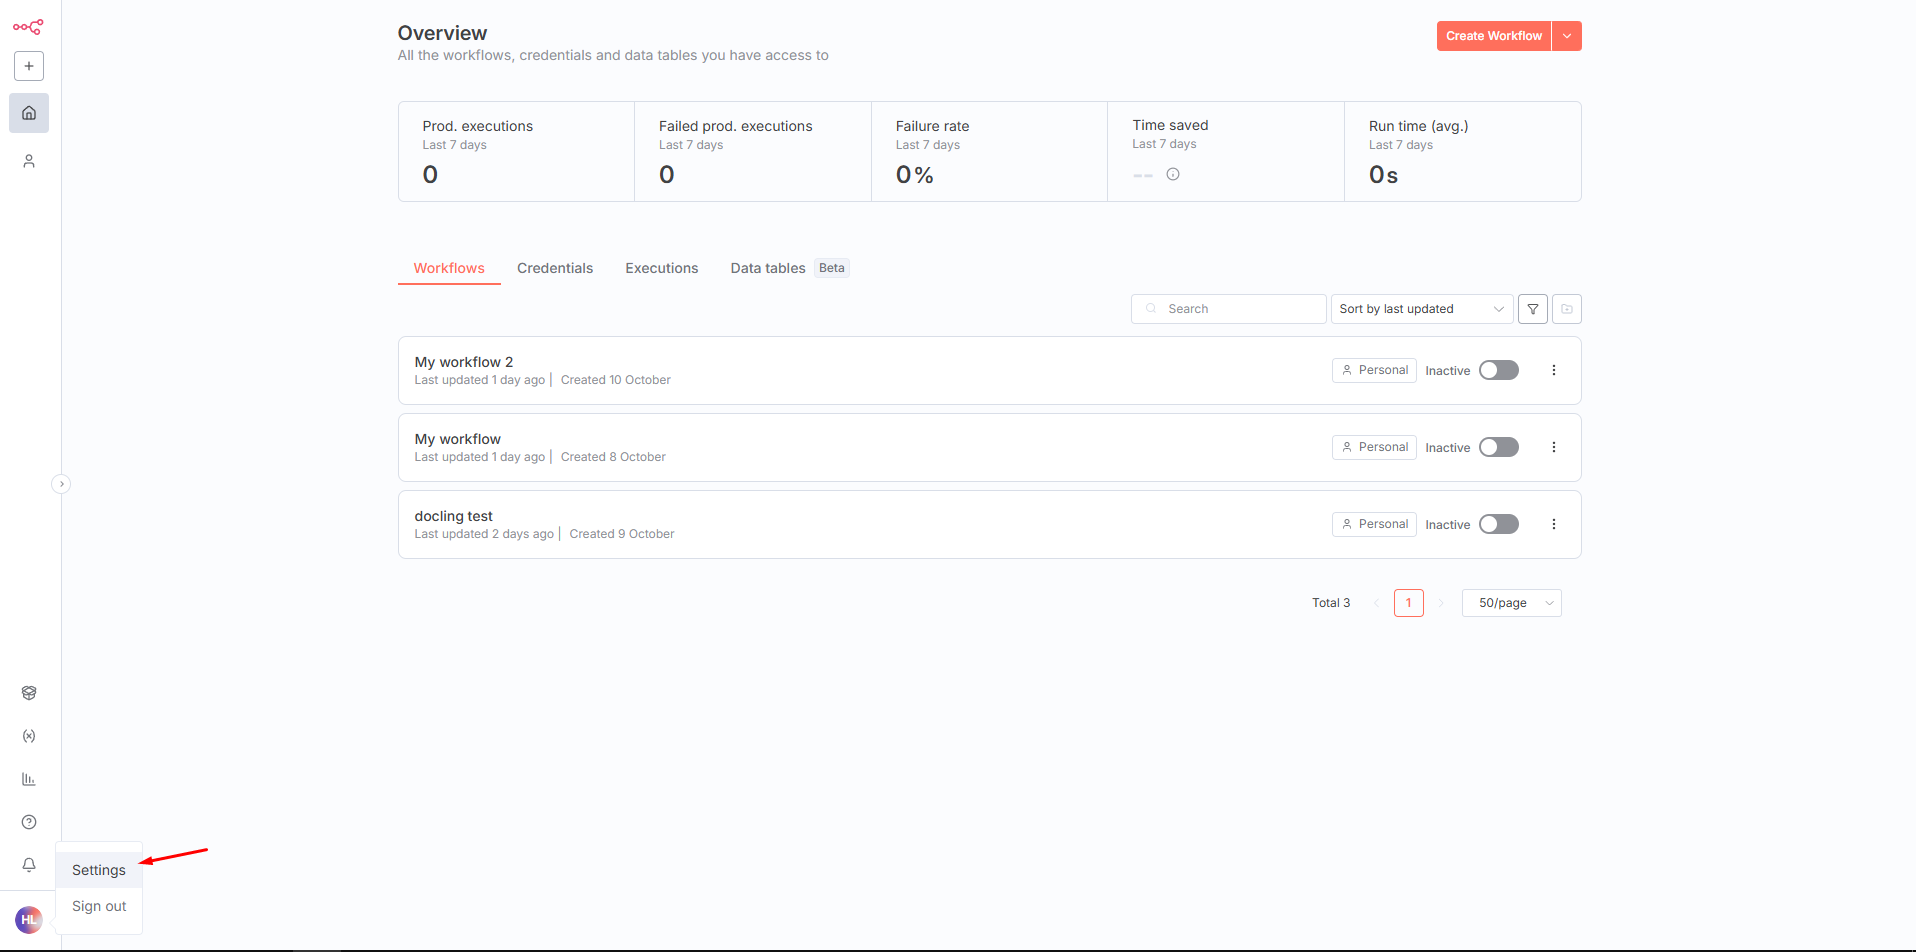
Read the section 'Understanding the n8n Interface: Dashboard, Workflows, and Credentials'. Focus on what each of these three areas is used for.
Here is what your dashboard will look like. It's your "mission control" for all your automations.
3. Finding Help in n8n
Just like Make, n8n has features designed to help you succeed. The article you've been reading has excellent tips on where to look when you get stuck.
The Complete Beginner's Guide to n8n: Your First Workflow
Finally, let's look at where to find help. This is a core part of your learning journey.
Read the sections 'Essential Tips for New Users and Troubleshooting Common Errors' and 'Next Steps: Exploring the n8n Community'. Pay close attention to the advice about the execution log and the n8n community forums—these will be your best friends when you need help.
Conclusion
Fantastic work! You have successfully bridged the gap from theory to practice. This lesson was all about getting your environment ready for the hands-on work to come.
Key Takeaways:
- You have successfully created a free account on a powerful no-code automation platform (Make.com or n8n).
- You can now identify and navigate the main areas of the user interface: the Dashboard, the list of Workflows/Scenarios, the Connections/Credentials area, and the visual Canvas.
- You know where to find the Execution Log and other help features, which is the first step in learning how to troubleshoot your work.
You are now officially ready to build. In our next lesson, we will kick off a new module, "Building Your First Workflow," where you will create a new workflow from scratch and configure your very first trigger.