Hello! Welcome back to our course on Vue.js.
In our last lesson, you successfully refactored our to-do application from a single, large component into a more organized parent-child structure (App.vue and TodoItem.vue). You got a first look at the "props down, events up" pattern by passing the todo object from the parent to the child.
Today, we're going to dive deep into the first half of that pattern: props. While you've already used them, props have a lot more to offer for building robust, reusable, and easy-to-understand components. This aligns perfectly with your goal of not just learning the syntax, but understanding the "why" behind professional development practices.
By the end of this lesson, you will have a solid command of props, including:
- Passing different types of data (static and dynamic).
- Using prop validation to make your components more reliable.
- Understanding the crucial principle of one-way data flow.
Let's get started.
Part 1: The Fundamentals of Passing Props
Props are custom attributes you can register on a component. When a value is passed to a prop attribute, it becomes a property on that component instance.
In the last lesson, you did this to pass a todo object:
Parent (App.vue):
<TodoItem ... :todo="todo" />
Child (TodoItem.vue):
const props = defineProps({
  todo: {
    type: Object,
    required: true
  }
});
Let's explore the different ways we can pass data.
Static vs. Dynamic Props
You can pass data as a static string, which is useful for values that don't change. Notice there's no v-bind or : prefix.
<MyComponent greeting-message="hello world" />
More commonly, you'll pass data dynamically using the v-bind directive, which has a colon (:) shorthand. This allows you to pass variables, objects, or the results of JavaScript expressions from your parent component's state.
<!-- Bind to a variable from your <script> -->
<TodoItem :todo="todo" />

<!-- Bind to a number -->
<BlogPost :likes="42" />

<!-- Bind to a boolean -->
<Modal :is-visible="isModalOpen" />

<!-- Even complex expressions work -->
<UserCard :full-name="user.firstName + ' ' + user.lastName" />
Prop Name Casing
A very important convention in Vue is the casing for prop names.
- In JavaScript (inside
<script setup>), we declare props usingcamelCase. - In the HTML template, we pass props using
kebab-case.
Vue automatically converts kebab-case attributes to their camelCase equivalent in your component's script.
Example:
Child Component (GreetingCard.vue):
// Prop defined in camelCase
defineProps({
  greetingMessage: String
});
Parent Component (App.vue):
<!-- Prop passed in kebab-case -->
<GreetingCard greeting-message="Welcome to Vue!" />
This convention keeps your JavaScript consistent with JS standards and your HTML templates consistent with HTML attribute standards.
To see these concepts in action, let's watch a short video that walks through the basics of defining and passing props.
Learn Vue Props In 10 Minutes // Vue.js Tutorial on Props for Components // Pass Data Via Props
The video 'Learn Vue Props In 10 Minutes' by Program With Erik provides a great practical demonstration of passing both static and dynamic props. It clearly shows how to send data from a parent and receive it in a child.
Watch from the beginning until 05:47. Pay close attention to how he first passes a static string and then uses v-bind (and its : shorthand) to pass dynamic data from the parent's state.
Part 2: Prop Validation: Building Bulletproof Components
When you create a component that might be used by others (or by your future self), you want to ensure it's used correctly. Prop validation is how you do that. It allows you to specify requirements for the props a component receives. If the requirements aren't met, Vue will show a warning in the browser console, which is incredibly helpful for debugging.
Instead of defining props as an array of strings like defineProps(['title', 'author']), you provide an object where you can specify the type, whether it's required, and even a default value.
You've already seen a simple version of this in our TodoItem:
defineProps({
  todo: {
    type: Object,
    required: true
  }
});
Let's expand on the options available.
type: Can be a native constructor likeString,Number,Boolean,Array,Object,Function, orDate. You can also allow multiple types with an array, e.g.,type: [String, Number].required: A boolean (trueorfalse) indicating if the prop is mandatory.default: A fallback value if the prop is not provided. ForObjectorArraytypes, this must be a factory function that returns the default value, to prevent the same object reference from being shared across multiple component instances.
Here is a more comprehensive example:
defineProps({
  // A required string
  title: {
    type: String,
    required: true
  },
  // A number with a default value
  likes: {
    type: Number,
    default: 0
  },
  // An array with a default value (using a factory function)
  tags: {
    type: Array,
    default: () => ['news', 'tech']
  },
  // A prop that can be one of two types
  authorId: [String, Number]
});
The official Vue documentation is the best place to see all the validation possibilities.
Props | Vue.js - Prop Validation
Please read the official Vue.js documentation on Prop Validation. This is the definitive guide and will serve as an excellent reference throughout your career.
Read the section titled 'Prop Validation'. Pay special attention to the example code block that shows how to define type, required, and default. Note the special syntax for default values on Objects and Arrays.
The video you watched earlier also has a good summary of these validation features. Feel free to re-watch the second half (from 05:47 to 10:37) if you prefer a video explanation.
Part 3: The Golden Rule: One-Way Data Flow
This is one of the most important concepts for managing state in a Vue application. Props are one-way-down.
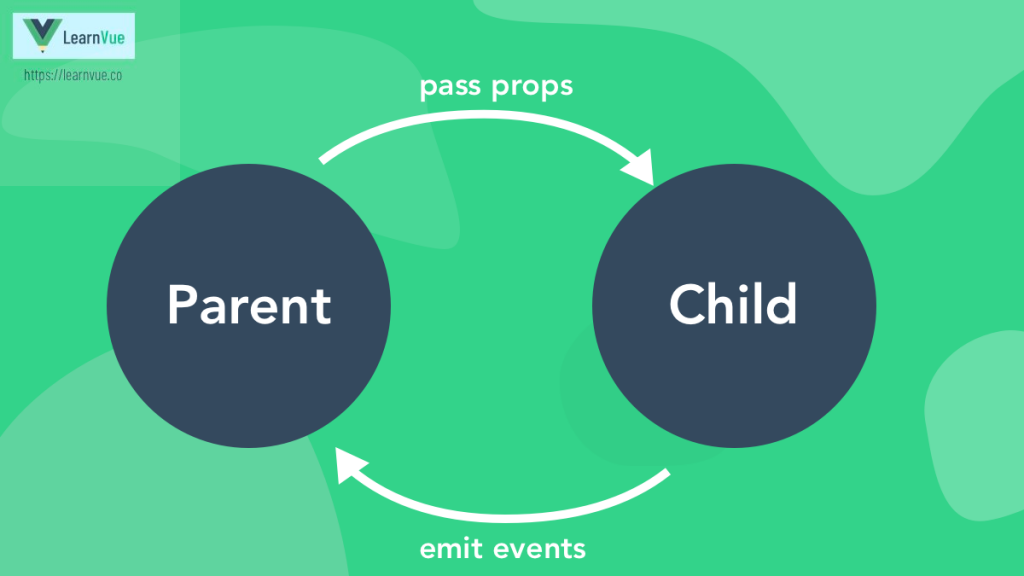
This means:
- A parent component can pass data down to a child through props.
- When the parent's data changes, Vue automatically updates the prop in the child.
- The child component should never attempt to directly mutate (change) a prop.
Why is this so important?
It prevents child components from accidentally changing the parent's state. This makes your app's data flow much easier to understand and debug. If any component could change any other component's data, it would quickly become a tangled mess, and you'd have no idea where a change originated from.
So, what should you do if a child component needs to use the prop's value but also needs to modify it?
-
If you need a local data property that starts with the prop's value: Define a local
refand initialize it with the prop. This disconnects it from the prop.import { ref } from 'vue'; const props = defineProps(['initialCounter']); // 'counter' is now local state, initialized with the prop's value. const counter = ref(props.initialCounter); -
If you need a transformed version of the prop: Use a
computedproperty. It will automatically update whenever the prop changes.import { computed } from 'vue'; const props = defineProps(['username']); // This computed property will always reflect the latest prop value. const normalizedUsername = computed(() => props.username.trim().toLowerCase()); -
If you need to tell the parent to make a change: This is where the other half of our pattern comes in: emitting an event. The child sends a message up to the parent, requesting a change. We'll cover this in detail in the next lesson.
Props | Vue.js - One-Way Data Flow
The Vue documentation explains this concept perfectly. Understanding it is key to writing clean Vue code.
Please read the section 'One-Way Data Flow'. Focus on understanding why you shouldn't mutate a prop and the two common scenarios provided for handling it correctly.
Part 4: Mini-Project Enhancement
Let's apply what we've learned to our to-do app. We'll pass a priority level to each TodoItem and display it.
-
Modify Parent Data (
App.vue):
In yourtodosarray, add apriorityproperty to a few of the to-do objects. You can use values like'high','medium', or'low'. Make sure at least onetododoes not have a priority property, so we can test our default value.// src/App.vue const todos = ref([ { id: 1, text: 'Learn Vue', done: true, priority: 'high' }, { id: 2, text: 'Build a project', done: false, priority: 'medium' }, { id: 3, text: 'Refactor code', done: false } // No priority here ]); -
Define New Prop in Child (
TodoItem.vue):
Update yourdefinePropscall inTodoItem.vueto accept a newpriorityprop. Make it aStringwith adefaultvalue of'low'.// src/components/TodoItem.vue const props = defineProps({ todo: { type: Object, required: true }, priority: { // <-- Add this new prop type: String, default: 'low' } }); -
Pass the Prop in Parent (
App.vue):
In your template, pass thepriorityfrom thetodoobject down to the component. Remember thekebab-caseconvention!<!-- src/App.vue --> <TodoItem v-for="todo in todos" :key="todo.id" :todo="todo" :priority="todo.priority" /* <-- Add this line */ @delete-todo="deleteTodo" /> -
Display the Prop in Child (
TodoItem.vue):
Finally, display the priority in theTodoItem.vuetemplate. You can add a<span>for it. Because we useddefineProps, thepriorityis available directly in the template.<!-- src/components/TodoItem.vue --> <template> <li :class="{ 'completed': props.todo.done }"> <input type="checkbox" v-model="props.todo.done" /> <span>{{ props.todo.text }}</span> <span class="priority">(Priority: {{ priority }})</span> <!-- Add this --> <button class="delete-btn" @click="emit('delete-todo', props.todo.id)">Delete</button> </li> </template>
Now run your app. You should see the priority displayed for each item, and the item that didn't have a priority set in App.vue should correctly show the default value of "low".
Conclusion
Excellent work today. You've gone from a basic understanding of props to a professional-level command of how they work. This is fundamental to building scalable and maintainable applications in Vue.
Key Takeaways:
- Prop Casing: Define in
camelCase, use inkebab-case. - Dynamic Data: Use the
:shorthand to bind props to your component's reactive data. - Validation is Your Friend: Always define
type,required, anddefaultvalues for your props to make your components robust and predictable. - One-Way Data Flow: Props flow down. Never mutate them in a child. Instead, use local state, computed properties, or emit an event.
You are now fully equipped to pass data into your components. In the next lesson, we will complete the communication loop by mastering the other half of the pattern: communicating from a child component to a parent component by emitting custom events.