Hello! Welcome to the mini-project for our module on Vue Components.
In our previous lessons, we've covered the essential tools for building complex applications with Vue:
- Props: For passing data down from parent to child.
- Events: For communicating up from child to parent.
- Slots: For creating flexible and reusable layout components.
We also discussed the architectural challenge of "prop drilling" and why it's a sign that a more robust state management solution might be needed. Today, we'll put all this theory into practice.
This lesson is fully hands-on, aligning with your preference for learning by building. Our goal is to refactor the single-file to-do app we built earlier into a clean, multi-component architecture. This is a critical skill for creating applications that are easy to maintain, scale, and reason about.
By the end of this project, you will have a to-do app that is broken down into logical, reusable components that communicate using the standard props-down, events-up pattern.
Part 1: Planning the New Architecture
Before writing any code, it's a best practice to plan your component structure. Let's look at our current to-do app's UI and identify the distinct, logical pieces.
Our app has:
- An input form to add new tasks.
- A list that displays the existing tasks.
- Each individual task in that list, with a checkbox, text, and a delete button.
This structure naturally suggests breaking the app into the following components:
App.vue: The root component. It will own the application's state (the array of tasks) and the logic for manipulating that state. It will act as the orchestrator.TodoForm.vue: A "presentational" component responsible only for displaying the form. When the user submits the form, it will simply tell the parent component, "Hey, a new task was added with this text!"TodoList.vue: Another presentational component. Its job is to receive a list of tasks and render them.TodoItem.vue: The most granular component. It will receive a single task object and be responsible for displaying it. It will also tell its parent when the user wants to toggle its completion status or delete it.
This separation of concerns is a core principle of good software design. Each component has a single, clear responsibility.
Part 2: Hands-On Refactoring
Let's start refactoring. I'll guide you step-by-step. The process we'll follow is very common in real-world development.
Step 1: Create the Component Files
First, in your project's src/components directory, create the following three new files. For now, you can just give them a basic template and script block.
TodoForm.vueTodoList.vueTodoItem.vue
Step 2: The Parent (App.vue) as the Source of Truth
Our App.vue component will hold the state and the methods to change that state. All the other components will be "dumb" and simply receive data (props) and emit events.
Your App.vue <script setup> block should contain:
- The
tasksreactive array (ref([])). - The
addTaskfunction. - The
deleteTaskfunction. - The
toggleCompletefunction.
Its <template> will be simplified to just render the TodoForm and TodoList components. It will look something like this:
<template>
  <h1>My To-Do List</h1>

  <TodoForm @add-task="addTask" />

  <TodoList
    :tasks="tasks"
    @delete-task="deleteTask"
    @toggle-complete="toggleComplete"
  />
</template>
Notice how App.vue is now like a switchboard: it passes the tasks data down to TodoList via a prop and listens for events from both TodoForm and TodoList to trigger its methods.
Step 3: TodoForm.vue - Emitting Events Up
Now, let's build the TodoForm.vue component.
- Move the HTML: Cut the
<form>element from your originalApp.vueand paste it into the<template>ofTodoForm.vue. - Move the Logic:
- Create a
reffor the new task input (e.g.,const newTask = ref('')). - Create a function that runs on form submission.
- Create a
- Emit the Event: Instead of adding the task to an array, this function will now use
defineEmitsto send an event to the parent.
// In TodoForm.vue

import { ref } from 'vue'

const newTask = ref('')
const emit = defineEmits(['addTask'])

const handleSubmit = () => {
  if (newTask.value.trim() !== '') {
    emit('addTask', newTask.value) // Send the new task text to the parent
    newTask.value = '' // Clear the input
  }
}
The parent (App.vue) will listen for this @addTask event and call its own addTask method with the payload. This is a classic example of child-to-parent communication.
The following video demonstrates this exact pattern of refactoring a form into its own component and using emit to communicate with the parent.
Modern Vue.js Crash Course | with TypeScript + script setup + Composition API
To see this in action, watch this segment from the 'Modern Vue.js Crash Course' by Syntax. It shows how to move a form into a TaskForm component and emit a custom addTask event.
Watch from 00:10:28 to 00:14:01. Focus on how defineEmits is used in the child and how the @add-task listener is set up in the parent.
Step 4: TodoList.vue & TodoItem.vue - Passing Props Down
Next, we'll handle displaying the list. This involves passing data two levels deep: App.vue -> TodoList.vue -> TodoItem.vue.
A. TodoList.vue
- Define Props: In
TodoList.vue, usedefinePropsto declare that it expects atasksprop, which will be an array. - Move the
v-for: Move the<ul>and thev-forloop fromApp.vueinto the<template>ofTodoList.vue. - Render
TodoItem: Inside the loop, you will now render the<TodoItem />component instead of the<li>content directly. Pass the individualtaskobject from the loop down to eachTodoItemas a prop.
Your TodoList.vue template will look like this:
<!-- TodoList.vue -->
<template>
  <ul>
    <TodoItem
      v-for="task in props.tasks"
      :key="task.id"
      :task="task"
      @delete-task="emit('deleteTask', $event)"
      @toggle-complete="emit('toggleComplete', $event)"
    />
  </ul>
</template>
Notice we are also defining emits here. TodoList acts as a middle-man, listening for events from TodoItem and passing them straight up to App.vue.
B. TodoItem.vue
- Define Props: In
TodoItem.vue, usedefinePropsto accept the singletaskobject. - Define Emits: Use
defineEmitsto declare that this component can emitdeleteTaskandtoggleCompleteevents. - Move the
<li>Content: Move the content of the list item (the checkbox, the task text, the delete button) into the<template>ofTodoItem.vue. - Wire up Events:
- When the delete button is clicked, emit the
deleteTaskevent withprops.task.idas the payload. - When the checkbox value changes, emit the
toggleCompleteevent withprops.task.idas the payload.
- When the delete button is clicked, emit the
This is a classic example of parent-to-child communication.
The following video sections are excellent guides for this process of passing data down through props and handling events from list items.
Modern Vue.js Crash Course | with TypeScript + script setup + Composition API
These sections from the same 'Modern Vue.js Crash Course' demonstrate passing an array as a prop and then emitting events from the child items to modify the parent's state.
Watch from 00:20:22 to 00:22:26 for passing props to a list component. Then watch from 00:24:40 to 00:26:48 and 00:29:57 to 00:32:15 to see how to emit toggle and remove events from the list items.
For a different perspective that reinforces these same concepts, you can also review the "Creating a to-do list..." article.
Creating a to-do list with the Vue 3 Composition API
This article from Jump24 builds a to-do list from scratch using the same component architecture. It's a great textual reference for defineProps and defineEmits in this context.
Skim through the code snippets in the article. Notice how ToDoListItem (our TodoItem) defines props and emits, and how ToDoList uses v-for to render the items and handles their events.
Part 3: Reviewing the Final Data Flow
Once you have completed the refactoring, your application will have the exact same functionality, but its internal structure will be vastly improved.
Let's review the data flow:
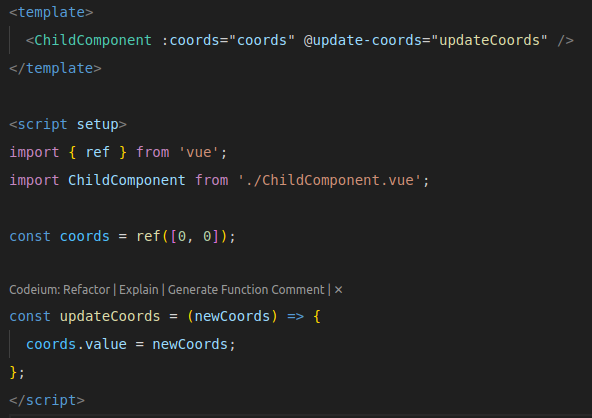
Our Data Flow:
- State: The single source of truth, the
tasksarray, lives inApp.vue. - Props Down:
App.vuepasses the fulltasksarray toTodoList.vue.TodoList.vueloops overtasksand passes each individualtaskobject to aTodoItem.vue.
- Events Up:
TodoForm.vueemitsaddTaskdirectly toApp.vue.TodoItem.vueemitsdeleteTaskortoggleCompletetoTodoList.vue.TodoList.vuedoesn't handle these events itself; it just passes them up again toApp.vue, which contains the actual logic to modify the state.
This "event bubbling" through TodoList.vue is a small example of the prop/event drilling we discussed. For this small app, it's perfectly fine. But you can imagine if the nesting was 5 levels deep, it would become tedious.
Conclusion
Congratulations! You have successfully refactored an application into a clean, reusable, and maintainable component architecture. This is a fundamental skill that separates simple scripts from professional-grade applications.
Key Takeaways:
- Component Planning: Breaking down a UI into logical components is the first step.
- Single Source of Truth: For a given feature, state should live in the highest-level common ancestor component (
App.vuein our case). - Props Down, Events Up: This is the standard, predictable pattern for communication between parent and child components.
- Separation of Concerns: Our new
TodoItemandTodoFormcomponents are now highly reusable because they are "presentational"—they just display data and report on user actions, without containing any business logic.
You've now mastered the core concepts of component communication. In the next module, we'll address the minor "event drilling" we saw by introducing Pinia, a state management library that will allow any component to interact with the application state directly, simplifying our data flow even further.