Welcome to the first lesson of your web development refresher course! We're starting with a crucial first step: setting up your primary tool, the code editor. A well-configured editor is like a well-organized workshop—it makes your work more efficient, enjoyable, and professional.
This lesson addresses the first learning outcome of our initial module: Install and configure VS Code on Fedora with essential web development extensions (e.g., Live Server).
By the end of this 60-minute session, you will have a fully functional and professional code editor installed on your Fedora system, ready for the projects we'll be building.
1. Installing VS Code on Fedora
Visual Studio Code (or VS Code) is a free, powerful, and highly popular code editor from Microsoft. It's the industry standard for web development due to its vast ecosystem of extensions and excellent performance.
Since you're using Fedora, the best way to install and manage VS Code is through Microsoft's official software repository. This ensures you get timely updates directly alongside your regular system updates.
The following guide provides clear, step-by-step instructions for this process.
How to Install Visual Studio Code on Fedora Linux
Please read this guide to learn how to install VS Code on your Fedora system. We'll be using the recommended 'Method 1'.
Focus on 'Method 1: Install Visual Studio Code via Microsoft RPM Repository'. Follow the steps to update your packages, add the repository, and install the stable build. Then, review the 'Launch Visual Studio Code' section to see how to open the application.
To summarize the key commands you'll be running in your terminal:
- Update system packages:
sudo dnf upgrade --refresh - Import the Microsoft GPG key:
sudo rpm --import https://packages.microsoft.com/keys/microsoft.asc - Add the VS Code repository:
echo -e "[code]\nname=Visual Studio Code\nbaseurl=https://packages.microsoft.com/yumrepos/vscode\nenabled=1\nautorefresh=1\ntype=rpm-md\ngpgcheck=1\ngpgkey=https://packages.microsoft.com/keys/microsoft.asc" | sudo tee /etc/yum.repos.d/vscode.repo > /dev/null - Install VS Code (stable build):
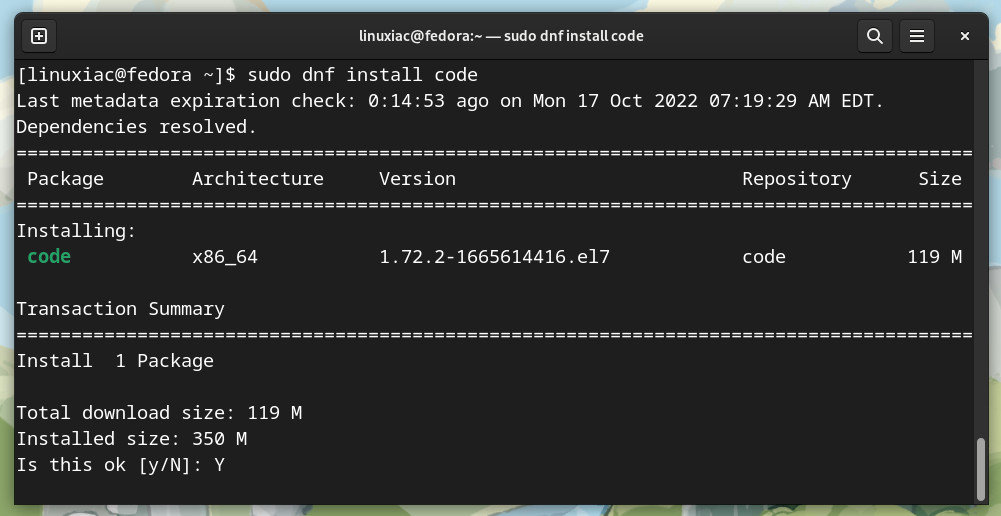
sudo dnf install code
Your terminal output during the installation should look similar to this:
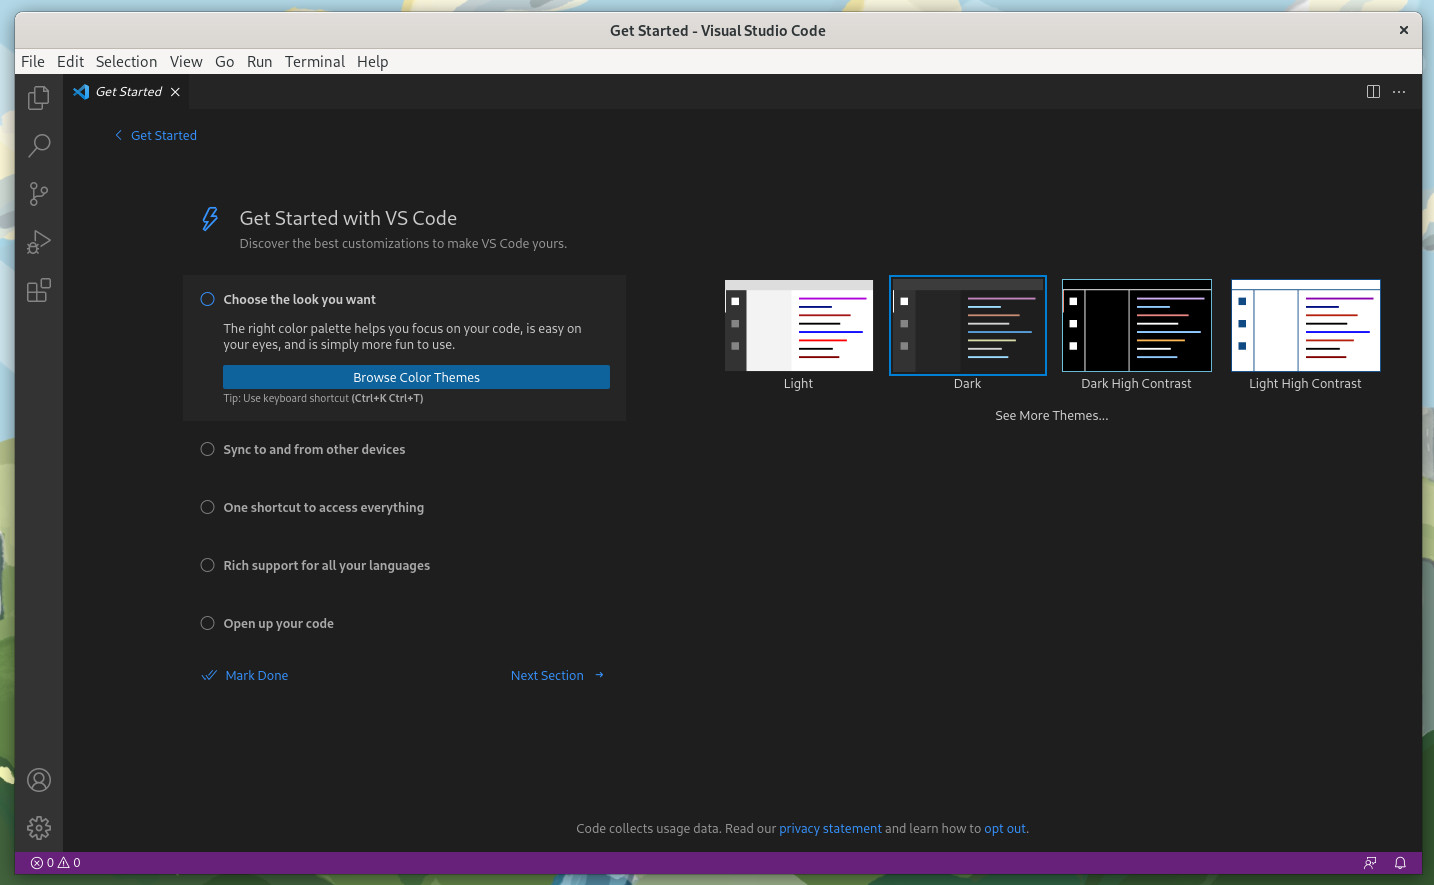
Once installed, you can launch VS Code either from your graphical applications menu or by typing code in your terminal. On your first launch, you'll be greeted with a welcome screen where you can choose a color theme.
2. Configuring for Web Development
With VS Code installed, our next step is to equip it with extensions that streamline web development. Extensions add new features, support for new languages, and tools to make you more productive.
We will focus on two essential extensions:
- Prettier: An automatic code formatter. This is crucial for maintaining clean, readable, and consistent code, which directly aligns with your goal of learning industry best practices.
- Live Server: Launches a local development server with a live reload feature. When you save a file, your browser automatically refreshes to show the changes. This creates a fast and efficient feedback loop.
This video provides an excellent tour of the VS Code interface and walks through installing and configuring these exact extensions.
VS Code for Absolute Beginners
This video by Coder Coder provides a great introduction to the VS Code interface and shows how to set up the key extensions we need.
Please watch from the beginning to 2:47 for a tour of the UI. Then, watch the segment from 19:11 to 24:12, which covers installing and configuring the 'Prettier' and 'Live Server' extensions. Pay close attention to the steps for setting up 'format on save'.
3. Your First Hands-On Task
Now it's time to apply what you've learned. Please complete the following steps to set up your editor.
- Install VS Code: Follow the terminal commands from the How to Install Visual Studio Code on Fedora Linux guide.
- Launch VS Code: Open the application.
- Install Extensions:
- Go to the Extensions view (the icon with four squares in the activity bar on the left).
- Search for and install "Prettier - Code formatter".
- Search for and install "Live Server" by Ritwick Dey.
- Configure Format on Save:
- Open the settings (use the shortcut
Ctrl+,or go toFile > Preferences > Settings). - Search for "Default Formatter" and select "Prettier - Code formatter" from the dropdown menu.
- Search for "Format on Save" and ensure the checkbox is ticked.
- Open the settings (use the shortcut
This "format on save" configuration is a standard practice that saves a lot of manual effort and ensures your project's code style remains consistent.
If you ever run into issues with Live Server (e.g., the "Go Live" button is missing), the following article from GeeksforGeeks is an excellent troubleshooting reference. I recommend bookmarking it for future use.
How to Enable Live Server on Visual Studio Code - GeeksforGeeks
This article is a great text-based reference for installing and troubleshooting the Live Server extension. You don't need to read it all now, but it's a useful resource to have.
Skim through the installation steps to reinforce what you saw in the video. The 'What to Do If the "Go Live" Button is Not Showing' section is particularly useful to keep in mind for future troubleshooting.
Conclusion
Congratulations on completing the first lesson! You have now set up your professional development environment by:
- Installing VS Code on your Fedora system using the recommended repository method.
- Familiarizing yourself with the basic user interface.
- Installing and configuring two essential extensions, Prettier and Live Server, which enforce best practices and boost productivity.
Your code editor is now ready for action.
In the next lesson, we will continue setting up your development environment by learning how to use the Fedora terminal to navigate directories and manage files. Mastering these command-line basics is a fundamental skill for any developer and will be essential for using tools like Git, which we'll cover soon.