Hello! Welcome back to our course.
In the last lesson, we built a solid foundation for working with APIs. You learned how to use the modern async/await syntax to fetch data and how to implement a basic error-handling pattern using try...catch and response.ok. We successfully fetched data, but our error handling was developer-focused—we only logged errors to the console.
Today, we'll build directly on that knowledge. Our goal is to handle API errors gracefully using try/catch blocks and display user-friendly messages. A user doesn't have the developer console open, so a silent failure or a frozen interface creates a poor experience. By the end of this lesson, you'll be able to communicate clearly to the user what's gone wrong and what they can do about it, a crucial skill for building professional web applications.
1. The Two Types of Fetch Errors
When making a network request, things can go wrong in a couple of distinct ways. As we briefly touched on before, it's vital to understand the difference because fetch treats them differently.
- Network/Connection Errors: These happen when the request can't even reach the server. This could be due to the user being offline, a DNS issue, a CORS policy violation, or a typo in the domain name. The
fetch()promise will reject in this case, and the error will be caught by thecatchblock. - HTTP Status Errors: These occur when the request successfully reaches the server, but the server responds with an error status. Common examples include
404 Not Found(the requested resource doesn't exist) or500 Internal Server Error(something went wrong on the server). Thefetch()promise will resolve successfully because a response was received. This is a common point of confusion.
This distinction is the single biggest "gotcha" when handling errors with fetch. Let's see a clear demonstration of this.
JavaScript Fetch API - One Mistake I ALWAYS MAKE!
The video 'JavaScript Fetch API - One Mistake I ALWAYS MAKE!' by James Q Quick perfectly illustrates this common pitfall. Notice how a 404 error does not trigger the catch block.
Watch from 00:51 to 02:08, and then from 03:18 to 03:55. In the first segment, observe how a 404 error doesn't go to the catch block and instead causes a different error when the code tries to parse the non-JSON response. The second segment shows what kind of error (an invalid domain) does trigger the catch block.
To solidify this concept, the following article provides a great textual breakdown of the same problem.
Fetch API, do you really know how to handle errors? - DEV Community
The article 'Fetch API, do you really know how to handle errors?' reinforces what we just saw. It clearly explains which errors are caught by try/catch and which are not.
Read the introduction and the sections 'How to handle errors using Fetch API?' and 'Using try/catch to handle Fetch API errors'. Focus on the distinction between promise rejection (network/CORS errors) and promise resolution with a bad status (404/500 errors).
2. A Robust, Unified Error-Handling Strategy
So, if try...catch only handles network errors, how do we create a single, clean way to manage all possible failures? The best practice is to combine try...catch with an explicit check of the response status, and then make our own error to unify the logic.
The strategy looks like this:
- Wrap the
await fetch(...)call in atry...catchblock. This will handle any network errors. - Inside the
tryblock, right after getting the response, check ifresponse.okisfalse. - If it is
false,throwa newError. This will immediately stop the execution of thetryblock and jump to thecatchblock.
This way, the catch block becomes the single source of truth for handling any kind of error, whether it was a network failure or a bad HTTP status.
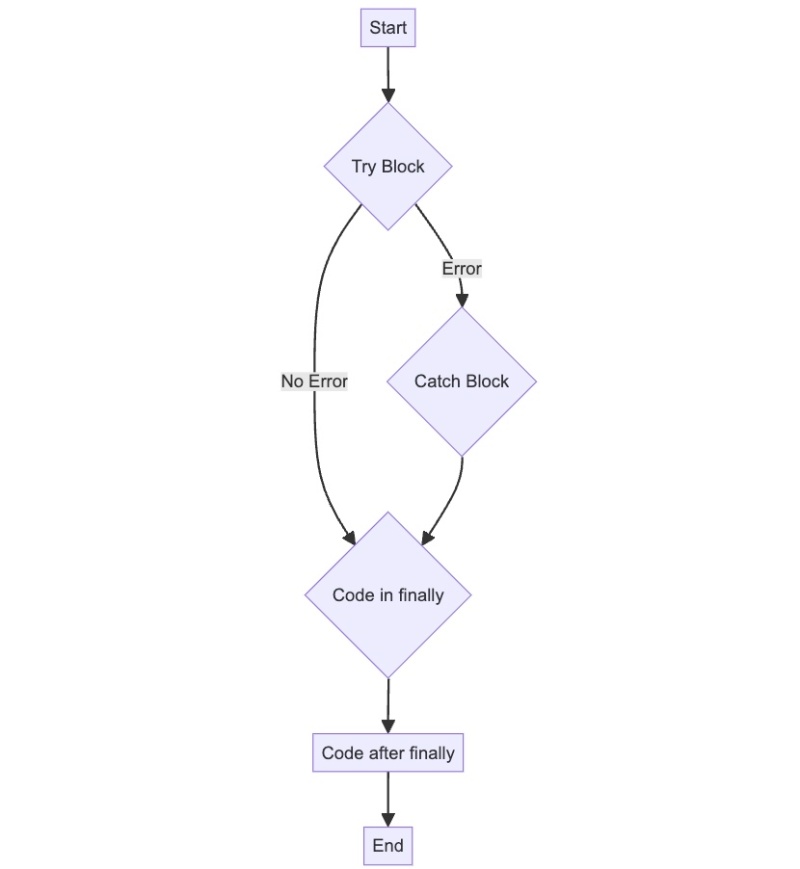
The following resource shows this exact pattern in action.
Fetch API, do you really know how to handle errors? - DEV Community
Let's return to the DEV Community article, which presents this unified solution beautifully.
Read the section 'Best way to handle errors using Fetch API', paying close attention to Example 02. This code demonstrates how to check response.ok, throw a new custom error if needed, and handle all errors in one catch block.
This pattern gives us a predictable, maintainable structure for all our API calls.
3. Hands-On: Giving the User Proper Feedback
Now, let's apply this strategy to the Poké-Fetcher you built in the last lesson. Our goal is to stop logging errors to the console and start showing them in the UI.

We'll implement a simpler version of this by adding a dedicated error message area to our page.
Your Task: Upgrade the Poké-Fetcher
Start with your code from the previous lesson. If you don't have it handy, use this as your starting point.
index.html
<!DOCTYPE html>
<html lang="en">
<head>
  <meta charset="UTF-8">
  <meta name="viewport" content="width=device-width, initial-scale=1.0">
  <title>Poké-Fetcher</title>
  <style>
    body { font-family: sans-serif; text-align: center; margin-top: 50px; }
    input { padding: 8px; }
    button { padding: 8px 12px; }
    img { margin-top: 20px; width: 150px; height: 150px; border: 1px solid #ccc; }
    /* Style for our new error message */
    .error { color: red; margin-top: 15px; }
  </style>
</head>
<body>
  <h1>Poké-Fetcher</h1>
  <input type="text" id="pokemonName" placeholder="Enter Pokémon name">
  <button onclick="fetchData()">Fetch Pokémon</button>

  <!-- Add a paragraph to display errors -->
  <p id="errorMessage" class="error"></p>

  <br>
  <img src="" alt="Pokemon Sprite" id="pokemonSprite" style="display: none;">

  <script src="app.js"></script>
</body>
</html>
app.js (Starter Code)
// This is the function you will modify
async function fetchData() {
    const pokemonName = document.getElementById("pokemonName").value.toLowerCase();

    try {
        const response = await fetch(`https://pokeapi.co/api/v2/pokemon/${pokemonName}`);

        // This is where the old, simple check was.
        if (!response.ok) {
            console.error(`HTTP error! Status: ${response.status}`);
            return; // We will improve this!
        }

        const data = await response.json();
        const spriteUrl = data.sprites.front_default;

        const pokemonSpriteElement = document.getElementById("pokemonSprite");
        pokemonSpriteElement.src = spriteUrl;
        pokemonSpriteElement.style.display = "block";

    } catch (error) {
        console.error("Fetch error:", error);
    }
}
Instructions:
-
Modify
index.html: Add the<p id="errorMessage" class="error"></p>element as shown above. This is where we'll display our messages. -
Refactor
app.js:- At the beginning of your
fetchDatafunction, get a reference to the error messageptag and theimgtag. It's a good practice to clear any previous error message and hide the image at the start of a new fetch. - Inside the
tryblock, replace the oldif (!response.ok)block. Instead of just logging to the console,throw new Error(...). Create a user-friendly message, likethrow new Error(\Could not find: ${pokemonName}`);. You can even include the status code:throw new Error(`Error ${response.status}: Pokémon not found`);`. - Update your
catch (error)block. Instead of logging to the console, set thetextContentof your error message element toerror.message. Make sure the error message is visible.
- At the beginning of your
Test your work by trying to fetch a Pokémon that exists (like "pikachu") and one that doesn't (like "fakemon"). Also, try disconnecting from the internet to simulate a network error. Both types of errors should now display a message on the page.
Click to see the completed `app.js` file
async function fetchData() {
    const pokemonName = document.getElementById("pokemonName").value.toLowerCase();
    const errorMessageElement = document.getElementById("errorMessage");
    const pokemonSpriteElement = document.getElementById("pokemonSprite");

    // 1. Reset UI state on new fetch
    errorMessageElement.textContent = "";
    pokemonSpriteElement.style.display = "none";

    // Stop if the input is empty
    if (!pokemonName) {
        errorMessageElement.textContent = "Please enter a Pokémon name.";
        return;
    }

    try {
        const response = await fetch(`https://pokeapi.co/api/v2/pokemon/${pokemonName}`);

        // 2. Check for HTTP errors and throw to centralize error handling
        if (!response.ok) {
            throw new Error(`Error ${response.status}: Could not find Pokémon "${pokemonName}"`);
        }

        const data = await response.json();
        const spriteUrl = data.sprites.front_default;

        // On success, display the image
        pokemonSpriteElement.src = spriteUrl;
        pokemonSpriteElement.style.display = "block";

    } catch (error) {
        // 3. Catch ALL errors (network or thrown) and display in the UI
        console.error(error); // It's still good practice to log the full error for debugging
        errorMessageElement.textContent = error.message;
    }
}
Conclusion
Great job! You have now elevated your error-handling skills from being developer-centric to user-centric. This is a significant step towards building professional, resilient applications.
Key Takeaways:
fetchhas two main error types: network errors (promise rejects) and HTTP status errors (promise resolves).- The
try...catchblock only catches rejected promises (network errors) by default. - A robust pattern is to check
response.okinside thetryblock andthrow new Error()on failure. This allows thecatchblock to handle all errors uniformly. - Always provide clear, user-friendly feedback in the UI when an error occurs. A silent failure is a frustrating user experience.
In our next lesson, we will focus on what to do with a successful API response. You'll learn how to parse a JSON response and render the fetched data dynamically into the DOM, which will allow us to build much more complex and interactive features, like displaying a list of items fetched from an API.