Hello! Welcome back to our course on PHP mastery.
In our last lessons, you learned how to use the Guzzle HTTP client to consume external APIs, including fetching data with GET and sending data to create or update resources with POST and PUT. This gives you the technical ability to communicate with many APIs. However, most real-world APIs aren't completely open; they require you to prove who you are before they'll respond.
This lesson bridges that gap. Our learning outcome is to handle API authentication methods such as sending an API key in headers. We'll explore why this is necessary and then dive into several practical ways to implement it using Guzzle, moving from the most direct method to more robust, professional techniques. This is a critical step toward building secure and reliable applications that interact with third-party services.
1. Why Authenticate with an API?
Before we write any code, it's important to understand the "why." Why do APIs require authentication? It's not just about security. Authentication allows an API provider to:
- Authorize: Ensure you have permission to access a specific resource.
- Track Usage: Monitor how many requests you're making, often for billing purposes.
- Rate Limit: Prevent abuse by limiting the number of requests a single client can make in a given time period.
- Customize Responses: Provide data specific to your user account.
There are several authentication strategies (like OAuth, JWTs), but one of the most common for server-to-server communication is the simple and effective API Key.
To get a clear overview of API keys and why they are a good choice in many scenarios, please watch the following short video segment.
API Authentication EXPLAINED! 🔐 OAuth vs JWT vs API Keys 🚀
This video from SoftsWeb provides an excellent, high-level explanation of API authentication and gives a clear breakdown of what an API key is.
Watch the segment from 02:00 to 03:58. Pay close attention to the analogy of a 'VIP pass' and the two ways of sending a key: in the URL versus in the headers. Note why sending it in the headers is the recommended, more secure method.
As the video explained, an API key is a unique string that identifies your application. While you can sometimes send it as a URL parameter (e.g., ?api_key=...), this is insecure because URLs are often logged in browser histories, server logs, and network equipment.
The standard, secure method is to send the API key in an HTTP request header, most commonly the Authorization header.
2. Implementing API Key Authentication in Guzzle
Now, let's get practical. How do we add this header to our requests using Guzzle? We'll look at three common patterns.
Method 1: Setting Default Headers on the Client
This is the most common and straightforward approach. If all (or most) of your requests to a specific API need the same authentication, you can configure the Guzzle client once with the necessary header.
Many modern APIs use the Bearer Token authentication scheme. This means the Authorization header should be formatted like this: Authorization: Bearer <YOUR_API_KEY>.
The Rev AI documentation provides a perfect, concise example of this.
The PHP code samples from Rev AI show a clean, practical implementation of setting a default Authorization header when creating a Guzzle client.
Look at the first code example, 'Submit a local file for transcription'. You don't need to understand the file upload part. Focus only on how the $client is instantiated. Notice the headers key in the configuration array.
Let's adapt that pattern to a simple GET request. Imagine we have an API key for a service at https://api.awesome-service.com.
<?php

require 'vendor/autoload.php';

use GuzzleHttp\Client;
use GuzzleHttp\Exception\RequestException;

// Your secret API key. In a real app, load this from a secure config file!
$apiKey = 'asdf-1234-ghjk-5678';

try {
    // Configure the client ONCE with the auth header.
    $client = new Client([
        'base_uri' => 'https://api.awesome-service.com/v1/',
        'headers' => [
            'Authorization' => 'Bearer ' . $apiKey,
            'Accept'        => 'application/json' // Also good practice to specify expected response type
        ]
    ]);

    // Now, EVERY request made with this client will be authenticated.
    echo "Fetching user profile...\n";
    $response = $client->get('user/profile');

    echo "Fetching user orders...\n";
    $response2 = $client->get('user/orders');

    // You get the idea. No need to repeat the header!
    $profile = json_decode($response->getBody()->getContents(), true);
    print_r($profile);

} catch (RequestException $e) {
    // If auth fails, you might get a 401 or 403 status code.
    if ($e->hasResponse()) {
        echo "Error: " . $e->getResponse()->getStatusCode() . ' ' . $e->getResponse()->getReasonPhrase();
    } else {
        echo "Guzzle Error: " . $e->getMessage();
    }
}
This method is clean, efficient, and follows the "Don't Repeat Yourself" (DRY) principle.
Method 2: The 'auth' Option for Basic Authentication
Another pattern you'll encounter is HTTP Basic Authentication. Here, the Authorization header is still used, but its value is Basic followed by a base64-encoded string of username:password. Often, you'll use your API key as either the username or the password (with the other field blank).
Guzzle provides a convenient shortcut for this so you don't have to do the encoding yourself.
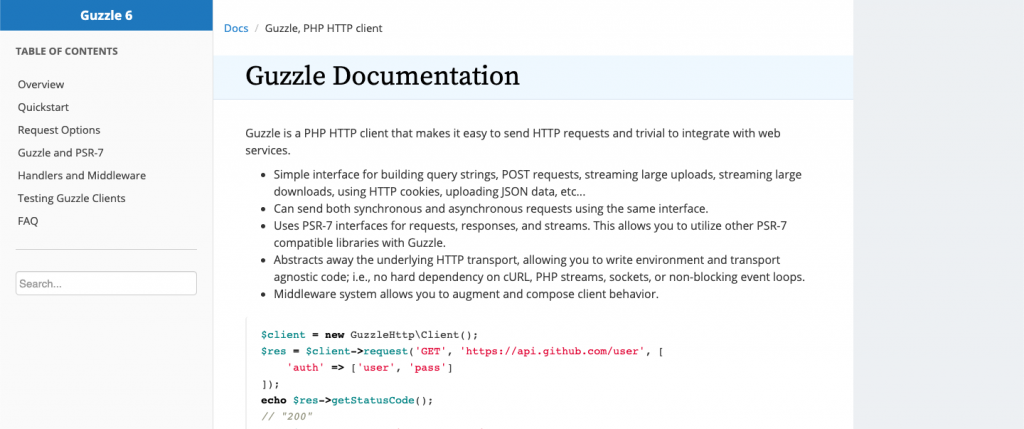
Using this option, a request to the GitHub API (which supports Basic Auth with an API token) would look like this:
// Using an API key as the username, with a blank password.
$response = $client->get('user', [
    'auth' => ['your_api_key', '']
]);
This is just a shorthand. It achieves the same goal—sending an Authorization header—but is tailored for the "Basic" scheme.
Method 3: A Robust Solution with Middleware
For larger applications, you might want to separate your authentication logic from your client creation code entirely. Guzzle's middleware system allows you to build a request "pipeline" where you can modify every request before it goes out.
This is a more advanced technique, but it's incredibly powerful and aligns with your goal of PHP mastery. It keeps your code organized and is a common pattern in professional applications.
How to create robust HTTP clients with Guzzle
This article on dev.to by Roman Lytvyn demonstrates how to use Guzzle's middleware stack to automatically add an API key to every request.
Read the first part of the article, focusing on the section that introduces Middleware::mapRequest. Study the code snippet that shows how to push a function onto the $stack that adds an Authorization header. This is the core concept.
Let's break down the concept from the article:
- Create a
HandlerStack: This is the pipeline that your request will pass through. - Push Middleware onto the Stack: You add a function to this pipeline. This function receives the
Requestobject. - Modify the Request: Inside your function, you modify the request (e.g., add a header) and return the modified request.
- Create the Client: You pass this handler stack to the Guzzle client when you create it.
Here's what that looks like in practice:
<?php
require 'vendor/autoload.php';

use GuzzleHttp\Client;
use GuzzleHttp\HandlerStack;
use GuzzleHttp\Middleware;
use Psr\Http\Message\RequestInterface;

$apiKey = 'asdf-1234-ghjk-5678'; // Again, load from a secure config.

// 1. Create the handler stack
$stack = HandlerStack::create();

// 2. Push the authentication middleware
$stack->push(Middleware::mapRequest(function (RequestInterface $request) use ($apiKey) {
    // 3. Add the header and return the modified request
    return $request->withHeader('Authorization', 'Bearer ' . $apiKey);
}));

// 4. Create the client with the handler stack
$client = new Client([
    'base_uri' => 'https://api.awesome-service.com/v1/',
    'handler' => $stack, // Use our custom stack
]);

// Now, any request made with this client automatically gets the auth header.
$response = $client->get('user/profile');

echo $response->getBody()->getContents();
This approach is highly modular and is the most scalable way to handle concerns like authentication, logging, or caching that apply to all API requests.
Conclusion
You now have a solid understanding of how to handle one of the most common forms of API security. This is a skill you will use constantly as a professional PHP developer.
Key Takeaways:
- API authentication is essential for security, rate limiting, and tracking usage.
- API keys are a common authentication method, and the secure standard is to send them in an HTTP request header, typically
Authorization. - You can easily implement this in Guzzle by:
- Setting a default
'headers'array when creating the client (most common). - Using the
'auth'option for HTTP Basic Authentication. - Using middleware for a more robust, scalable, and professional solution.
- Setting a default
Preview of the Next Lesson:
So far, we have been writing our PHP code in single scripts. While this is great for learning, it's not how real applications are built. In our next module, we will begin a major topic: Modern Application Architecture (MVC). You'll learn about the Model-View-Controller pattern, a fundamental design concept for organizing your code into a clean, testable, and maintainable structure. This will be your first step in moving from writing scripts to architecting applications.