Hello! Welcome back to the capstone module.
In our last lesson, we built a complete and secure user authentication system, allowing users to register, log in, and log out. Our application now has a solid MVC structure, a database connection, and session management.
Today, we'll leverage that foundation to build the core functionality of many web applications: the ability to manage content. The learning outcome for this lesson is to develop full CRUD (Create, Read, Update, Delete) functionality for a resource. We'll create a "Posts" resource that authenticated users can manage. This means a logged-in user will be able to create new posts, see a list of their own posts, edit them, and delete them.
By the end of this lesson, your application will have a fully functional content management system, a major step towards completing our project.
Visualizing CRUD
CRUD is a fundamental concept in web development. It represents the four basic operations for persistent data storage.
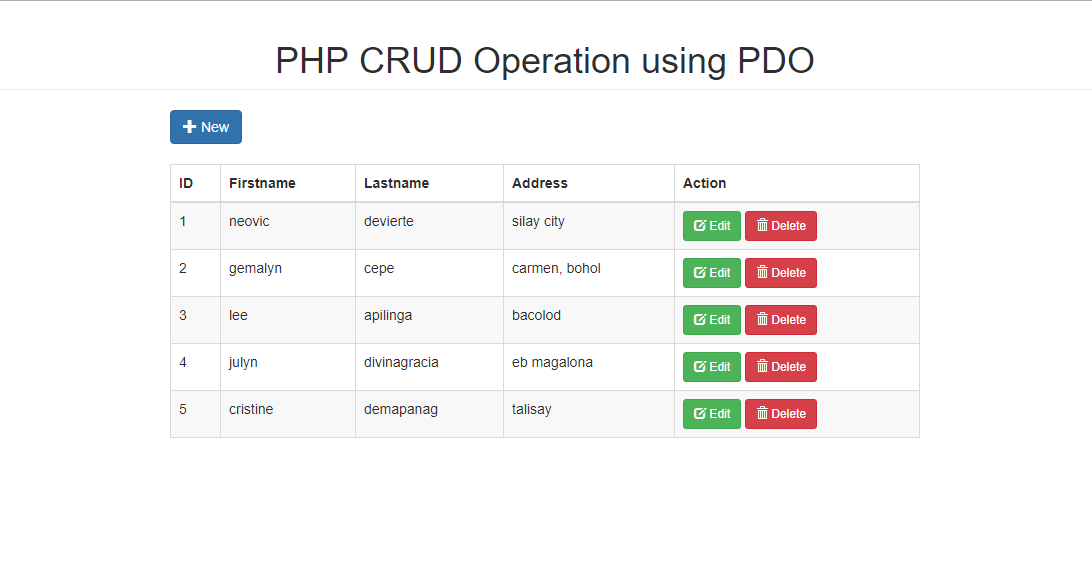
1. Setting the Stage: The posts Resource
Before we can write any PHP code, we need a database table to store our posts and a Model to interact with it.
Step 1: Create the posts Table
Connect to your MySQL database and run the following SQL query. Notice the user_id column—this is essential for linking each post to the user who created it.
CREATE TABLE posts (
    id INT AUTO_INCREMENT PRIMARY KEY,
    user_id INT NOT NULL,
    title VARCHAR(255) NOT NULL,
    content TEXT NOT NULL,
    created_at TIMESTAMP DEFAULT CURRENT_TIMESTAMP,
    updated_at TIMESTAMP DEFAULT CURRENT_TIMESTAMP ON UPDATE CURRENT_TIMESTAMP,
    FOREIGN KEY (user_id) REFERENCES users(id) ON DELETE CASCADE
);
The FOREIGN KEY constraint ensures data integrity. ON DELETE CASCADE means if a user is deleted, all their posts will be automatically deleted as well.
Step 2: Create the Post Model
Now, let's create the model at app/Models/Post.php. This class will contain all the logic for interacting with the posts table. We'll implement the four CRUD methods.
<?php

namespace App\Models;

use App\Core\Database;
use PDO;

class Post
{
    private PDO $db;

    public function __construct()
    {
        $this->db = Database::getInstance();
    }

    /**
     * READ all posts for a specific user.
     * @param int $userId
     * @return array
     */
    public function findAllByUserId(int $userId): array
    {
        $stmt = $this->db->prepare("SELECT * FROM posts WHERE user_id = :user_id ORDER BY created_at DESC");
        $stmt->execute(['user_id' => $userId]);
        return $stmt->fetchAll();
    }

    /**
     * READ a single post by its ID.
     * @param int $id
     * @return array|false
     */
    public function findById(int $id): array|false
    {
        $stmt = $this->db->prepare("SELECT * FROM posts WHERE id = :id");
        $stmt->execute(['id' => $id]);
        return $stmt->fetch();
    }

    /**
     * CREATE a new post.
     * @param string $title
     * @param string $content
     * @param int $userId
     * @return int|false The new post's ID or false on failure.
     */
    public function create(string $title, string $content, int $userId): int|false
    {
        $stmt = $this->db->prepare(
            "INSERT INTO posts (title, content, user_id) VALUES (:title, :content, :user_id)"
        );

        $success = $stmt->execute([
            'title' => $title,
            'content' => $content,
            'user_id' => $userId
        ]);

        if ($success) {
            return (int)$this->db->lastInsertId();
        }

        return false;
    }

    /**
     * UPDATE an existing post.
     * @param int $id
     * @param string $title
     * @param string $content
     * @return bool True on success, false on failure.
     */
    public function update(int $id, string $title, string $content): bool
    {
        $stmt = $this->db->prepare(
            "UPDATE posts SET title = :title, content = :content WHERE id = :id"
        );

        return $stmt->execute([
            'id' => $id,
            'title' => $title,
            'content' => $content
        ]);
    }

    /**
     * DELETE a post.
     * @param int $id
     * @return bool True on success, false on failure.
     */
    public function delete(int $id): bool
    {
        $stmt = $this->db->prepare("DELETE FROM posts WHERE id = :id");
        return $stmt->execute(['id' => $id]);
    }
}
This model provides a clean API for our controllers. Each method corresponds to one of the CRUD operations and uses prepared statements for security.
For a great example of how these CRUD methods are organized within an OOP structure, the following tutorial is very helpful.
Building a PHP CRUD Application with OOP and MySQL
The article 'Building a PHP CRUD Application with OOP and MySQL' clearly demonstrates how to encapsulate database operations within a model class.
Review the 'Create Model (User.php)' section. Notice how the create, read, update, and delete methods are defined. Our Post model follows this exact pattern, providing a dedicated method for each database action.
2. Implementing the CRUD Flow
With our model ready, let's create the PostController and the necessary Views and routes to bring the functionality to life.
First, create the controller file at app/Controllers/PostController.php:
<?php

namespace App\Controllers;

use App\Models\Post;

class PostController
{
    // We will add the CRUD methods here.
}
Step 1: READ - Listing Posts
The "Read" operation is where users can see a list of their posts.
Controller Logic: Add the index() method to app/Controllers/PostController.php.
// Inside the PostController class

public function index()
{
    // 1. Check if user is logged in
    if (!isset($_SESSION['user_id'])) {
        header('Location: /login');
        exit;
    }

    // 2. Fetch posts for the logged-in user
    $postModel = new Post();
    $posts = $postModel->findAllByUserId($_SESSION['user_id']);

    // 3. Load the view and pass the posts
    require_once __DIR__ . '/../../views/posts/index.php';
}
This method first secures the page, then uses our Post model to get the data, and finally passes it to a view.
View: Create the file views/posts/index.php.
<!DOCTYPE html>
<html lang="en">
<head>
    <meta charset="UTF-8">
    <title>My Posts</title>
    <link rel="stylesheet" href="https://cdn.jsdelivr.net/npm/water.css@2/out/water.css">
</head>
<body>
    <h1>My Posts</h1>
    <p>Welcome, <?= htmlspecialchars($_SESSION['user_name']) ?>! <a href="/logout">Logout</a></p>

    <a href="/posts/create">Create New Post</a>

    <?php if (empty($posts)): ?>
        <p>You have not created any posts yet.</p>
    <?php else: ?>
        <table>
            <thead>
                <tr>
                    <th>Title</th>
                    <th>Created At</th>
                    <th>Actions</th>
                </tr>
            </thead>
            <tbody>
                <?php foreach ($posts as $post): ?>
                    <tr>
                        <td><?= htmlspecialchars($post['title']) ?></td>
                        <td><?= $post['created_at'] ?></td>
                        <td>
                            <a href="/posts/edit?id=<?= $post['id'] ?>">Edit</a>
                            <!-- We will make this delete button functional later -->
                            <form action="/posts/delete" method="post" style="display:inline;">
                                <input type="hidden" name="id" value="<?= $post['id'] ?>">
                                <button type="submit" onclick="return confirm('Are you sure?')">Delete</button>
                            </form>
                        </td>
                    </tr>
                <?php endforeach; ?>
            </tbody>
        </table>
    <?php endif; ?>

</body>
</html>
Routing: Add the route to public/index.php.
// ... inside the switch statement
    case '/posts':
        $postController = new App\Controllers\PostController();
        $postController->index();
        break;
Now, log in and navigate to /posts. You should see the "My Posts" page (though it will be empty for now).
Step 2: CREATE - Adding a New Post
Controller Logic: Add the create() and store() methods to PostController.
// Inside the PostController class

public function create()
{
    if (!isset($_SESSION['user_id'])) {
        header('Location: /login');
        exit;
    }
    // Just show the form
    require_once __DIR__ . '/../../views/posts/create.php';
}

public function store()
{
    if (!isset($_SESSION['user_id'])) {
        header('Location: /login');
        exit;
    }

    $title = $_POST['title'] ?? '';
    $content = $_POST['content'] ?? '';

    if (empty($title) || empty($content)) {
        die('Title and content are required.');
    }

    $postModel = new Post();
    $postModel->create($title, $content, $_SESSION['user_id']);

    header('Location: /posts');
    exit;
}
View: Create the file views/posts/create.php.
<!DOCTYPE html>
<html lang="en">
<head>
    <meta charset="UTF-8">
    <title>Create Post</title>
    <link rel="stylesheet" href="https://cdn.jsdelivr.net/npm/water.css@2/out/water.css">
</head>
<body>
    <h1>Create New Post</h1>
    <form action="/posts/create" method="post">
        <div>
            <label for="title">Title</label>
            <input type="text" id="title" name="title" required>
        </div>
        <div>
            <label for="content">Content</label>
            <textarea id="content" name="content" required></textarea>
        </div>
        <button type="submit">Save Post</button>
    </form>
</body>
</html>
Routing: Update public/index.php to handle both showing the form (GET) and submitting it (POST).
// ... inside the switch statement
    case '/posts/create':
        $postController = new App\Controllers\PostController();
        if ($_SERVER['REQUEST_METHOD'] === 'POST') {
            $postController->store();
        } else {
            $postController->create();
        }
        break;
You can now navigate to /posts/create, fill out the form, and see your new post appear in the list on the /posts page.
Step 3: UPDATE - Editing an Existing Post
This is a multi-step process: fetch the data, show it in a form, and process the submission.
Controller Logic: Add edit() and update() methods to PostController.
// Inside the PostController class

public function edit()
{
    if (!isset($_SESSION['user_id'])) {
        header('Location: /login');
        exit;
    }

    $id = $_GET['id'] ?? null;
    if (!$id) {
        die('Post ID is missing.');
    }

    $postModel = new Post();
    $post = $postModel->findById((int)$id);

    // Authorization: Check if post exists and belongs to the logged-in user
    if (!$post || $post['user_id'] !== $_SESSION['user_id']) {
        http_response_code(403);
        die('Forbidden: You do not have permission to edit this post.');
    }

    require_once __DIR__ . '/../../views/posts/edit.php';
}

public function update()
{
    if (!isset($_SESSION['user_id'])) {
        header('Location: /login');
        exit;
    }

    $id = $_POST['id'] ?? null;
    $title = $_POST['title'] ?? '';
    $content = $_POST['content'] ?? '';

    if (!$id || empty($title) || empty($content)) {
        die('Missing required data.');
    }

    $postModel = new Post();
    $post = $postModel->findById((int)$id);

    // Authorization: Double-check ownership before updating
    if (!$post || $post['user_id'] !== $_SESSION['user_id']) {
        http_response_code(403);
        die('Forbidden: You do not have permission to edit this post.');
    }

    $postModel->update((int)$id, $title, $content);

    header('Location: /posts');
    exit;
}
The authorization check here is critical. It prevents a user from editing another user's post by guessing the ID in the URL.
View: Create views/posts/edit.php.
<!DOCTYPE html>
<html lang="en">
<head>
    <meta charset="UTF-8">
    <title>Edit Post</title>
    <link rel="stylesheet" href="https://cdn.jsdelivr.net/npm/water.css@2/out/water.css">
</head>
<body>
    <h1>Edit Post</h1>
    <form action="/posts/edit" method="post">
        <input type="hidden" name="id" value="<?= $post['id'] ?>">
        <div>
            <label for="title">Title</label>
            <input type="text" id="title" name="title" value="<?= htmlspecialchars($post['title']) ?>" required>
        </div>
        <div>
            <label for="content">Content</label>
            <textarea id="content" name="content" required><?= htmlspecialchars($post['content']) ?></textarea>
        </div>
        <button type="submit">Update Post</button>
    </form>
</body>
</html>
This form is pre-filled with the existing post data. A hidden input holds the id so we know which post to update upon submission.
Routing: Add the route to public/index.php.
// ... inside the switch statement
    case '/posts/edit':
        $postController = new App\Controllers\PostController();
        if ($_SERVER['REQUEST_METHOD'] === 'POST') {
            $postController->update();
        } else {
            $postController->edit();
        }
        break;
Step 4: DELETE - Removing a Post
The final piece is deleting a post. We use a POST request for this to prevent accidental deletion from search engine crawlers or pre-fetching browsers.
Controller Logic: Add the destroy() method to PostController.
// Inside the PostController class

public function destroy()
{
    if (!isset($_SESSION['user_id'])) {
        header('Location: /login');
        exit;
    }

    $id = $_POST['id'] ?? null;
    if (!$id) {
        die('Post ID is missing.');
    }

    $postModel = new Post();
    $post = $postModel->findById((int)$id);

    // Authorization: Check ownership before deleting
    if (!$post || $post['user_id'] !== $_SESSION['user_id']) {
        http_response_code(403);
        die('Forbidden: You do not have permission to delete this post.');
    }

    $postModel->delete((int)$id);

    header('Location: /posts');
    exit;
}
Again, the authorization check is essential.
Routing: Add the route to public/index.php.
// ... inside the switch statement
    case '/posts/delete':
        $postController = new App\Controllers\PostController();
        if ($_SERVER['REQUEST_METHOD'] === 'POST') {
            $postController->destroy();
        } else {
            // Deleting via GET is not allowed
            http_response_code(405);
            echo 'Method Not Allowed';
        }
        break;
The "Delete" button in views/posts/index.php is already set up to POST to this route. You can now test the full CRUD cycle!
The following video walks through implementing a full CRUD application. While it uses a more procedural style, it's great for visualizing the four distinct operations we've just built in an MVC context.
PHP PDO CRUD Tutorial - How to Insert, Fetch, Edit & Update, Delete data using PDO in PHP
In this 'PHP PDO CRUD Tutorial', Funda Coder demonstrates how to Insert, Fetch, Edit/Update, and Delete data. You can map each part of the video to the MVC components we just built.
Watch the following sections, and notice how our organized Controller methods and Views correspond to the actions shown: Create: 2:22 - 16:00 (Our create and store methods and the create.php view) Read: 16:00 - 24:22 (Our index method and the index.php view) Update: 24:22 - 40:05 (Our edit and update methods and the edit.php view) Delete: 40:05 - 46:27 (Our destroy method and the form in the index.php view)
Conclusion
Congratulations! You have successfully implemented full CRUD functionality for a resource within our growing application. This is a massive milestone and forms the backbone of almost any data-driven website.
Key Takeaways:
- CRUD Operations: We implemented
create,findAllByUserId/findById,update, anddeletemethods in ourPostmodel. - MVC in Action: We created a dedicated
PostControllerto handle user requests andviews/poststo present the data and forms, keeping our logic cleanly separated. - Authorization is Key: We implemented crucial checks in the
edit,update, anddestroymethods to ensure users can only manage their own posts. This is a fundamental security principle. - RESTful Principles: We used different HTTP methods (GET and POST) for different actions, such as showing a form with GET and submitting data with POST.
Preview of the Next Lesson:
We've done a good job with prepared statements and authorization, but there's more to security. In the next lesson, we will focus on how to apply security best practices for all user inputs and database queries. We'll dive into systematically validating all incoming data and sanitizing all output to protect our application from common vulnerabilities like Cross-Site Scripting (XSS) and others.