Hello! Welcome back to your course on PHP mastery.
In our last lesson, we successfully implemented the Model-View-Controller (MVC) pattern. We separated our application's concerns by moving business logic to Models, presentation to Views, and request handling to Controllers. However, if you look at our views/home.php and views/about.php files, you'll notice they both contain the same boilerplate HTML (<!DOCTYPE html>, <html>, <head>, etc.). This violates the "Don't Repeat Yourself" (DRY) principle, a core tenet of good software design.
Today, we'll fix that. Your learning outcome is to create reusable view templates and partials. We will build a simple but powerful templating system that allows us to define a master page layout and reuse common elements like headers and footers across all our pages. This will make our application much more maintainable and scalable.
1. The Simplest Approach: Partials
The first step toward reusable views is to break down common UI elements into smaller, includable files called "partials." Think of the common sections of a webpage.

We can extract our header and footer into their own files and then include them where needed. A common convention is to prefix partial filenames with an underscore (e.g., _header.php) and place them in a dedicated subdirectory.
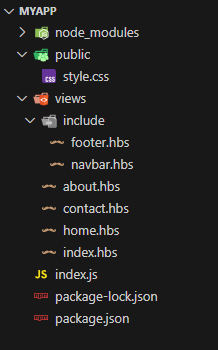
Let's implement this.
- Create a new folder inside your
viewsdirectory calledpartials. - Inside
views/partials, create two new files:_header.phpand_footer.php.
views/partials/_header.php
<!DOCTYPE html>
<html lang="en">
<head>
    <meta charset="UTF-8">
    <meta name="viewport" content="width=device-width, initial-scale=1.0">
    <title>My Awesome App</title>
    <style>
        body { font-family: sans-serif; max-width: 800px; margin: auto; padding: 20px; }
        nav { margin-bottom: 20px; border-bottom: 1px solid #ccc; padding-bottom: 10px; }
        nav a { margin-right: 15px; }
    </style>
</head>
<body>
    <header>
        <nav>
            <a href="/">Home</a>
            <a href="/about">About</a>
        </nav>
    </header>
    <main>
views/partials/_footer.php
</main>
<footer>
<p>© <?= date('Y') ?> My Awesome App</p>
</footer>
</body>
</html>
Now, update your home.php and about.php views to use these partials. Remove all the boilerplate HTML and replace it with require_once.
views/home.php (Updated)
<?php require_once VIEW_PATH . 'partials/_header.php'; ?>

<h1>Welcome to the Homepage!</h1>
<p>Here are our latest posts:</p>

<ul>
    <?php foreach ($posts as $post) : ?>
        <li>
            <h2><?= htmlspecialchars($post['title']) ?></h2>
            <p><?= htmlspecialchars($post['content']) ?></p>
        </li>
    <?php endforeach; ?>
</ul>

<?php require_once VIEW_PATH . 'partials/_footer.php'; ?>
(You can make the same change to about.php)
This is a good first step, but it has a key drawback: every single view file is responsible for including the header and footer. If you create a new view, you have to remember to add these require_once statements.
2. A Better Way: Layouts and Template Inheritance
A more robust approach is to reverse this logic. Instead of the view pulling in the header and footer, we can create a master layout file that "wraps" around our view content. This concept is often called template inheritance.
The following video introduces this idea perfectly, explaining why manual includes are insufficient and how layouts provide a better solution.
Routing, Controllers, Views - Part 1 | PHP MVC Framework from Scratch
Watch this segment to understand the problem with simple includes and the concept of using a master layout file with a content placeholder.
Watch the clip from 33:00 to 37:16. The narrator explains the problem of code duplication and introduces the solution: a main layout file with a placeholder (like {{content}}) where the specific page's content will be injected.
Let's build this system from scratch. We will create a single layout file and modify our View class to inject the specific view's content into it.
Step 1: Create the Layout File
Create a new file in your views directory named layout.php. This file will look very similar to our old _header.php and _footer.php combined, but with one crucial difference: a variable that will act as the content placeholder.
views/layout.php
<!DOCTYPE html>
<html lang="en">
<head>
<meta charset="UTF-8">
<meta name="viewport" content="width=device-width, initial-scale=1.0">
<!-- The title will be dynamic! -->
<title><?= htmlspecialchars($title ?? 'My Awesome App') ?></title>
<style>
body { font-family: sans-serif; max-width: 800px; margin: auto; padding: 20px; }
nav { margin-bottom: 20px; border-bottom: 1px solid #ccc; padding-bottom: 10px; }
nav a { margin-right: 15px; }
</style>
</head>
<body>
<header>
<nav>
<a href="/">Home</a>
<a href="/about">About</a>
</nav>
</header>
<main>
<!-- This is our content placeholder -->
<?= $content ?? '' ?>
</main>
<footer>
<p>© <?= date('Y') ?> My Awesome App</p>
</footer>
</body>
</html>
Notice two new things:
<title><?= htmlspecialchars($title ?? 'My Awesome App') ?></title>: We've made the page title dynamic. We can pass a$titlevariable to the layout. The??is the null coalescing operator, which provides a default value if$titleisn't set.<?= $content ?? '' ?>: This is the placeholder where the output ofhome.phporabout.phpwill be injected.
Step 2: Upgrade the View Class
Now, we'll modify our View class to support this layout system. The render method will perform a two-step render:
- Render the specific view file (e.g.,
home.php) into a string variable. - Render the layout file (
layout.php), injecting the string from step 1 into the$contentplaceholder.
We can achieve this elegantly with output buffering.
View.php (Updated)
<?php

class View
{
    protected string $viewFile;
    protected array $data;
    protected string $layout; // Add a layout property

    // The constructor now accepts a layout file
    public function __construct(string $view, array $data = [], string $layout = 'layout')
    {
        if (!defined('VIEW_PATH')) {
            define('VIEW_PATH', __DIR__ . '/views/');
        }

        $this->viewFile = VIEW_PATH . $view . '.php';
        $this->data = $data;
        $this->layout = VIEW_PATH . $layout . '.php'; // Set the full layout path

        if (!file_exists($this->viewFile)) {
            throw new Exception("View file not found: " . $this->viewFile);
        }
        if (!file_exists($this->layout)) {
            throw new Exception("Layout file not found: " . $this->layout);
        }
    }

    public function render(): string
    {
        // Data passed from the controller is available in both the view and the layout.
        extract($this->data);

        // 1. Render the specific view file into a $content variable
        ob_start();
        include $this->viewFile;
        $content = ob_get_clean();

        // 2. Render the layout, which will use the $content variable
        ob_start();
        include $this->layout;
        return ob_get_clean();
    }
}
Step 3: Update the Controller and Views
First, let's update the HomeController to pass the page title. The View constructor now knows about layouts by default, so we just need to add the title to our data array.
controllers/HomeController.php (Updated index method)
public function index()
{
    $postModel = new PostModel();
    $posts = $postModel->getPosts();

    // Add a 'title' to the data array
    $viewData = [
        'posts' => $posts,
        'title' => 'Homepage'
    ];

    $view = new View('home', $viewData);
    return $view->render();
}
You can do the same for the about method, passing 'title' => 'About Us'.
Finally, we can simplify our view files. They now only need to contain the HTML specific to that page.
views/home.php (Final Version)
<h1>Welcome to the Homepage!</h1>
<p>Here are our latest posts:</p>

<ul>
    <?php foreach ($posts as $post) : ?>
        <li>
            <h2><?= htmlspecialchars($post['title']) ?></h2>
            <p><?= htmlspecialchars($post['content']) ?></p>
        </li>
    <?php endforeach; ?>
</ul>
That's it! No more require_once. Refresh your browser, and you should see the full page rendered correctly, with the title "Homepage" in the browser tab.
3. Professional Templating Engines
What we've built is a simple but effective templating system. For your goal of professional development, it's important to know that most modern frameworks use sophisticated, pre-built templating engines like Twig (used by Symfony) or Blade (used by Laravel).
These engines build on the concepts we've learned today and add more powerful features:
- More concise syntax for loops, conditionals, and outputting variables.
- Automatic escaping of output to prevent XSS attacks (a key topic for your interest in CyberSec).
- Advanced template inheritance with multiple levels and named blocks.
The video below introduces a simpler templating engine called Plates, which is notable because it uses plain PHP syntax. It effectively demonstrates the benefits of using a dedicated library for this task.
Build a PHP Framework: Templating
This video shows how a templating engine like Plates can formalize the concepts we just built, providing a cleaner API for layouts and a more concise way to escape output, improving both maintainability and security.
Watch from 11:33 to 17:01. You don't need to install Plates. Focus on understanding the conceptual improvements it offers over our manual approach: 1) Using $this->layout('layout') instead of relying on the constructor. 2) Using a concise e($variable) function for escaping instead of the longer htmlspecialchars($variable). 3) Using $this->section('content') as an explicit placeholder.
Conclusion
Excellent work! You've gone from repetitive view files to a clean, maintainable, and professional templating structure. This is a crucial step in building scalable web applications.
Key Takeaways:
- Partials are small, reusable view snippets (like headers/footers) included with
require. - A Layout is a master template that wraps around page-specific content.
- We implemented a template inheritance system in our
Viewclass by using output buffering to render a view into a$contentvariable and then injecting it into a layout file. - This system allows us to pass data like a page's
$titlefrom the controller to the master layout. - Professional applications often use dedicated templating engines (like Twig, Blade, or Plates) to handle this with more features and better security.
Preview of the Next Lesson:
So far, we've organized our code into classes and files, but we're still manually including them with require_once. As an application grows, managing these includes becomes a significant chore. In our next lesson, we will solve this problem by learning how to explain the role of Composer in modern PHP projects. We'll introduce Composer, the standard dependency manager for PHP, and set up a PSR-4 autoloader to load our classes automatically, paving the way for a truly modern application structure.