Hello! Welcome back to our journey of building your educational website.
In the last lesson, we added visual elements to your page by learning how to use the <img> tag. You now know how to embed images and, most importantly, how to provide alt text to make your site accessible. So far, your index.html file contains structured text, lists, and images.
Today, we'll connect the dots—literally. The learning outcome for this lesson is to create hyperlinks to other pages and external websites. Hyperlinks are the very essence of the World Wide Web, allowing users to navigate between documents. For your educational site, this means you'll be able to link your homepage to course pages, contact forms, or external resources.
The Anatomy of a Hyperlink
At the heart of every link is the HTML anchor tag, <a>. This tag wraps around the content you want to make clickable (like text or an image) and uses the href attribute to specify the destination.
<a>: The opening anchor tag.href: The hypertext reference attribute, which contains the URL or file path you want to link to.</a>: The closing anchor tag.
The content between the opening and closing tags is what becomes the visible, clickable link.

To get a quick overview, let's watch this short video.
Learn HTML hyperlinks in 4 minutes 👈
This video from Bro Code will give you a fast-paced introduction to creating hyperlinks with the <a> tag and the href attribute.
Watch from the beginning (00:00) until 00:52. Focus on how the <a> tag and the href attribute are put together to form a basic link.
Linking to External Websites
The simplest type of link is one that points to a different website. This is called an external link. To create one, you use the full URL (including https://) in the href attribute. This is also known as an absolute URL.
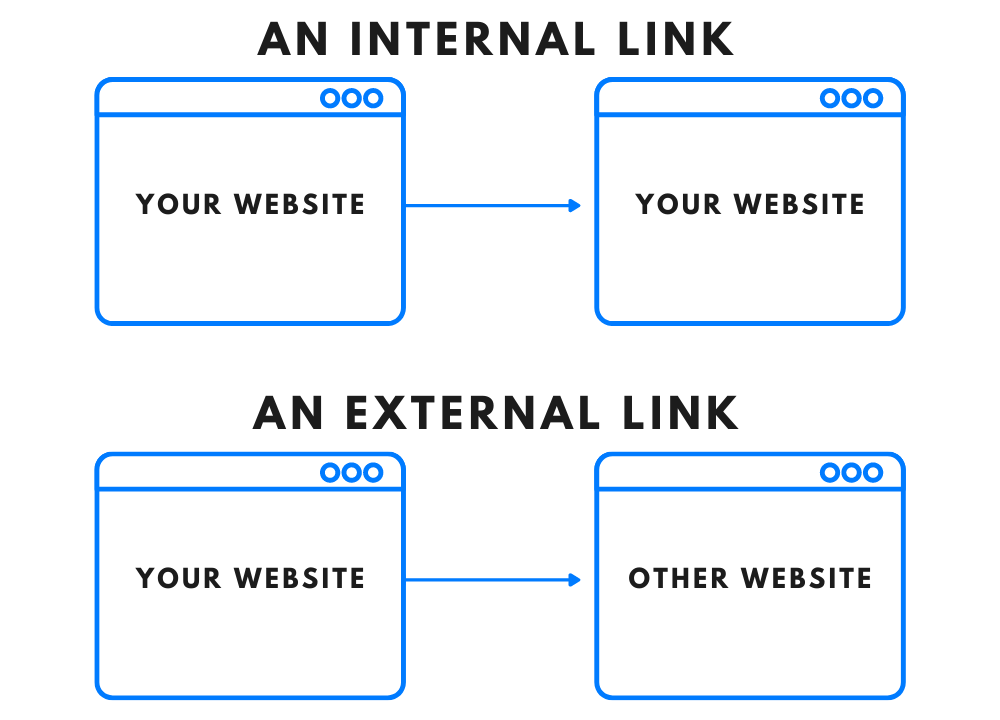
Let's add an external link to your index.html file. Since your goal is to build an educational website and you have an interest in accounting, you could add a link to a helpful accounting resource.
Open your index.html file and add the following code, perhaps below your image:
<p>
  For more information on accounting principles, visit
  <a href="https://www.investopedia.com/accounting-4427749">Investopedia</a>.
</p>
When you save and view the page, you'll see a clickable link. However, clicking it takes you away from your site. It's often better to open external links in a new browser tab. We can do this with the target attribute.
Learn HTML hyperlinks in 4 minutes 👈
Let's see how to make a link open in a new tab. This clip also introduces the title attribute, which provides a tooltip on hover.
Watch from 01:03 to 01:44. Pay attention to the target="_blank" attribute, which is a standard way to open links in a new tab.
Now, update your link to include target="_blank":
<p>
  For more information on accounting principles, visit
  <a href="https://www.investopedia.com/accounting-4427749" target="_blank">Investopedia</a>.
</p>
Now when you click the link, it will open in a new tab, keeping your website open.
Linking to Pages Within Your Site
The real power of hyperlinks comes from connecting the pages of your own website. These are called internal links. To do this, we need another page to link to!
- In your
my-education-siteproject folder, create a new file and name itabout.html. - Open this new file and paste the following basic HTML structure into it:
<!DOCTYPE html>
<html lang="en">
<head>
    <meta charset="UTF-8">
    <title>About Us</title>
</head>
<body>
    <h1>About Our Educational Site</h1>
    <p>This page will contain information about our mission and our team.</p>

    <!-- We will add a link back to the homepage here -->
</body>
</html>
Now that we have two pages, index.html and about.html, in the same folder, we can link them using a relative URL. Just like when you linked to an image in your images folder (e.g., src="images/photo.jpg"), a relative link specifies the path from the current file to the destination file. Since both files are in the same directory, the path is simply the filename.
Let's add a link from your homepage to your new "About" page. In your index.html file, add this code:
<p>
  Learn more <a href="about.html">about our mission</a>.
</p>
Now, let's complete the loop by adding a link in about.html that takes the user back to the homepage. In your about.html file, add this line where the comment is:
<p>
  <a href="index.html">Back to Home</a>
</p>
Save both files and open index.html in your browser. You can now navigate back and forth between your two pages!
For a more detailed explanation of how paths work, the following resource is excellent.
Creating links - Learn web development | MDN
The MDN Web Docs provide the most thorough explanation of URLs and paths. This reading will solidify your understanding of how to link between files in different folders.
Read the section titled 'A quick primer on URLs and paths'. Focus on the sub-sections 'Same directory', 'Moving down into subdirectories', and the explanation of 'Absolute path' vs. 'Relative path'.
Test your understanding!
Imagine you create a courses folder inside your my-education-site project. Inside that folder, you have a page called accounting-101.html.
What would the <a> tag look like in your index.html file to link to this new course page?
Show answer
<a href="courses/accounting-101.html">Learn Accounting 101</a>
Reasoning:
The href value courses/accounting-101.html is a relative path. It tells the browser to first look inside the courses folder from the current location (index.html) and then find the accounting-101.html file inside it.
Turning an Image into a Link
You can make any HTML element a link by wrapping it in an <a> tag. This is a great way to combine what you learned in the last lesson with this one. Let's make the image on your homepage a clickable link that goes to the "About" page.
Simply wrap the <img> tag you created in the last lesson with an <a> tag:
<a href="about.html">
  <img src="images/learning-photo.jpg" alt="A person sitting at a desk and writing in a notebook" width="400">
</a>
Now, when you hover over the image, your cursor will change to a pointer, and clicking it will take you to about.html.
Conclusion
You've just mastered one of the most fundamental skills in web development! You can now create the connections that turn a collection of individual files into a functional, navigable website.
Key Takeaways:
- Hyperlinks are created with the
<a>(anchor) tag. - The
hrefattribute specifies the destination URL or file path. - Absolute URLs (full web addresses) are used for external links to other websites.
- Relative URLs (file paths) are used for internal links between pages on your own site.
- Use
target="_blank"to open links in a new tab, which is good practice for external links. - You can make other elements, like images, clickable by wrapping them in an
<a>tag.
Preview of the Next Lesson:
Your pages now have content and can link to one another, but they lack a clear structure. A website needs consistent sections like a header, a main content area, and a footer. In our next lesson, we will learn how to structure a page layout using semantic HTML elements like <header>, <nav>, <main>, and <footer>. This will be the foundation for building professional and organized page layouts.