Hello! Welcome to your second lesson. In our first session, we took a tour of Roblox Studio, learning about the main windows and how to test our game. Today, the real fun begins—we're going to become builders!
Our goal is to learn how to create and build stable structures. We'll start with the basic building blocks of every Roblox game, called Parts. You'll learn how to use the main building tools to move, resize, and rotate these parts to create anything you can imagine. Most importantly, you'll discover the secret to making your creations solid and strong so they don't fall over when the game starts.
Your First Building Block: The Part
Everything you see in a Roblox game, from giant castles to tiny buttons, is built from basic shapes called Parts. Think of them like digital LEGO® bricks. You can add a Part to your game world and then change it however you like.
Let's start by adding your very first Part.
Learn to Use Parts on Roblox Studio - Fun at-home activities for Kids.
This guide provides a simple, step-by-step introduction to adding and modifying parts. We'll follow the first few steps to get our first block into the game.
Please open your Roblox project. In the guide, follow Step 3 to insert a new Block part into your game. You can find the Part button in the Home or Model tab at the top of Roblox Studio. A new gray block should appear in your world!
You now have a Part in your Workspace. If you click on it, you'll see it highlighted in the Explorer window, and its details will appear in the Properties window, just like we learned in the last lesson.
The Builder's Toolkit
Roblox gives you three main tools to shape and position your Parts. You can find them in the Home tab at the top of your screen.
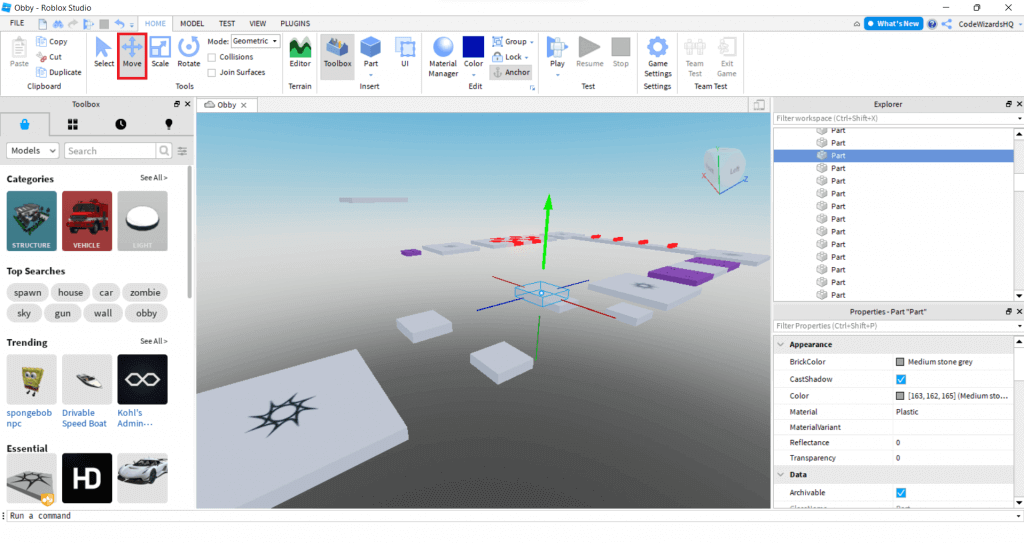
These tools are:
- Move: To change a Part's position (up/down, left/right, forward/backward).
- Scale: To change a Part's size (making it bigger or smaller).
- Rotate: To change a Part's angle (turning it around).
To see these tools in action, watch this short video.
Roblox Studio - Building Tutorial | Basics
This video gives a very quick demonstration of the four essential building tools. Pay attention to how each tool works on the part.
Watch from the beginning until the demonstration of the Rotate tool ends. The video also mentions number hotkeys (1, 2, 3, 4) which are a fast way to switch between tools.
Try selecting your Part and using each of these tools.
- With the Move tool, drag the colored arrows to move your block around.
- With the Scale tool, drag the colored dots to stretch and shrink your block.
- With the Rotate tool, drag the colored circles to spin your block.
Don't worry about making it perfect. Just get a feel for how each tool works.
The Most Important Rule: Anchoring
Now for a little experiment. Use the Move tool to lift your part so it floats in the air. Once it's floating, click the Play button to test the game.
What happened? Your part probably fell to the ground!
This happens because Roblox has a physics engine, which means it has gravity, just like the real world. Any Part that isn't held in place will fall. To stop this from happening, we need to Anchor our Parts. Anchoring is like gluing a Part in place so that physics can't move it.
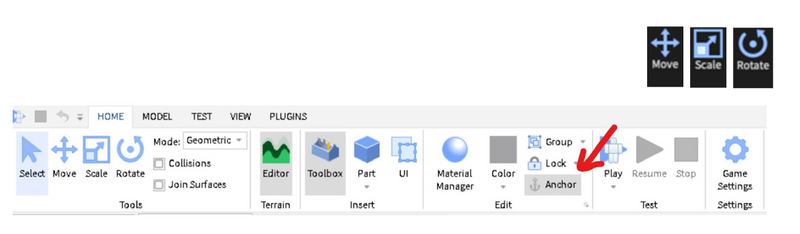
Let's learn exactly why this is so important.
Create-Your-First-Civil-and-Safe-Game. ...
This official Roblox guide explains the concept of anchoring perfectly. Understanding this is the key to building anything that stays put.
In the PDF, find the section titled "Anchoring Parts In Place". Read this short section to learn why we anchor parts and how to do it.
Now, let's fix our falling part.
- Click the Stop button to exit Play mode.
- Select your floating Part again.
- Find the Anchor button in the Home tab and click it. The button should turn a darker gray to show it's on.
- Click Play again.
Success! Your Part should now stay exactly where you put it, floating in the air. From now on, remember this rule: If you build something that shouldn't move, Anchor it!
Let's Build a Bridge
Now that you know the basics, let's put it all together and build something useful for our Obby game: a simple bridge.
- Create a Pillar: Add a new Part. Use the Scale tool to make it look like a tall, square pillar.
- Position and Anchor: Use the Move tool to place the pillar where you want one side of your bridge to be. Make sure it's touching the ground. Anchor it!
- Duplicate the Pillar: Instead of building a second pillar from scratch, let's duplicate the first one. Select the pillar and press Ctrl+D (or Cmd+D on a Mac). A copy will appear in the exact same spot.
- Move the Second Pillar: Use the Move tool to drag the new pillar to the other side of your gap. Since it's a copy, it's already anchored!
- Create the Bridge Deck: Add a new Part. Use the Scale tool to make it a long, flat plank.
- Position the Deck: Use the Move tool (and maybe the Rotate tool) to place the plank on top of your two pillars, forming the bridge.
- Anchor the Deck: Don't forget this last, crucial step! Select the deck and Anchor it.
- Test Your Bridge: Click Play! Your character should be able to walk across your bridge without it collapsing.
Great job! You've just assembled your first stable structure in Roblox.
Key Takeaways
In this lesson, you've learned the fundamental skills of a Roblox builder:
- You can create Parts, which are the building blocks for your game.
- You know how to use the Move, Scale, and Rotate tools to change a Part's position, size, and orientation.
- You learned the most important rule of building: Anchor any Part that you don't want to move or fall.
- You practiced these skills by building a simple, stable bridge.
Next Time
Now that you can build structures, you might be wondering how to make them look more interesting. In our next lesson, we'll learn how to change a Part's appearance by giving it different colors and materials, like making a block look like wood, metal, or even glowing neon