Introduction
In the previous lesson, we established a robust Continuous Integration (CI) pipeline using GitHub Actions. This automated workflow acts as a quality gate, ensuring that any code merged into your main branch is tested, linted, and type-checked. Your project is now well-structured and automatically validated.
This lesson addresses the final step in the development lifecycle covered in this course: making your project available for others to use. We'll move from having validated source code to producing a standardized, distributable package. This directly fulfills the learning outcome: Build a distributable wheel package with python -m build and test its installation in a clean environment.
You'll learn what a Python "wheel" is, how to configure your pyproject.toml to define your package, and how to use modern tooling to build and test it. This process is analogous to using Maven or Gradle in the Java ecosystem to build a .jar file from your source code. By the end of this lesson, you will have transformed your project from a private codebase into a shippable artifact.
Packaging Artifacts: Wheels vs. Source Distributions
When you distribute a Python package, you typically generate two types of files, known as "distribution archives":
- Source Distribution (sdist): A
.tar.gzfile containing your source code, thepyproject.tomlfile, and any other files needed to build the project. The end-user must have a compatible build environment to install it. - Built Distribution (wheel): A
.whlfile that is a pre-built package. It's essentially a ZIP archive with a specific structure that can be installed very quickly bypipwithout needing a build step on the user's machine. This is the preferred distribution format.
The video below gives an excellent explanation of what wheels are, why they are the standard for distribution, and how they differ from source distributions. It also touches on an important concept: the difference between pure-Python wheels and wheels containing compiled binary components.
Building Python wheels to distribute your programs
Watch this segment from InfoWorld's video 'Building Python wheels' to understand the fundamental concepts of Python distribution formats.
Watch the video from the beginning until 2:16. Focus on: What a Python wheel is and why it's the standard for distribution. The role of the build tool. The difference between a built distribution (.whl) and a source distribution (.tar.gz).
The Build Configuration: pyproject.toml
As you've seen throughout this course, pyproject.toml is the modern, standardized file for configuring Python projects. We've used it for ruff, mypy, and pytest. Its primary role, however, is to define the build process and package metadata.
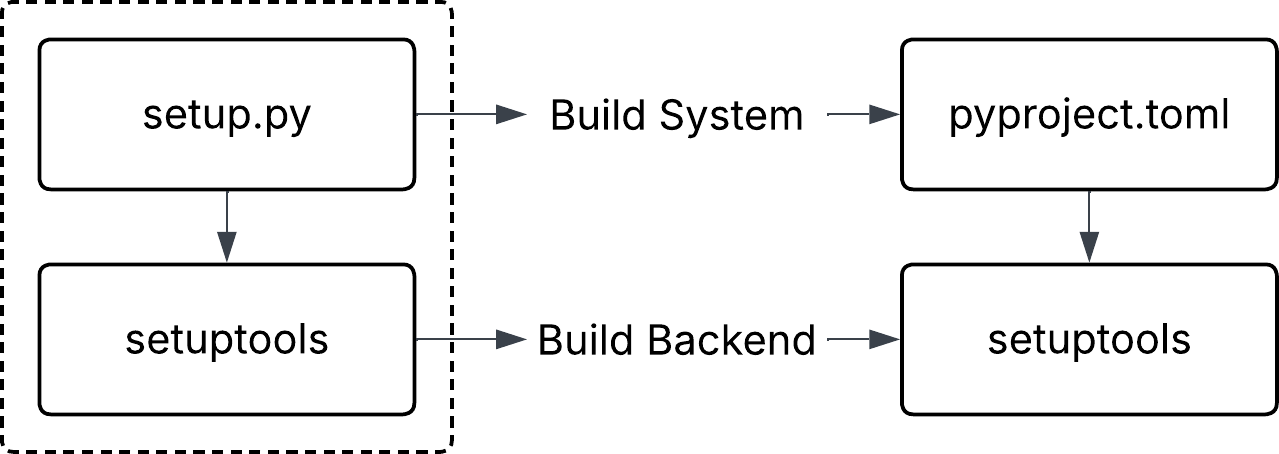
To make your project buildable, you need to configure two main tables in pyproject.toml: [build-system] and [project].
The official Python Packaging User Guide provides the definitive tutorial on this. Please read the specified sections to understand how to set up your project structure and configuration files.
The official 'Packaging Python Projects' tutorial is the most authoritative guide. We'll focus on the sections related to project setup and metadata configuration.
Read the following sections from the tutorial: A simple project: Understand the recommended file structure (e.g., using a src layout or a flat layout with a package directory). Choosing a build backend: This explains the [build-system] table. We will use setuptools in our example, as it is a common and robust choice. Configuring metadata: This is the most important part. Study the [project] table and the meaning of keys like name, version, description, readme, requires-python, and classifiers. Creating README.md and Creating a LICENSE: These are essential metadata files referenced by pyproject.toml.
Here is a summary of a minimal pyproject.toml for a package using setuptools:
# pyproject.toml

[build-system]


# These dependencies are required to build your package.
# pip will install them in an isolated environment.
requires = ["setuptools>=61.0"]
build-backend = "setuptools.build_meta"

[project]


# Core metadata for your package.
name = "your-package-name"
version = "0.0.1"
authors = [
  { name="Your Name", email="your@email.com" },
]
description = "A short description of your project."
readme = "README.md"
requires-python = ">=3.9"
classifiers = [
    "Programming Language :: Python :: 3",
    "License :: OSI Approved :: MIT License",
    "Operating System :: OS Independent",
]


# List your project's dependencies here.
# These will be installed by pip when a user installs your package.
dependencies = [


    # e.g., "requests>=2.20.0"
]


# Optional: URLs shown on the PyPI project page.
[project.urls]
Homepage = "https://github.com/your-username/your-repo"
"Bug Tracker" = "https://github.com/your-username/your-repo/issues"
Generating the Package
Once your pyproject.toml is configured, generating the distribution archives is straightforward. You'll use the build package, which is the standard, frontend-agnostic tool for this job.
The following video provides a clear, step-by-step demonstration of the entire process, from configuring pyproject.toml to building the package and installing it in a separate, clean project.
The Anatomy of Python Packages and pyproject.toml
Watch this demonstration from 'The Anatomy of Python Packages' to see the build process in action.
Watch the video from 10:59 to 18:13. This covers: Creating and configuring the pyproject.toml file. Installing the necessary build tools (build, setuptools, wheel). Running python -m build and observing the output in the dist directory. Creating a new project, setting up a clean virtual environment, and installing the newly built wheel file to verify it works.
The core commands are:
- Install the build tool:
pip install build - Run the build:
python -m build
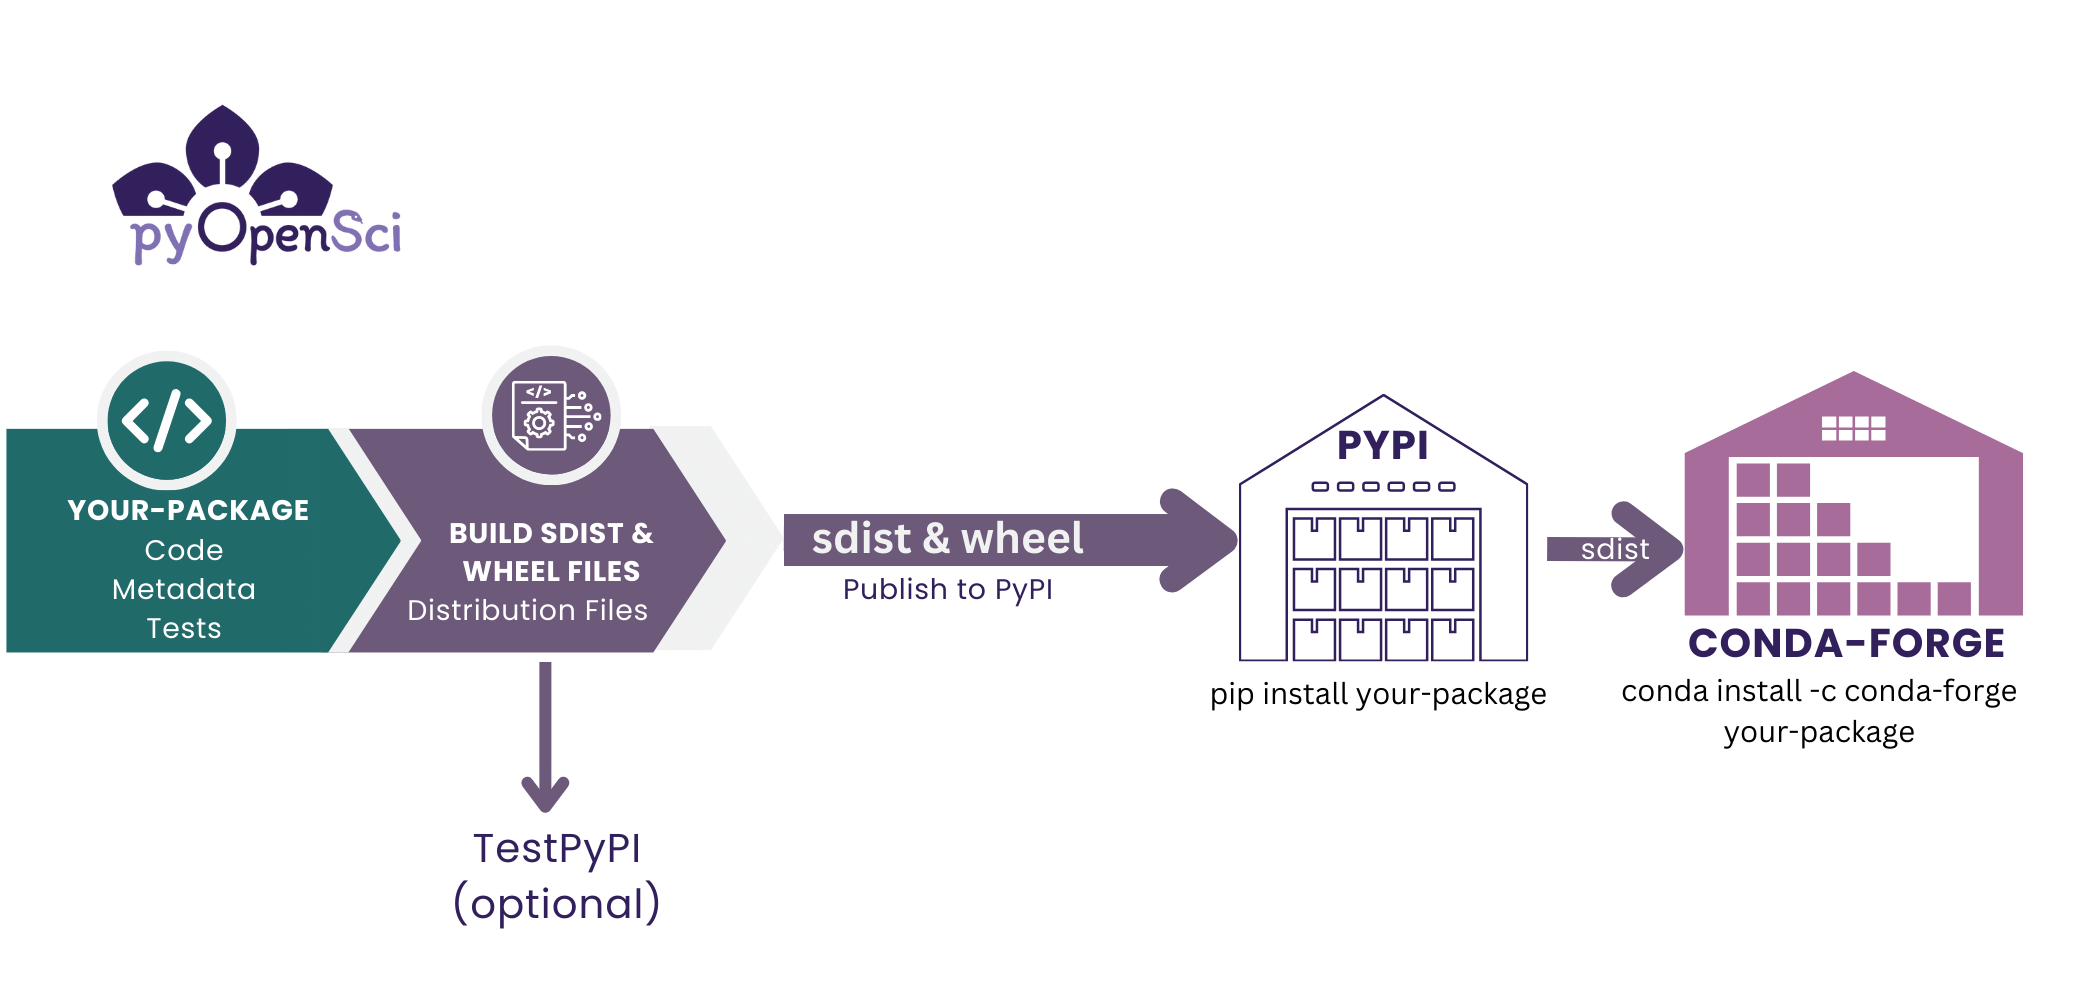
After running this, you'll find a dist/ directory in your project root containing your .whl and .tar.gz files.
Exercise: Build and Test Your Package Locally
Now, let's apply these concepts to your project. The goal is to build your package and confirm that it can be installed and used correctly in a completely isolated environment.
Part A: Configure pyproject.toml
- Open your project's
pyproject.tomlfile. - Add the
[build-system]table, specifyingsetuptoolsas the build backend. - Add or complete the
[project]table with the core metadata:name: Choose a unique name for your package.version: Start with"0.1.0".authors: Add your name and email.description: Write a one-sentence summary.readme: Ensure this points to yourREADME.mdfile.requires-python: Set an appropriate minimum version (e.g.,">=3.9").classifiers: Add the basic classifiers for Python 3, your license, and OS independence.dependencies: List any runtime dependencies your package has (but not development tools likepytestorruff).
Part B: Build the Package
- Open your terminal in the project's root directory.
- Ensure your project's virtual environment is activated.
- Install the build tool:
pip install build. - Run the build command:
python -m build. - Verify that a
dist/directory has been created and contains both a.whland a.tar.gzfile.
Part C: Test the Installation
This is the most critical step. We need to simulate being a user who knows nothing about your project's internal structure.
- Navigate away from your project directory. Create a new, empty directory somewhere else on your filesystem (e.g.,
~/tmp/test-install).cd .. mkdir test-install && cd test-install - Create and activate a new, clean virtual environment inside this directory. This ensures no other packages or local project files interfere.
python -m venv venv source venv/bin/activate # On Windows: venv\Scripts\activate - Install your package from the wheel file you created. You will need to provide the full or relative path to it.
# Adjust the path to your project's dist folder pip install ../your-project-folder/dist/*.whl - Verify the installation:
- Run
pip list. You should see your package name and version in the list. - Create a simple Python script (
test_script.py) in thetest-installdirectory. In this script, import your package and call a function from it. For example:# test_script.py from your_package_name import some_function result = some_function(...) print(f"The function returned: {result}") print("Package installed and imported successfully!") - Run the script:
python test_script.py. If it executes without errors, your package is correctly built and installed.
- Run
Conclusion
Congratulations! You have successfully built a distributable Python package and verified its integrity. This is the culmination of the development and tooling module, bridging the gap between writing code and shipping a product.
Key Takeaways:
pyproject.tomlis the heart of your package: It defines not only your tools but also your package's identity, metadata, and build requirements.- Wheels are the standard: They provide a fast, reliable installation experience for users, which is why you should always aim to distribute them.
python -m buildis the command: It's the simple, standard way to generate yoursdistandwheelfiles.- Always test in a clean environment: Installing and testing your wheel in a fresh virtual environment is the only way to be certain that your package is self-contained and will work for your users.
What's Next?
You have a tested, validated, and packaged project. The final step in the real world would be to publish it to a package index like the Python Package Index (PyPI) so others can install it with a simple pip install your-package-name. While we won't cover the upload process in this course, the "Packaging Python Projects" tutorial you read earlier continues on to explain how to use a tool called twine to upload your distribution files. You now have all the foundational knowledge to take that next step.