Hello! Welcome back to our course on building complex websites with "vibe coding."
In our last lesson, we saw how taxonomies like tags and categories are the engine behind Hugo's related content feature. By adding tags to your posts, you provided the data for Hugo to intelligently suggest other relevant articles. This is a great way to guide users deeper into your site.
But what happens when a user wants to see all content related to a specific topic, not just a few suggestions? This is where taxonomy list pages come in. As an SEO manager, you know the value of creating topical hubs that group related content. These pages are excellent for user experience and help search engines understand the structure and topical depth of your site.
Today's learning outcome is to create custom taxonomy list templates (for tags or categories) to group related content. We will close the loop on content discovery, allowing users to click a tag on a post and land on a beautifully formatted page listing all content with that same tag.
Step 1: Understanding Hugo's Automatic Taxonomy Pages
First, let's solidify our understanding of what taxonomies are and how Hugo handles them out of the box. Hugo does a lot of the heavy lifting for us by automatically creating URLs for our taxonomy terms.
To see this in action, let's watch a short video that explains the concept clearly.
Taxonomies | Hugo - Static Site Generator | Tutorial 10
The video 'Taxonomies | Hugo - Static Site Generator' by Giraffe Academy provides a great introduction to what taxonomies are and how Hugo automatically generates pages for them.
Please watch from the beginning until 06:49. Focus on: The definition of taxonomies (tags and categories). How to add them to your content's front matter. The key point that Hugo automatically creates list pages for each tag and category, grouping content for you.
As the video demonstrates, if you add tags: ["seo", "hugo"] to a post's front matter, Hugo automatically understands that it needs to create pages at /tags/seo/ and /tags/hugo/.

Right now, these auto-generated pages might look empty or use a very basic default layout. Our goal is to take control of their appearance by creating a custom template.
Step 2: Creating a Custom Taxonomy Template
To create a custom template, we need to know where to put the file so Hugo can find it. Hugo uses a specific template lookup order. For taxonomy list pages, the logic is very intuitive.
Hugo will look for a template in your layouts/ directory that matches the taxonomy's name.
- To create a template for all
tagspages, you create:layouts/taxonomy/tag.html - To create a template for all
categoriespages, you create:layouts/taxonomy/category.html
If Hugo doesn't find these specific files, it will fall back to more generic list templates, like layouts/_default/taxonomy.html or layouts/_default/list.html. By creating tag.html, we ensure all tag list pages use our custom design.
The article "Add Tags to Your Hugo Blog Using Taxonomies" by Jake Wiesler provides an excellent, concise explanation of this process.
Add Tags to Your Hugo Blog Using Taxonomies
This article provides a clear, practical guide to creating the exact template we need.
Read the sections 'Defining tags in your blog posts' and 'Taxonomy list templates'. Pay close attention to the file path the author uses (layouts/taxonomy/tag.html) and the simple template code provided. This is the core of what we need to implement.
Step 3: Vibe Coding the Template
Now, let's apply our vibe coding workflow. We'll write a prompt to generate the tag.html template. Our prompt will be precise, telling the AI the file name, the required logic, and the desired HTML structure.
Prompt for AI:
Role: You are an expert Hugo template developer.
Task: Generate the Go template code for a custom taxonomy list page that displays all content for a specific tag.
File Details & Format:
- The file should be named
tag.htmland be placed in thelayouts/taxonomy/directory.- The output should be a complete HTML page structure, including a header and footer partial.
Logic and Instructions:
- The main heading (
<h1>) of the page should dynamically display the name of the tag. For example: "Posts tagged with '{{ .Title }}'".- Use a
{{ range .Data.Pages }}block to loop through all the content pages associated with the current tag.- For each page in the loop, display its title (
.Title) inside an<h2>tag, and make it a link to the page's permalink (.RelPermalink).- Below the title, display the page's summary using the
.Summaryvariable.- Add a "Read More" link pointing to the page's permalink.
After running this prompt, you should get a template file that looks something like this. Place it in layouts/taxonomy/tag.html:
{{ define "main" }}
<main>
<h1>Posts tagged with '{{ .Title }}'</h1>
<ul>
{{ range .Data.Pages }}
<li>
<article>
<h2><a href="{{ .RelPermalink }}">{{ .Title }}</a></h2>
<p>{{ .Summary }}</p>
<a href="{{ .RelPermalink }}">Read More →</a>
</article>
</li>
{{ end }}
</ul>
</main>
{{ end }}
Breaking down the code:
{{ .Title }}: In the context of a taxonomy list page, this variable holds the name of the specific term (e.g., "SEO" or "Performance").{{ range .Data.Pages }}: This is the key. Hugo automatically populates the.Data.Pagesvariable with a collection of all pages assigned to the current term. We simply loop over them..RelPermalink,.Title,.Summary: Inside the loop, these variables refer to the properties of each individual page being processed.
Test your understanding!
You want to create a similar template for your categories taxonomy, but with one difference: instead of showing the summary, you only want to show each post's title and its publication date.
What file would you create, and what would the range loop look like inside it?
Show answer
-
File: You would create
layouts/taxonomy/category.html. -
Range Loop: The loop would look something like this:
{{ range .Data.Pages }}
  <li>
    <a href="{{ .RelPermalink }}">{{ .Title }}</a> - <time>{{ .Date.Format "January 2, 2006" }}</time>
  </li>
{{ end }}
We replace
.Summarywith.Dateand use the.Formatfunction to style it.
Step 4: Linking to Your New Taxonomy Pages
Our new tag list pages exist, but how will users find them? The most common way is by clicking on a tag displayed on a single blog post. To do this, we can create a small, reusable partial.
This step perfectly demonstrates how different pieces of the Hugo architecture work together: the single.html template will call a partial, which will generate links pointing to the tag.html list template we just created.
The same article from Jake Wiesler also provides a great example for this. The final two sections show you how to create a partial to render the tags on a page and how to call it from your single page template. This is a great way to complete the feature.
Conclusion
Congratulations! You've now mastered a core concept of content architecture in Hugo. By creating custom taxonomy list templates, you've built valuable landing pages that serve both your users and your SEO strategy by organizing content into logical, navigable hubs.
Key Takeaways:
- Taxonomies like
tagsandcategoriesare used to create logical groupings of your content. - Hugo automatically generates URLs for each taxonomy term (e.g.,
/tags/your-tag/). - You can create custom templates for these pages by following Hugo's lookup order, for example, by creating
layouts/taxonomy/tag.html. - Inside this template, the
range .Data.Pagesfunction is used to loop through and display all content associated with that term.
Preview of the next lesson:
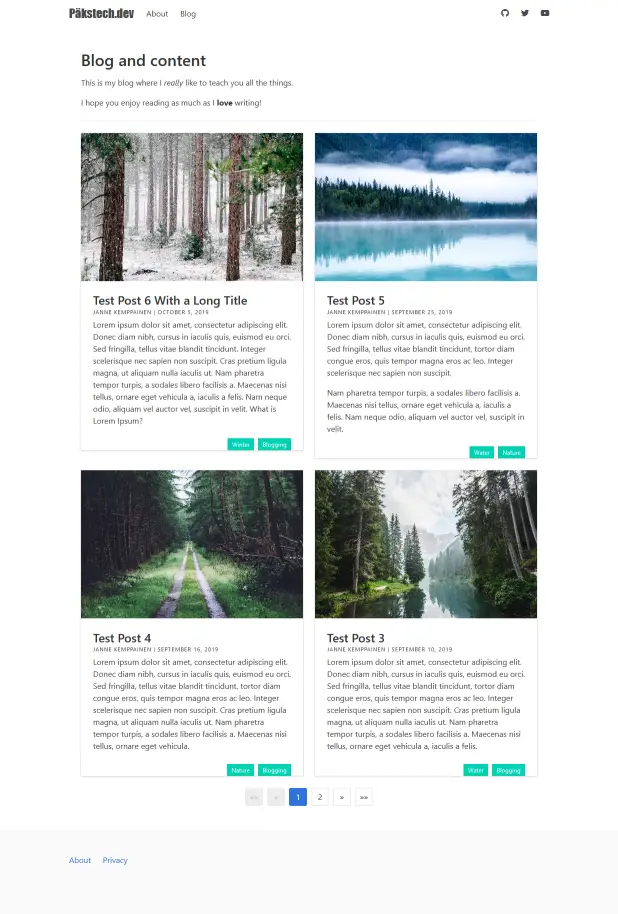
Our taxonomy list pages are functional, but they're visually plain. In the next lesson, we'll dive into aesthetics by learning how to prompt an AI to generate a responsive, card-based grid layout using modern CSS. We can then apply that beautiful layout to the list pages we built today, transforming them from simple lists into professional-looking content showcases.