Hello! Welcome to the final lesson in our course on building complex websites with "vibe coding."
In our last session, we built a crucial bridge between your local development environment and the live web. You successfully connected your Hugo project's Git repository to Netlify, configured the build settings, and created a fully automated deployment pipeline using netlify.toml.
Today, we complete the journey by learning to manage that pipeline. Our goal is to trigger, verify, and troubleshoot an automated deployment from a Git push. You'll learn what a successful deployment looks like, and more importantly, how to systematically diagnose and fix the common issues that arise when a deployment fails. For someone who manages end-to-end digital projects, mastering this final step ensures you can maintain a robust and reliable web presence.
The Deployment Lifecycle: Trigger, Verify, Troubleshoot
The automated workflow you set up is often called a CI/CD pipeline (Continuous Integration/Continuous Deployment). Let's break down the three key phases you'll manage.
1. Triggering a Deployment
As we saw in the last lesson, this part is elegantly simple. The trigger for a new deployment is a git push to the specific branch Netlify is configured to watch—in our case, the main branch.
Every time you push a new commit, Netlify automatically receives a notification from GitHub and queues a new build.
2. Verifying a Successful Deployment
Once a build is triggered, how do you know it worked? There are two main steps for verification.
First, check the Netlify Dashboard.
Your site's dashboard in Netlify provides a log of all deployment activity. A successful deployment will be marked with a "Published" status.
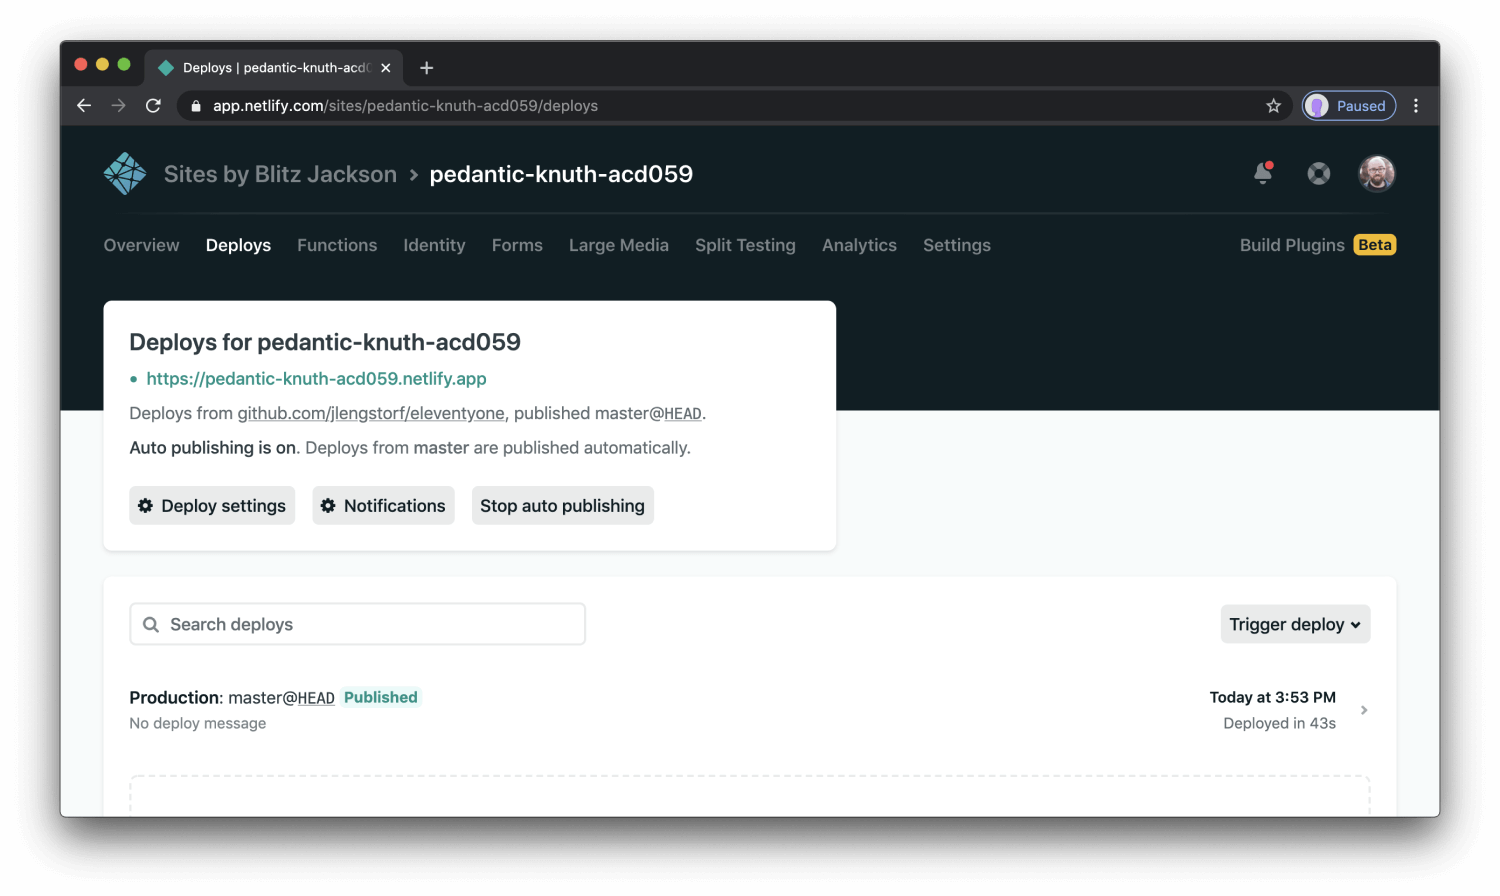
You can click on a specific deployment to view its detailed log. A successful log will show a series of steps without any red error messages, culminating in a message like "Site is live."
Second, visit the live site.
The ultimate verification is to visit your site's URL and confirm that the changes you pushed are visible. This simple act confirms that the entire pipeline—from your git push to Netlify's build process to the final published files—is working correctly.
The following short video demonstrates this exact verification process: connecting to the deployment service, seeing the project deploy, and clicking the link to verify the live site.
How To Deploy Github Project on Netlify (Step By Step)
To see what this verification process looks like in practice, watch this short clip from 'How To Deploy Github Project on Netlify'. It shows navigating the dashboard and accessing the live site after a deployment.
Watch from 01:35 to 02:02. Focus on how the user navigates from the deployment dashboard to the live, functional application by clicking the provided URL. This is the final step in verifying a successful deployment.
3. Troubleshooting Failed Deployments
Inevitably, a deployment will fail. This is a normal part of the development process. The key is to approach it methodically. The deploy log is your single most important tool for diagnosis. It contains a complete record of the build environment, the commands run, and any warnings or errors that occurred.
Let's explore two of the most common reasons a Hugo build fails on Netlify.
Common Issue #1: Hugo Version Mismatch
This is the most frequent culprit. The features available in Hugo change between versions. If your site uses a feature from a newer version of Hugo, but Netlify's build server uses an older version, the build will fail.
The official Netlify documentation for Hugo provides the direct solution to this problem.
The 'Hugo on Netlify' guide explains how to control the Hugo version used during the build process. This is a critical configuration setting for ensuring stable deployments.
Read the section titled 'Hugo version'. Pay close attention to the HUGO_VERSION environment variable and the mention of the exit code: 255 error, which is a classic symptom of a version mismatch.
As the document highlights, if you see an error like exit code: 255 in your log, the first thing to check is your Hugo version. In the previous lesson, we added a netlify.toml file to our project root. The definitive fix is to ensure this file explicitly sets the HUGO_VERSION to match what you use locally (which you can check by running hugo version in your terminal).
# In your netlify.toml
[build.environment]
HUGO_VERSION = "0.124.1" # Or whatever your version is
Common Issue #2: Theme Not Found
If your site uses a theme, the build server needs access to that theme's files. A common mistake is to download a theme into your themes folder locally, but not properly add it to your Git repository. When Netlify tries to build the site, it can't find the theme and fails.
The solution is to add the theme as a Git submodule. This tells Git to track the theme from its own repository, making it available to Netlify during the build.
The Netlify guide we just looked at also covers this. Please refer back to the "Hugo on Netlify" resource and read the section titled Hugo themes for the correct commands.
The error log for this issue will typically contain messages like theme "your-theme-name" not found or errors about missing layout files (e.g., _default/single.html).
Test your understanding!
You push a change to your site, and the Netlify build fails. The log shows this error: Error: failed to build sites: ... function "image.Process" not found. Your site works perfectly on your local machine, where you are running Hugo 0.125.0. Your netlify.toml looks like this:
[build]
command = "hugo --gc --minify"
publish = "public"
What is the most likely cause of the failure, and how would you fix it in your netlify.toml file?
Show answer
The most likely cause is a Hugo version mismatch. The error function "image.Process" not found indicates the version of Hugo being used by Netlify is older and doesn't have the image.Process function. Since no HUGO_VERSION is specified in netlify.toml, Netlify is using its default, older version.
To fix it, you need to add a build.environment table to your netlify.toml and explicitly set the Hugo version to match your local environment:
[build.environment]
HUGO_VERSION = "0.125.0"

[build]
command = "hugo --gc --minify"
publish = "public"
A Real-World Debugging Walkthrough
Let's see how these principles apply in a real-world scenario. The following resource is a short blog post detailing how a developer debugged a failing Netlify deployment. It perfectly illustrates the systematic process of reading logs to find a root cause.
DSLC Slack: Debugging Netlify Deploys · TanHo.ca
This blog post, 'DSLC Slack: Debugging Netlify Deploys', is a case study in troubleshooting. It shows a non-obvious problem and how inspecting the deploy logs revealed the exact configuration issue.
Read the entire post. It's short. Follow the author's chain of logic: from seeing the warning in the log, to checking the build context, to inspecting the netlify.toml file, and finally to arriving at the correct fix.
This case study is brilliant because it combines several concepts:
- Reading the Logs: The entire investigation starts with a
WARNmessage in the deploy log. - Hugo Versioning: The warning points directly to a Hugo version incompatibility.
- Deploy Contexts: The root cause was that
HUGO_VERSIONwas set for theproductioncontext, but not for thedeploy-previewcontext (which Netlify uses for pull requests). This is a subtle but powerful feature of thenetlify.tomlfile.
This kind of diagnostic skill is invaluable and demonstrates true ownership of the development and deployment process.
Conclusion and Course Wrap-Up
Congratulations! You have now mastered the complete lifecycle of a modern static site project. You can not only build and deploy a site automatically but also confidently verify its success and troubleshoot it when things go wrong.
Key Takeaways from this Lesson:
- Automated deployments are triggered by a
git pushto your designated branch. - Verification is a two-step process: check for a "Published" status in the Netlify dashboard and then view the live site.
- The deploy log is your primary tool for troubleshooting failed builds.
- The most common deployment issues are
HUGO_VERSIONmismatches and improperly installed themes. - Using a
netlify.tomlfile to explicitly define yourHUGO_VERSIONand build settings for all contexts (production,deploy-preview, etc.) is the best practice for creating a stable pipeline.
Over the past eight lessons, you've gone from the fundamentals of Hugo to mastering a sophisticated, AI-assisted workflow. You learned to structure content in Google Sheets, prompt an AI to generate templates, build complex layouts, and finally, deploy and maintain your site like a professional. You are now fully equipped to achieve your goal of building complex, dynamic static websites using "vibe coding." Well done