Introduction
In our previous lesson, we engineered robust closure systems for high-impact aquatic scenes, treating the clasp as a critical piece of hardware. However, a secure clasp is only as reliable as the seams it's attached to. The construction of the garment's edges is paramount, as this is where the forces of tension and movement are constantly at play. A poorly finished seam can lead to sagging, discomfort, or catastrophic failure during a performance—a risk that is unacceptable in a professional Bollywood context.
This lesson focuses on a foundational construction skill for all professional swimwear: applying swimwear elastic. We will move from theory to practice, learning how to create a durable, puck-free finish that provides support and withstands the rigors of performance. You'll find that success here is a combination of precise technique and an analytical understanding of material properties—a perfect intersection of your design interests and your background in experimental methodology.
The Engineering of an Elastic Seam
Before we begin sewing, it's crucial to understand the purpose of elastic in a swimwear seam. It serves three primary functions:
- Structural Integrity: It reinforces the fabric edge, preventing it from stretching out of shape over time, especially when wet.
- Negative Ease and Fit: It actively pulls the garment edge against the body, ensuring a snug, secure fit that prevents gaping during movement.
- Recovery: It provides the seam with memory, allowing it to stretch during a dance move and return to its original shape without distortion.
Our goal is to create a seam that lies perfectly flat when at rest but has the hidden potential to stretch and recover flawlessly. This requires a careful selection of materials and stitches.
Material and Stitch Selection
The durability of your seam begins with choosing the right components.
Thread: As we've discussed, swimwear faces a harsh environment of chlorine, salt, and UV light. For all structural seams, a high-quality, UV-resistant polyester thread is the industry standard. It offers superior strength and chemical resistance compared to nylon. For edges that will be in direct contact with the skin, you might consider using woolly nylon in the serger loopers or bobbin. Its soft, fluffy texture provides a more comfortable, chafe-free finish without compromising the structural integrity provided by the polyester needle thread.
Stitches: A standard straight stitch has no stretch and will snap under tension. Therefore, we must use stitches that are specifically designed to elongate with the fabric.

The article below provides an excellent overview of the essential sewing techniques for swimwear. Pay close attention to the discussion of stitch types.
Bathing Suit Thread: Ultimate Guide to Durable Swimwear ...
This guide from MaggieFrameStore covers the essential techniques that differentiate professional swimwear construction. We will focus on the section covering stitches and needles.
Please read the section titled Swimwear Sewing Techniques. Focus on the descriptions of the Zigzag Stitch, Three-Step Zigzag, and Stretch Stitch (Lightning Bolt). These are the primary tools you'll use to apply elastic with a standard sewing machine.
As the article notes, the three-step zigzag is particularly effective for attaching elastic, as it distributes tension evenly and is highly resistant to "popped stitches."
Calculating Elastic Reduction: A Systematic Approach
One of the most common mistakes in swimwear construction is using the wrong length of elastic. Too much, and the seam will be wavy and loose. Too little, and the seam will pucker and feel constrictive. Rather than guessing, we can determine the optimal length with a simple calculation, an approach that should resonate with your background in experimental design.
This process, often called elastic reduction, ensures the tension is perfectly matched to the fabric's properties. The following resource breaks this down into clear, logical steps.
How Elastic Works in Swimwear / Dance wear / Athletic wear – mislopecustom
This article from mislopecustom provides a quantitative method for calculating the correct elastic length based on the specific properties of your fabric and elastic.
Read the section from How to Reduce Elastic. Follow the four steps provided: testing the fabric stretch ratio, testing the elastic's stretch, determining the total desired stretch, and finally, calculating the required elastic length.
By systematically measuring the properties of your materials, you can engineer the seam's performance instead of relying on trial and error. This is a more efficient and reliable workflow. As a practical rule of thumb, many designers use the "25% Stretch Rule" mentioned in the Bathing Suit Thread article, where the elastic is cut about 25% shorter than the opening. The calculation method you just read provides a more precise, first-principles approach.
Application Technique 1: The Quartering Method
For closed loops like leg openings, armholes, or waistbands, the most reliable way to ensure the elastic is applied evenly is the quartering method. This technique mechanically prevents uneven distribution of tension. The following video provides a clear, step-by-step demonstration of this essential process.
How to sew elastic in swimwear and activewear - beginner friendly tutorial
The "Sewing For A Living" channel offers this detailed tutorial on applying elastic. We will focus on the systematic method of dividing and pinning before sewing.
Watch these segments to master the quartering method: First, see how to prepare the elastic by closing it into a loop and marking quarters. Next, observe how to mark the corresponding quarters on the garment opening. Finally, watch the process of pinning and sewing the elastic to the fabric, stretching gently between the quarter marks to ensure even distribution. You can use either a zigzag stitch on a sewing machine or a serger.
This method is precise and repeatable, removing guesswork and guaranteeing a balanced finish.
Application Technique 2: The Two-Pass Fold-Over Method
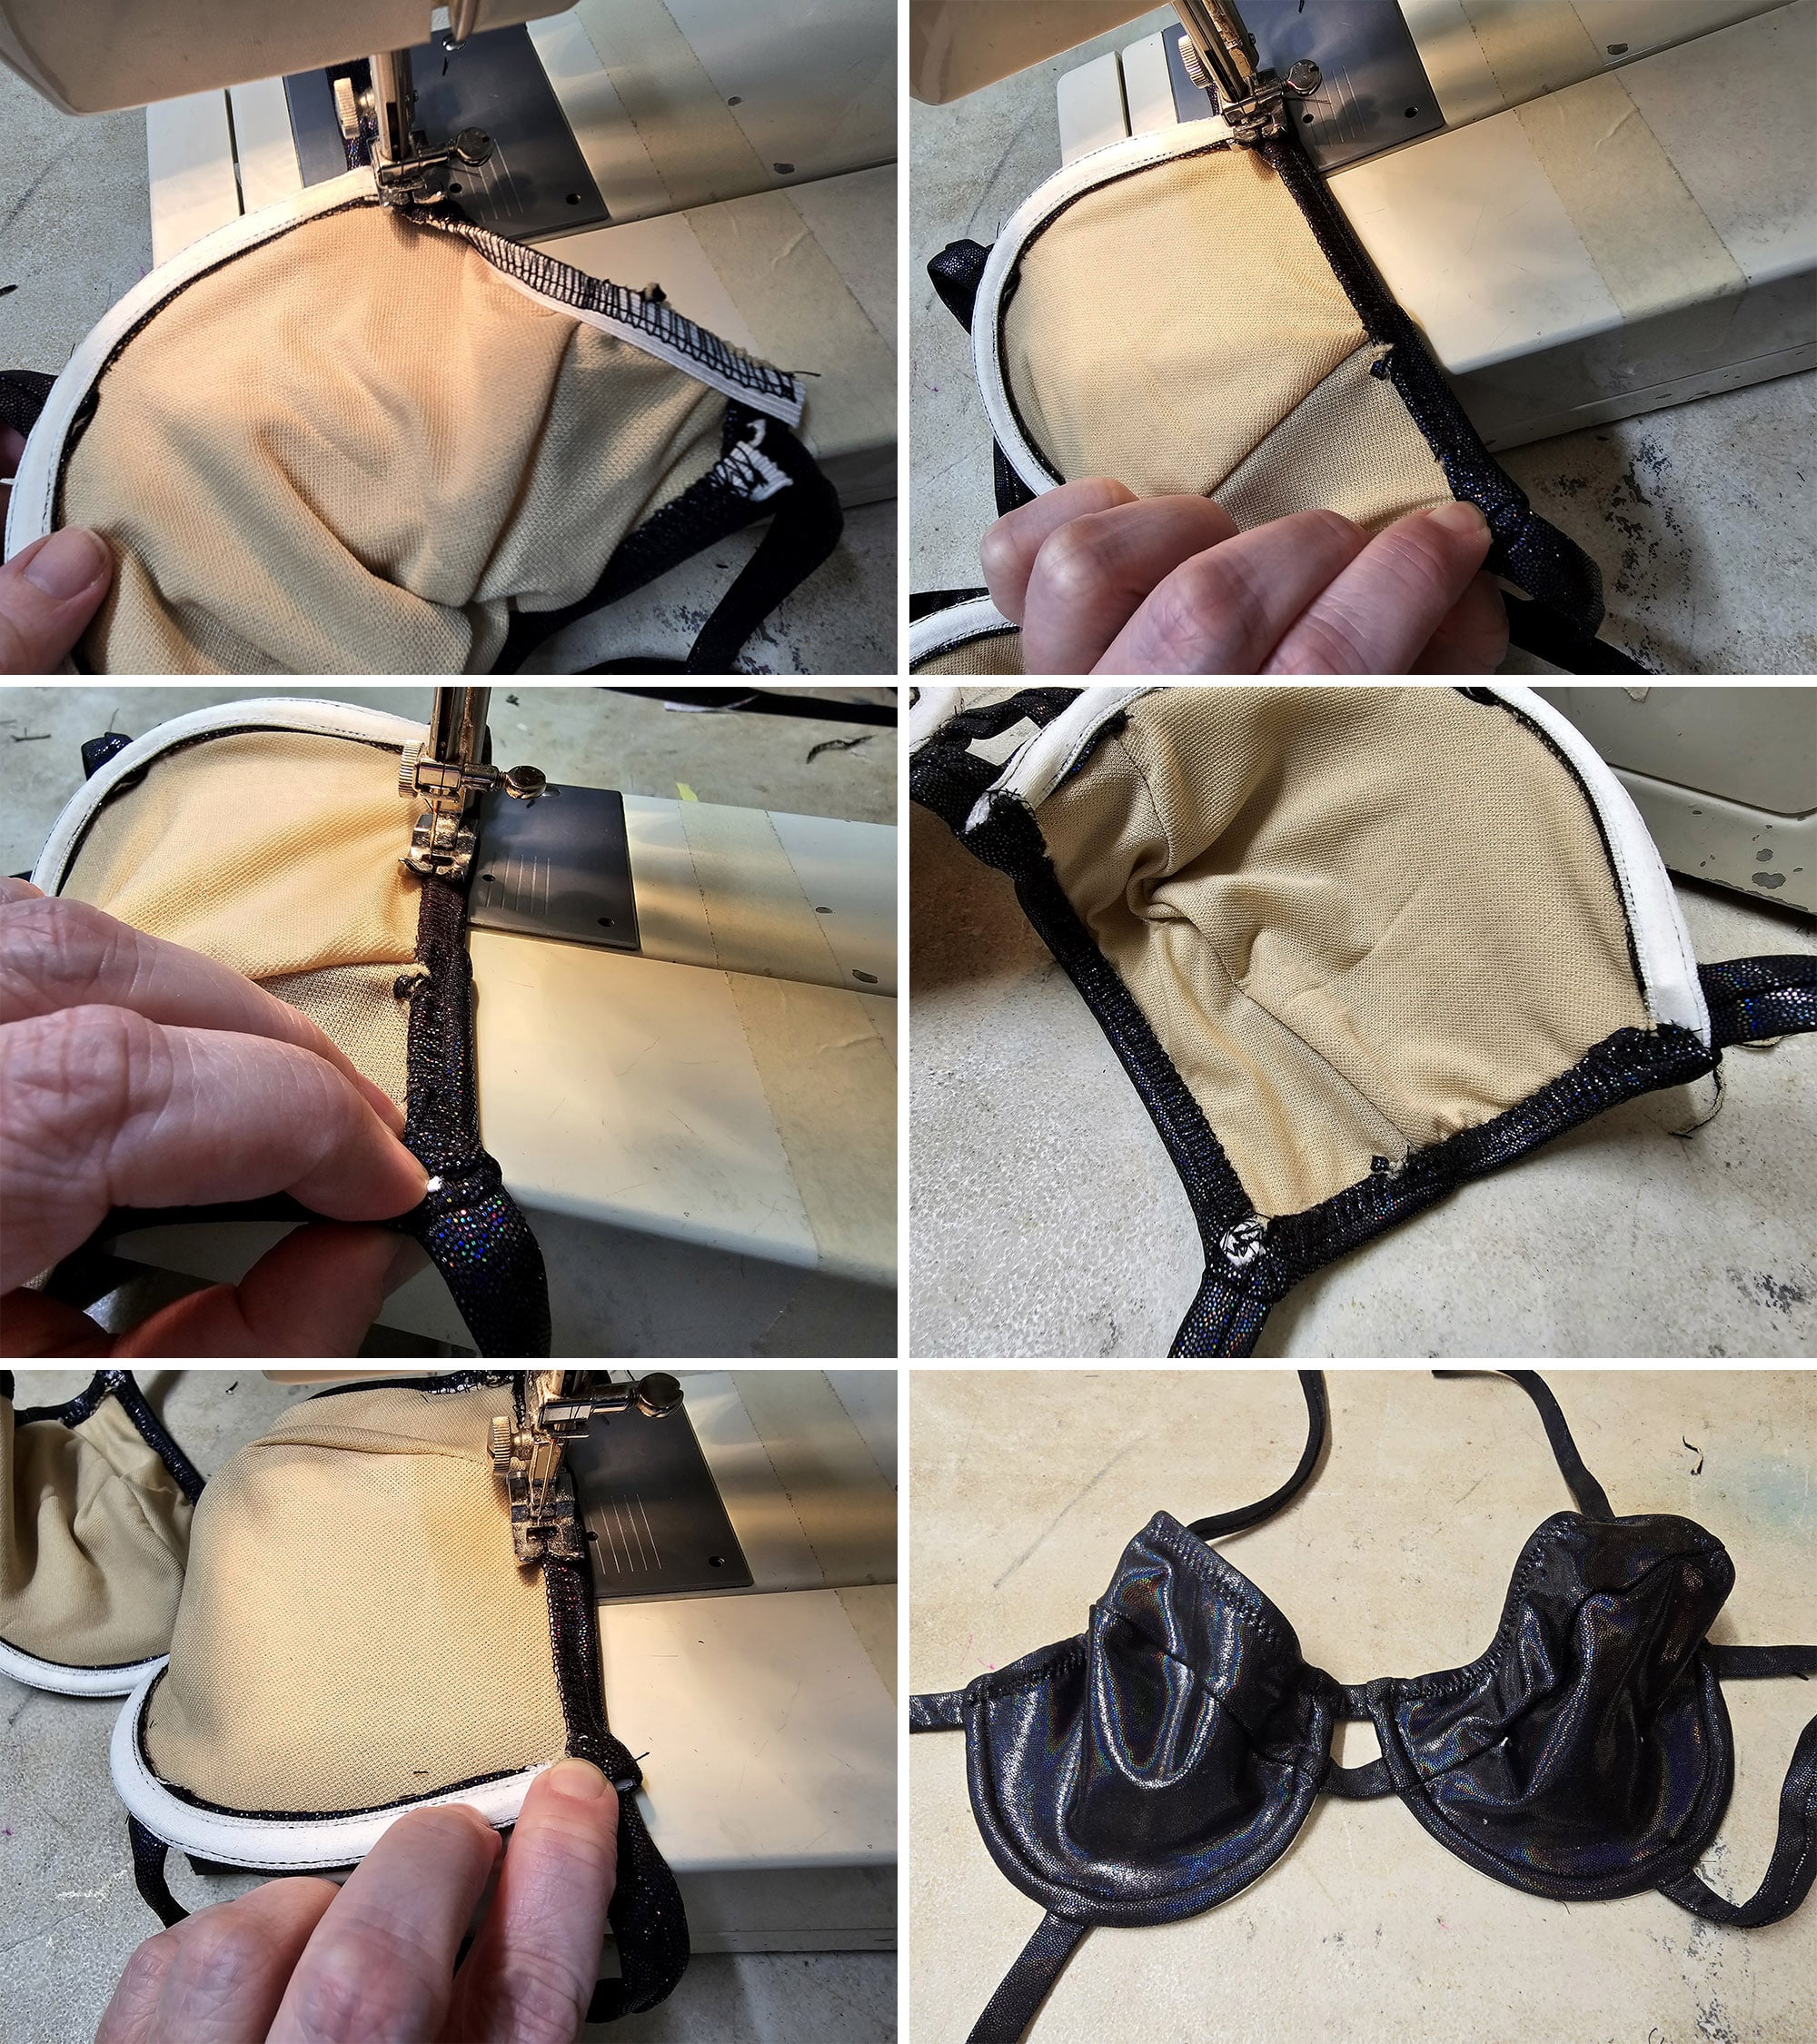
This is the standard professional technique for finishing swimwear edges. It's a two-step process: first, the elastic is attached to the raw edge on the inside of the garment; second, the elastic is folded inward again and topstitched from the right side.
This is where many beginners struggle with wavy or puckered seams. The key to success is an almost paradoxical instruction: you must hold the elastic taut but not stretch it (unless a specific design requires gathering). The following video explains this crucial distinction and introduces the invaluable professional tip of basting your elastic first.
The Best Way to Sew Elastic into Swimsuits and Underwear with Patterns for Pirates
This video from Patterns for Pirates provides a masterclass in the subtleties of elastic application.
Please watch the following sections carefully: Why you must baste your elastic first. Think of this as a preliminary test run; it takes a few extra minutes but can save you from the immense frustration of unpicking a serged or dense zigzag seam. Understanding the "taut" vs. "stretched" concept. The presenter explains why the fabric naturally wants to stretch as it feeds into the machine and how holding the elastic taut counteracts this, preventing wavy seams. After basting, the final stitch is applied with a serger or stretch stitch. With the elastic already secured by the basting, this pass is simple and fast.
Once the elastic is attached, you turn it to the inside one more time and topstitch it in place. This encases the elastic and creates a clean, durable edge.
Quality Control: The Puck-Free Finish
Your final seam should lie flat. If it's wavy, you eased in too much elastic (or stretched the fabric). If it's puckered or gathered, you stretched the elastic too much during application. If you followed the advice to baste first, correcting this is as simple as removing the long basting stitches and trying again.
To formalize your quality control, you can adopt the 50% Stretch Test Protocol from the Bathing Suit Thread article you reviewed earlier.
- Sew a test seam on a scrap of your project fabric with the elastic applied.
- Mark a 4-inch section along the seam.
- Stretch this section to 6 inches (a 50% stretch).
- Check for any popped threads or distortion in the fabric.
- Release the tension and ensure the seam returns to its original 4-inch length without any puckering or sagging.
If it passes this test, your construction method is sound and ready for the final garment. This turns a subjective assessment ("it looks good") into a quantifiable measure of performance, a methodology perfectly suited to your analytical skill set.
Conclusion
Today we've moved from designing structures to mastering the techniques that bring them to life. Applying elastic correctly is a non-negotiable skill that defines the line between amateur and professional swimwear. By combining precise material selection, quantitative calculation, and methodical application techniques, you can create seams that are not only beautiful but also engineered to perform under the demanding conditions of a Bollywood production.
Key Takeaways:
- Materials Matter: Use high-quality polyester thread and specialty swimwear elastic for maximum durability against chlorine, salt, and UV.
- Use Stretch Stitches: Employ a zigzag, three-step zigzag, or lightning stitch to allow the seam to stretch with the fabric.
- Calculate, Don't Guess: Use the elastic reduction formula or a reliable heuristic like the 25% rule to determine the correct elastic length.
- Baste First: A preliminary basting stitch is the professional's secret to avoiding frustration and achieving a perfect, puck-free finish.
- Master Tension: Learn the feel of sewing with the elastic held "taut" to counteract the fabric's natural stretch, preventing wavy seams.
- Test Your Work: Use a stretch test protocol to objectively verify the resilience and recovery of your seams.
Next Lesson Preview
Now that we can create a perfectly finished edge, our next lesson will explore a technique for creating garments with no visible edges at all. We will learn how to construct invisible seams to create reversible bikini tops, a valuable skill for providing multiple looks with a single garment for quick on-screen changes.