Introduction
In our last lesson, we explored the critical balance between aesthetic ornamentation and structural integrity, establishing how to engineer a garment to support heavy embellishments. We learned to think of a bra's design as an integrated system where reinforcement and placement strategy are paramount. The success of that system, however, rests entirely on the quality of its construction. Today, we transition from planning the structure to building it.
This lesson marks the beginning of our module on professional construction techniques. We will start with the heart of the bra: the cup. Specifically, you will learn how to construct a three-part cup, focusing on the precise seam alignment required to create a smooth, exceptionally supportive shape. This skill is fundamental for your goal of designing for Bollywood, where garments must withstand vigorous dance while providing a flawless silhouette. The seams you create are not merely joining fabric; they are engineered vectors that direct support and shape the bust.
Why Three-Part Cup Construction Matters
As we've previously discussed from a pattern-drafting perspective, multi-part cups offer superior fit and shaping capabilities compared to simpler darted or two-part cups. From a construction standpoint, the seams become load-bearing lines.
The article "Designing a bra that supports the DD cup" by Van Jonsson Design offers a succinct reminder of this principle.
Designing a bra that supports the DD cup — Van Jonsson Design
This article reinforces the structural advantages of multi-part cups, which is the foundational concept for this lesson.
Please read the short section that begins The more seams you have. Pay particular attention to the author's statement about seam direction: "a vertical seam will provide up lift to your breast."
This concept of a vertical seam providing lift is a direct application of structural engineering. The seam acts as a tensioned column, counteracting the downward gravitational pull on the breast tissue. Your hobby of designing tops and bras has likely given you an intuitive feel for this, but now we will master the precise construction that makes this principle effective under high-stress conditions.

Step 1: Preparation for Precision
A perfectly constructed cup begins long before you touch the sewing machine. The accuracy of your cutting and the stability of your materials are foundational. For most Bollywood applications, especially when using delicate or embellished fabrics, you will construct a double-layered cup using a fashion fabric and a stable lining, often with foam or other interfacing sandwiched between them.
The video "How to make a Double-Layered Three-Part Bra Cup" by LarryB Threads provides an excellent overview of the entire process, starting with material preparation. We will refer to different parts of this video as we go.
How to make a Double-Layered Three-Part Bra Cup : Perfect Fit for Any Bust Size
First, let's observe the material preparation stage. This step is crucial for ensuring your fabric pieces are stable and don't stretch or warp during sewing.
Watch the segment on preparing the fabrics. Notice how interfacing (hair stay) is fused to the main fabric, and a bra foam lining is prepared by fusing the lining fabric to it with hemming gum. This creates stable, non-fraying pieces that are much easier to sew accurately.
Accurate cutting and the transfer of all pattern markings, especially notches, are non-negotiable. These marks are your guideposts for perfect alignment.
Step 2: Assembling the Cup
Constructing a three-part cup involves a specific order of operations to ensure all seams are enclosed for a professional, comfortable, and durable finish. We will follow a method that creates a "sandwich" of fabric layers. The blog post "Let’s make a bra: construction" from duck goes oink provides exceptionally clear instructions for this process.
Let’s make a bra: construction | duck goes oink
This guide details the 'sandwich' and 'burrito' techniques for creating a fully lined three-part cup with perfectly enclosed seams.
Please read the entire section titled Step 3: Sew the cups. Pay close attention to: The Lower Cup: Study the instructions under "Prepare the lower cup". The specific stacking order of main fabric and lining pieces is the key to enclosing the vertical seam. Attaching the Upper Cup: Follow the logic for attaching the upper cup. The real magic happens in the "burrito" method. Carefully read the steps for rolling the lower cup to enclose the horizontal seam. This is a hallmark of high-quality construction.
As you read, visualize the pieces from a flat pattern, like the one shown in the "Full Band Bra Draft" image, coming together to form a three-dimensional object.
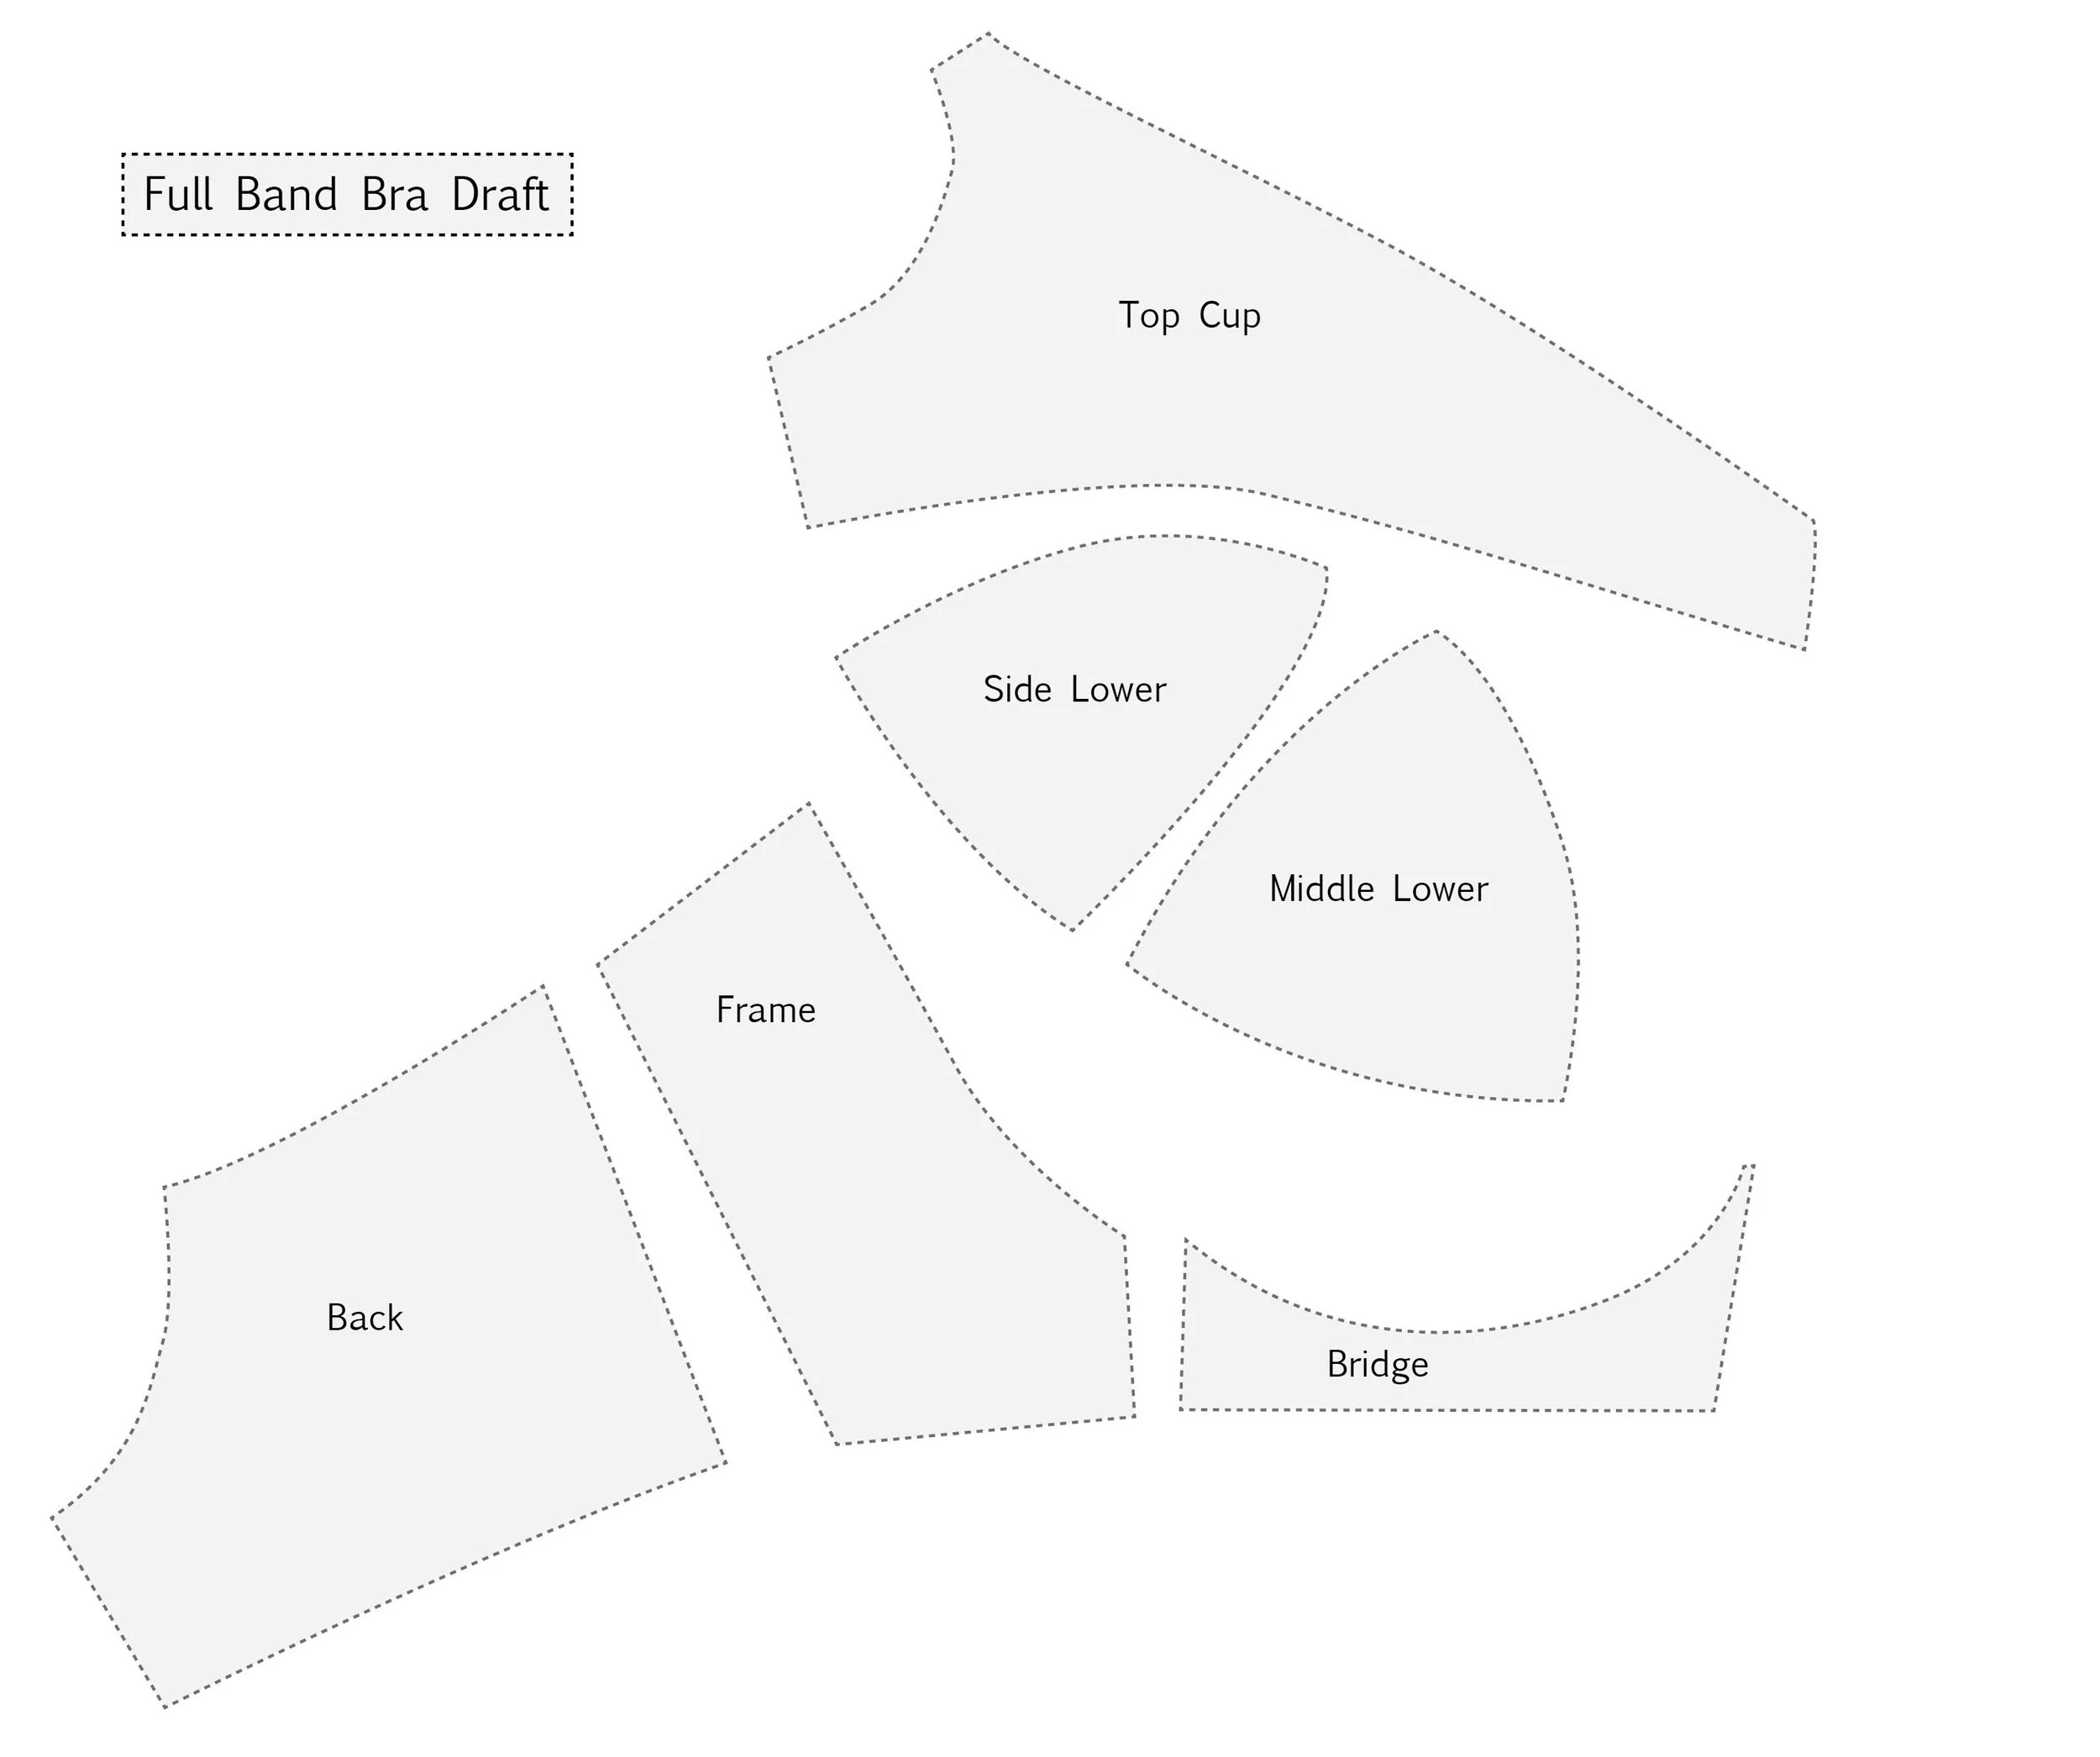
Step 3: Sewing and Topstitching for Strength
With your fabric pieces prepared and the assembly logic understood, the next phase is stitching. During this process, two techniques are vital: using a short stitch length for strength and topstitching to reinforce the seams.
Topstitching is not merely decorative. It flattens the seam allowance on the inside and adds an extra line of stitching that helps the seam hold its intended curve under stress. In the context of your statistical background, you can think of it as a deliberate intervention designed to improve the structural performance of the seam.
The LarryB Threads video provides a clear visual for this phase.
How to make a Double-Layered Three-Part Bra Cup : Perfect Fit for Any Bust Size
This part of the video demonstrates the actual stitching of the cup pieces, including the critical topstitching step.
Watch the segment from sewing the cup pieces. Observe how the lower cup pieces are joined first, followed by the upper cup. Most importantly, notice how after each seam is sewn, it is opened and topstitched. This action is what ensures a crisp, strong, and smooth seam line on the final cup.
Step 4: The Final Shape: Pressing on a Curve
This is arguably the most critical step in achieving a professional, smooth, and genuinely supportive cup. Sewing curved seams introduces tension into the fabric. If you press the cup on a flat ironing board, you will flatten its 3D shape, creating wrinkles and distortion. You must use a tailor's ham (or a dedicated bust ham) to press the seams, preserving and enhancing the cup's rounded form.
Pressing on a ham "sets" the shape. It molds the fabric and seams into their final three-dimensional configuration, allowing the cup to perfectly encapsulate and support the breast.
How to make a Double-Layered Three-Part Bra Cup : Perfect Fit for Any Bust Size
This final clip demonstrates the essential finishing touches that give the cup its final shape and professional appearance.
First, watch the detailed demonstration of ironing on a bust ham. The instructor carefully presses the seam allowances open on the ham, working in small sections to perfectly follow the curve. This is what creates the flawless, rounded shape. Notice the result: you can see the depth that is achieved. Next, watch how the main cup and lining cup are sewn together along the top edge and turned, creating the final, clean-finished, double-layered cup.
Case Study: Construction for a High-Impact "Sangeet" Dance Number
Scenario: A lead actress is performing a high-energy, acrobatic dance routine for a film's Sangeet sequence. Her costume is a modern, minimalist choli that offers no independent support. The bra underneath must provide complete control and lift while remaining invisible.
Analysis & Solution:
A three-part cup is the only viable option. The design challenge is purely structural.
- Pattern & Materials: A three-part cup pattern with a strong vertical seam is used. The cup is constructed from a rigid, non-stretch lining material, fused with a medium-density bra foam for shape.
- Construction Process:
- Precision Assembly: The pieces are assembled using the "sandwich" and "burrito" methods described in the duck goes oink article to create a perfectly smooth interior, preventing any possibility of chafing during intense movement.
- Reinforced Seams: All seams are sewn with a short stitch length (e.g., 2.0mm) and meticulously topstitched. This structural reinforcement is critical to prevent the seams from stretching or weakening under the multi-directional forces of the dance.
- Molding the Shape: Each cup is painstakingly pressed on a bust ham after each seam is sewn. This process essentially "molds" the foam and fabric into a rigid, supportive shell that matches the desired bust shape exactly. The final cup is not a soft piece of fabric but a lightweight, engineered component.
The result is a cup that provides unyielding support, lift, and a perfectly smooth silhouette under the choli, allowing the actress to perform without restriction. The precision of the seam alignment and the molding process are directly responsible for this success.
Conclusion
Today you have learned that constructing a three-part bra cup is an act of engineering. The smooth, supportive shape demanded by professional costume design is not an accident; it is the direct result of precise, methodical construction.
Key Takeaways:
- A three-part cup's superior support is realized through precise construction.
- Enclosing seams using "sandwich" and "burrito" techniques creates a durable, comfortable, and professional product.
- Topstitching is a functional reinforcement that helps a seam maintain its intended curve under stress.
- Pressing on a tailor's ham is a non-negotiable step to mold the cup into its correct three-dimensional shape.
Next Lesson Preview
Having mastered the construction of the cups, we must now build the chassis to which they will attach. In our next lesson, we will focus on assembling the bra frame, which consists of the bridge and bands. You will learn how to construct these components and attach them correctly to the cups you've just made, taking another crucial step toward completing the bra's foundational structure.