Hello! In our last lesson, we introduced the core principles of writing a production-ready Dockerfile. We touched upon selecting base images, optimizing layer caching, using .dockerignore, the power of multi-stage builds, and the security benefits of running as a non-root user.
Today, we'll solidify that knowledge by focusing on the practical application of these best practices. We'll move beyond theory and dissect the anatomy of a truly efficient and secure Dockerfile for a Python service. Our goal is to transform a basic, inefficient Dockerfile into a professional template that you can confidently use for your microservices.
1. From a Mess to a Masterpiece: An Optimization Journey
Often, the best way to understand best practices is to see the dramatic difference they make. We'll start with a common, but flawed, Dockerfile and progressively optimize it.
The following video from ArjanCodes provides an excellent demonstration of this process. We will walk through it together.
This Is How You Write an Efficient Python Dockerfile
First, let's look at the starting point. This segment introduces a simple FastAPI application and a very basic, inefficient Dockerfile.
Watch the initial part of the video to understand the simple application and the corresponding Dockerfile. Pay attention to the problems identified, such as the final image size (almost 1GB) and build time. This is our "before" picture.
The initial Dockerfile works, but it's slow to build and creates a bloated, insecure image. Let's fix it by applying the principles we've discussed.
2. Laying a Lean and Fast Foundation
The first and most impactful changes involve choosing the right base image and structuring our commands to take advantage of Docker's layer cache.
Choosing a Small, Specific Base Image
As we saw in the video, moving from a generic ubuntu image to a language-specific one like python:3.13-slim-bookworm provides a huge reduction in image size. The slim variants are optimized by removing development tools and documentation that aren't needed at runtime. Using a specific version tag (e.g., 3.13-slim-bookworm) instead of latest also ensures your builds are predictable and repeatable.
This Is How You Write an Efficient Python Dockerfile
This section of the video perfectly illustrates the impact of choosing the right base image.
Watch the explanation of why the default python image is still too large and the benefits of using a slim-bookworm variant. Also, note the reasoning for using specific version tags for build stability.
Optimizing Cache and Reducing Layer Size
To speed up builds, we must order our Dockerfile commands from least to most frequently changing. For a Python app, this means copying requirements.txt and installing dependencies before copying the application source code.
Additionally, you can reduce the final image size by cleaning up temporary files within the same RUN layer they are created in.
This Is How You Write an Efficient Python Dockerfile
This part of the video demonstrates a few powerful techniques for cleaning up our layers.
Focus on how the apt-get command is modified with --no-install-recommends to avoid pulling in unnecessary packages. Then, see how removing apt's cache metadata within the same RUN command further shrinks the image.
3. The Power of Multi-Stage Builds
This is the single most important technique for creating production-ready images. A multi-stage build separates the build environment from the runtime environment.
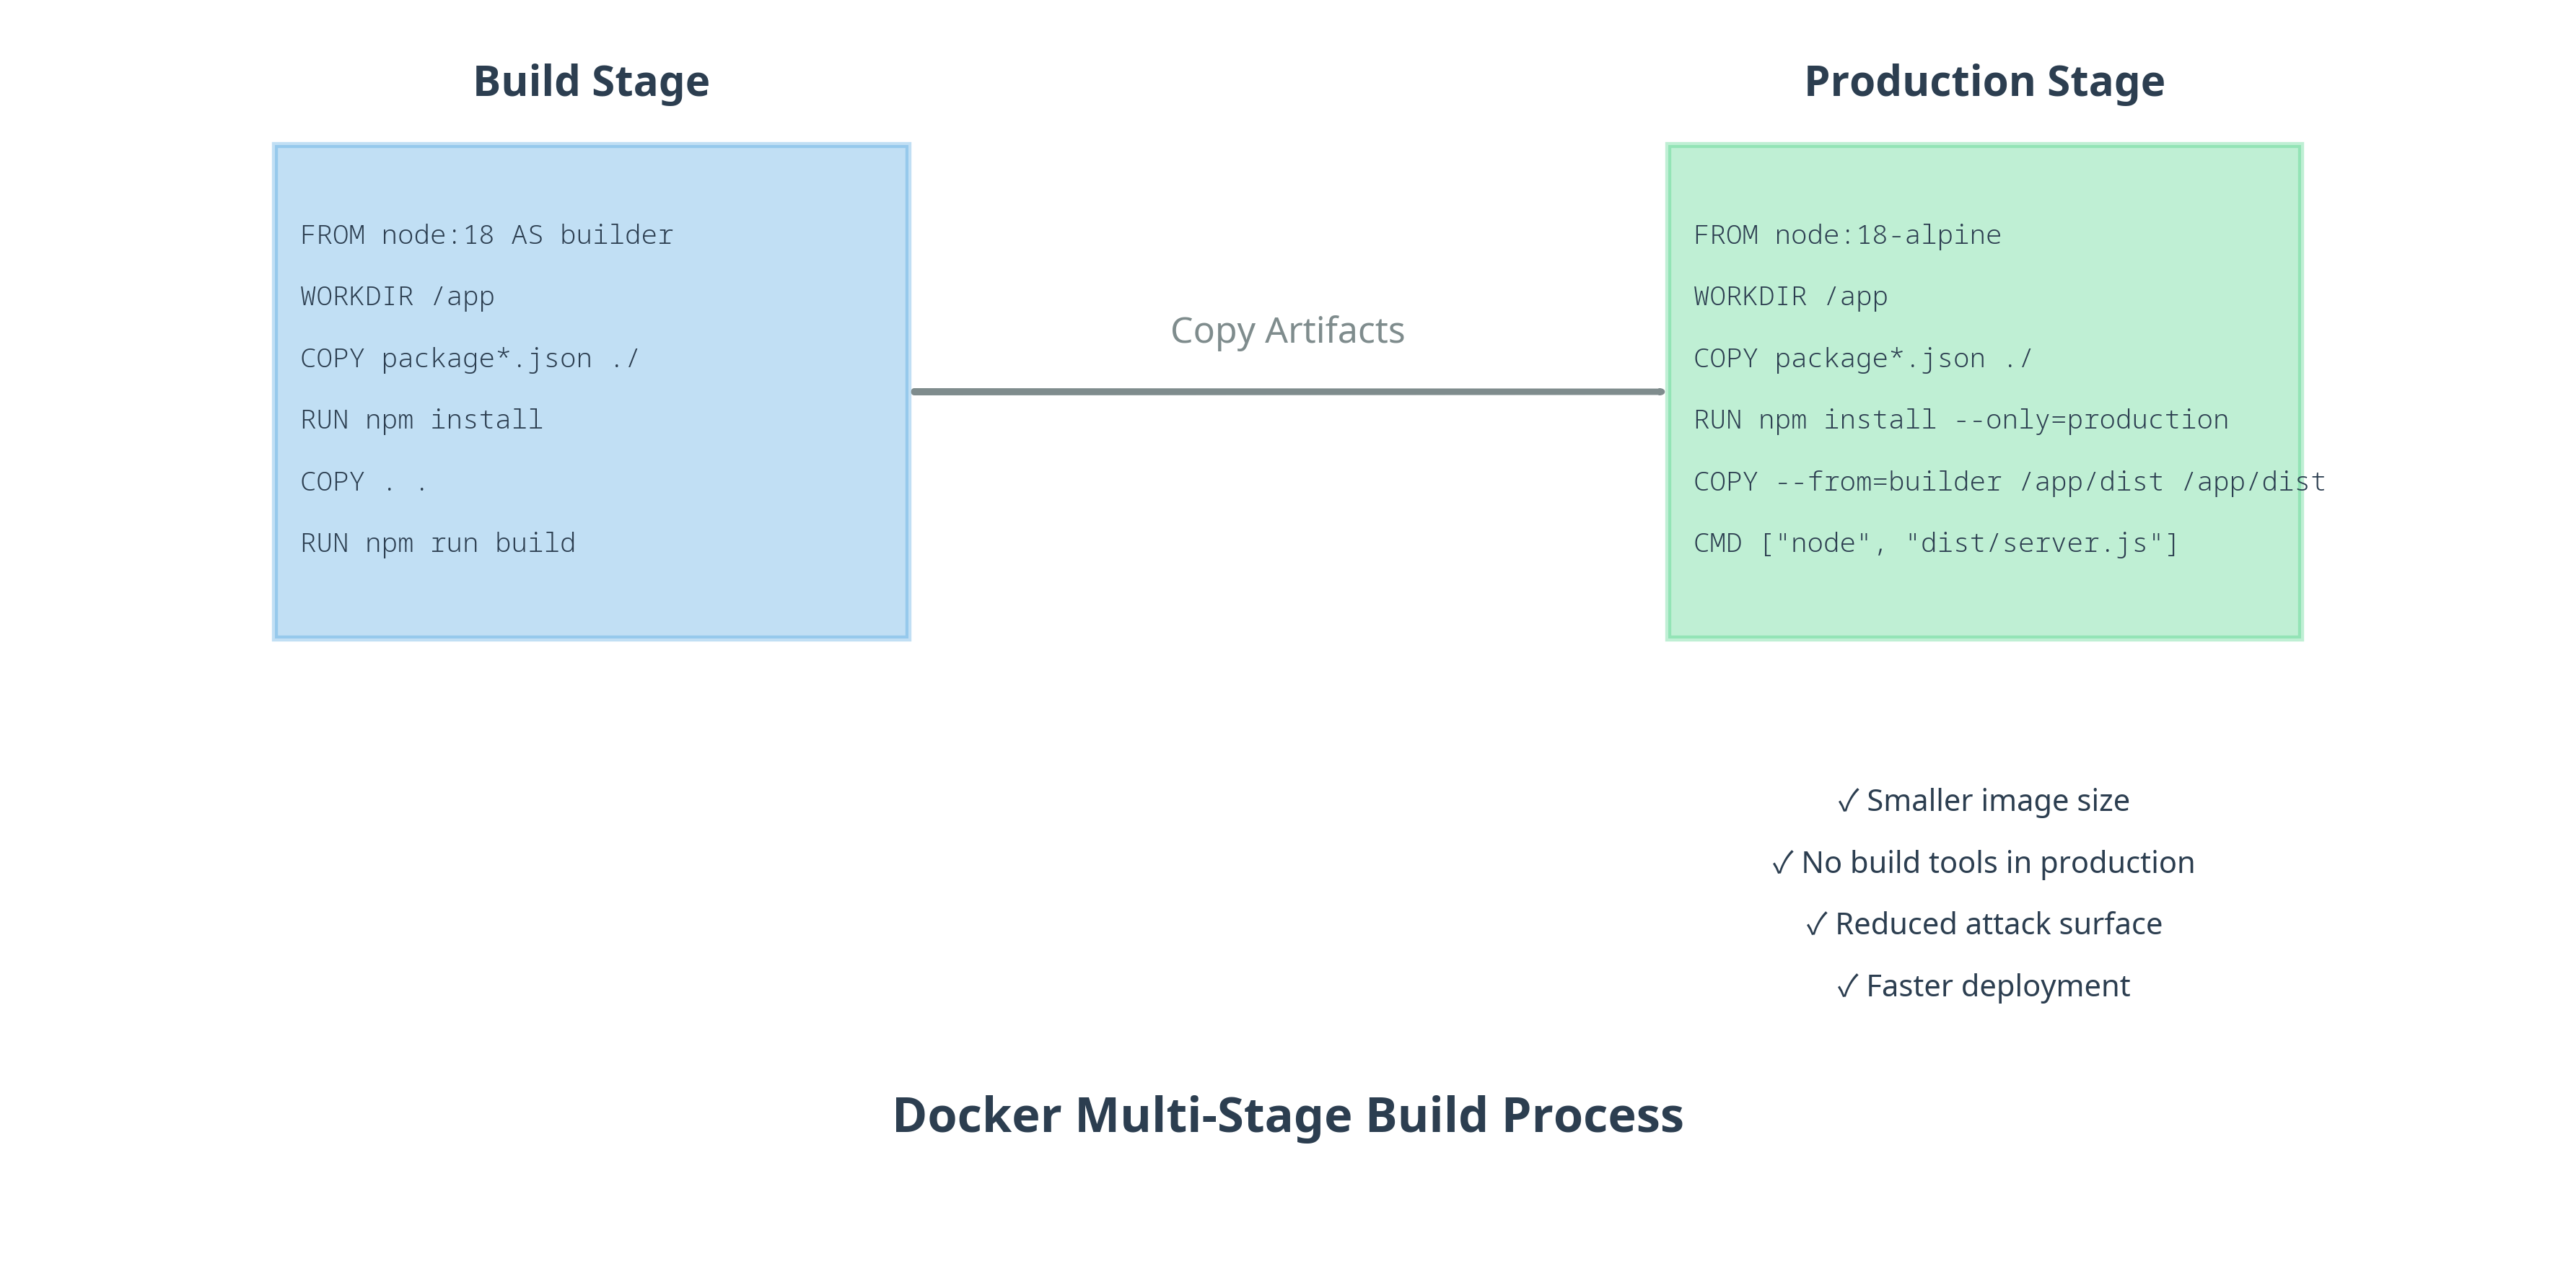
You can use a "builder" stage that contains compilers and development headers (gcc, python-dev, etc.) to install your dependencies. Then, you create a new, clean "runtime" stage and copy only the installed packages and your application code into it, leaving all the build tools behind.
This results in a final image that is dramatically smaller and has a reduced attack surface because it doesn't contain unnecessary tools.
This section from "Docker Best Practices for Python Developers" provides a concise, text-based explanation of multi-stage builds with Python-specific examples.
Read the section titled "Use Multi-stage Builds". Pay attention to the two examples provided (web development and data science) and how the COPY --from=builder command is used to move artifacts from the build stage to the final stage. Notice the significant difference in image size shown for both examples.
Now, let's see this in action. The next video segment demonstrates a practical implementation of a multi-stage build for a Python application.
This Is How You Write an Efficient Python Dockerfile
This is where the magic happens. This segment shows how to refactor the Dockerfile to use a multi-stage build.
Watch closely as a builder stage is defined to create a virtual environment. Then, see how a new production stage is created, and the virtual environment is copied from the builder. Observe the dramatic reduction in both build time and final image size.
4. Running as a Non-Root User
Running your container as the root user is a major security risk. If an attacker compromises your application, they gain root privileges within the container, making it easier to attack the host system.
The best practice is to create a dedicated, unprivileged user inside your Dockerfile and run your application as that user.
This Is How You Write an Efficient Python Dockerfile
This final clip from the video shows how to implement this critical security practice.
Watch how to add a user with the useradd command and then switch to that user with the USER instruction before the CMD is executed.
When you combine this with COPY --chown=appuser:appuser, you ensure your application code is also owned by the non-root user, further locking down permissions.
5. The Production-Ready Template
Let's combine everything we've learned into a single, production-grade Dockerfile. This example is a robust template you can adapt for your async Python microservices.
Multi-Stage Dockerfile with Optimizations
This article provides an excellent, real-world example of a production-grade Dockerfile for a FastAPI application.
Find the code block under the heading "Multi-Stage Dockerfile with Optimizations". Read through the Dockerfile and see if you can identify each of our best practices in action.
Let's break down that Dockerfile to see how it masterfully applies all our principles:
# Stage 1: The "Builder" Stage
# Start from a slim image that includes build tools
FROM python:3.11-slim as builder
WORKDIR /build


# BEST PRACTICE: Install build-time dependencies and clean up in the same layer
RUN apt-get update && apt-get install -y gcc g++ && rm -rf /var/lib/apt/lists/*


# BEST PRACTICE: Copy only requirements to leverage layer cache
COPY requirements.txt .


# Create a virtual environment and install dependencies into it
RUN python -m venv /opt/venv
ENV PATH="/opt/venv/bin:$PATH"
RUN pip install --no-cache-dir -r requirements.txt


# Stage 2: The "Runtime" Stage
# Start fresh from the same slim base image for a minimal final layer
FROM python:3.11-slim


# Set environment variables for Python
ENV PYTHONUNBUFFERED=1
ENV PYTHONDONTWRITEBYTECODE=1
ENV PATH="/opt/venv/bin:$PATH"


# BEST PRACTICE: Create a non-root user for security
RUN useradd -m -u 1000 appuser
WORKDIR /app


# BEST PRACTICE: Copy artifacts from the builder stage
# This brings in the Python packages without any build tools
COPY --from=builder /opt/venv /opt/venv


# BEST PRACTICE: Copy application code and set ownership
COPY --chown=appuser:appuser app/ ./app/


# BEST PRACTICE: Switch to the non-root user
USER appuser

EXPOSE 8000
CMD ["uvicorn", "app.main:app", "--host", "0.0.0.0", "--port", "8000"]
This Dockerfile is:
- Lean: It uses a multi-stage build to discard build tools, resulting in a small final image.
- Fast to build: It leverages layer caching by installing dependencies before copying application code.
- Secure: It runs the application as a dedicated non-root user.
Hands-on Exercise
Now it's your turn to apply these concepts. Below is a Dockerfile with several issues. Your task is to rewrite it to incorporate the best practices we've covered today.
"Bad" Dockerfile:
FROM ubuntu:latest

RUN apt-get update
RUN apt-get install -y python3 python3-pip

COPY . /app
WORKDIR /app

RUN pip install -r requirements.txt

CMD ["python3", "main.py"]
Think about these questions:
- What's wrong with the base image and package installation?
- How is the layer cache being misused?
- What security vulnerability exists?
- How could a multi-stage build make this significantly better?
Take a few minutes to write your improved version before looking at the solution.
Click to see a possible solution
"Good" Dockerfile:
# Stage 1: Builder
FROM python:3.11-slim as builder
WORKDIR /build


# Install build dependencies if any, e.g., for compiling packages
# RUN apt-get update && apt-get install -y gcc && rm -rf /var/lib/apt/lists/*

COPY requirements.txt .
RUN pip install --no-cache-dir --user -r requirements.txt


# Stage 2: Runtime
FROM python:3.11-slim
ENV PYTHONUNBUFFERED=1


# Create and switch to non-root user
RUN useradd --create-home appuser
USER appuser
WORKDIR /home/appuser


# Copy installed packages from builder stage
COPY --from=builder /root/.local /home/appuser/.local


# Add user's local bin to PATH
ENV PATH=/home/appuser/.local/bin:$PATH


# Copy application code as the final step
COPY --chown=appuser:appuser main.py .

CMD ["python", "main.py"]
This solution correctly uses a slim Python base image, applies a multi-stage build, creates a non-root user, and optimizes layer caching. This results in a smaller, more secure, and faster-building image.
Conclusion
You have now mastered the essential best practices for writing production-grade Dockerfiles. By consistently applying these techniques, you will build container images that are small, fast, and secure—a critical skill for any developer working with microservices.
Key Takeaways:
- Multi-stage builds are non-negotiable: They are the key to separating build concerns from runtime reality, producing lean and secure images.
- Order matters for caching: Structure your Dockerfile from the least-to-most-frequently-changed instructions to maximize build speed.
- Always run as a non-root user: This is a simple but powerful security measure that significantly reduces your container's attack surface.
- Be specific with base images: Use minimal, version-pinned base images (like
python:3.11-slim) for smaller, more predictable builds.
Preview of the Next Lesson
We can now build an efficient image for a single microservice. But a microservice rarely lives in isolation. In our next lesson, we will explore custom Docker networks. You will learn how to create a network that allows multiple containers to communicate with each other by name, setting the stage for orchestrating a complete application with Docker Compose.