Welcome to your first lesson. This course is designed to be a rapid, practical journey into the world of Large Language Models, focusing on prompt engineering and model fine-tuning. We'll begin by establishing a solid foundation for all the Python projects we'll build, starting with professional dependency management.
In your self-taught programming journey, you've likely installed Python packages like numpy or requests directly into your main Python installation. This is a great way to start, but as you build more complex applications—especially in a fast-moving field like LLMs—it's crucial to adopt a more robust approach. Today, we'll focus on setting up isolated Python virtual environments. This practice prevents conflicts between projects that might require different versions of the same library and ensures that your work is easily reproducible by others, or by you on a different machine.
By the end of this lesson, you will be able to set up, use, and manage a Python virtual environment for any project, a fundamental skill in modern software development.
The Problem: Dependency Conflicts
Imagine you're working on two projects. Project A is a web scraper that requires requests version 2.20. Project B is a new LLM application that needs a feature only available in requests version 2.31. If you install these packages globally, one project will inevitably break because your system can only have one version of requests installed at a time. This is known as a dependency conflict.
Virtual environments solve this by creating isolated, self-contained directories for each project. Each environment holds a specific version of Python and its own set of libraries, completely separate from other projects and the system's global packages.
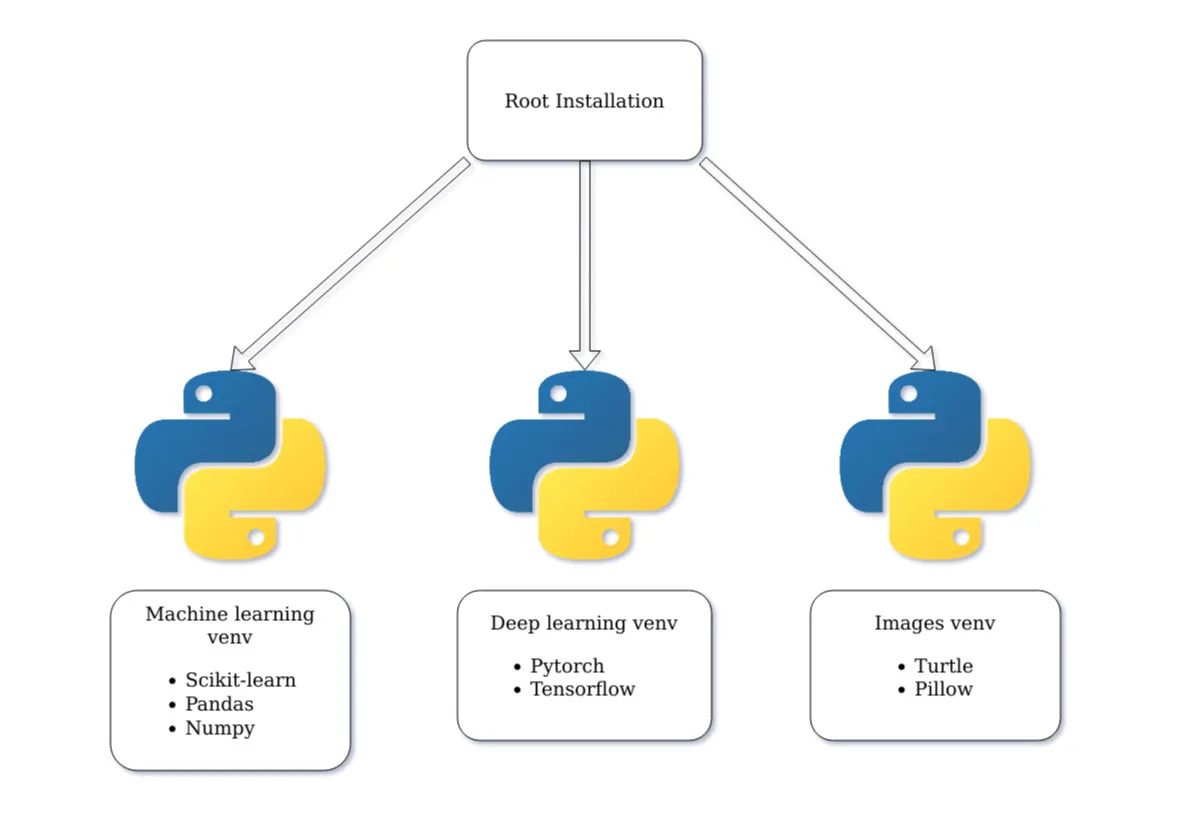
Let's explore the concept and its importance in more detail.
A Complete Guide to Python Virtual Environments (2022) - Dataquest
This article from Dataquest provides a concise explanation of what virtual environments are and why they are a best practice in Python development.
Please read the first two short sections: What Are Python Virtual Environments? and Why Are Python Virtual Environments Important?. This will solidify your understanding of the problem we are solving.
The Solution: The venv Module
Python includes a built-in module called venv for creating virtual environments. Since you're using a modern version of Python, you won't need to install any extra tools. The process involves a few simple commands in your terminal or command prompt.
The entire lifecycle for using a virtual environment follows these steps:
- Create the environment in your project folder.
- Activate it.
- Install your project-specific packages (e.g.,
openai,transformers). - Work on your project.
- Deactivate the environment when you're finished.
The video below provides an excellent walkthrough of this entire process. As you watch, feel free to open a terminal on your own computer and follow along with the commands.
Python Virtual Environments - Full Tutorial for Beginners
This tutorial from Tech With Tim demonstrates the essential commands for creating and managing a virtual environment.
Watch the following key segments to see the process in action: Creating an environment: Note the slight command difference between Windows (python) and macOS/Linux (python3). Activating and deactivating: See how the command prompt changes to show the active environment. Installing packages: Observe how pip list shows only the packages installed in the venv. Managing dependencies: This covers the crucial practice of using a requirements.txt file.
Your Turn: Setting Up Your First Environment
Now, let's put this into practice. We'll create a project folder for this course and set up a virtual environment inside it.
1. Create a Project Directory
Open your terminal (or Command Prompt/PowerShell on Windows) and create a new folder for our course, then navigate into it.
mkdir llm-course
cd llm-course
2. Create the Virtual Environment
Inside the llm-course directory, run the following command. We'll name our environment venv, which is a common convention.
- On macOS/Linux:
python3 -m venv venv - On Windows:
python -m venv venv
You will see a new folder named venv appear in your llm-course directory. This folder contains the Python interpreter and is where your packages will be installed.
3. Activate the Environment
Activation modifies your shell's path to point to the Python executable inside the venv folder. The command differs by operating system and shell.
- On macOS/Linux (using Bash/Zsh):
source venv/bin/activate - On Windows (using Command Prompt):
venv\Scripts\activate - On Windows (using PowerShell):
.\venv\Scripts\Activate
After running the command, your prompt should change to show (venv) at the beginning. This indicates that the virtual environment is active. Any python or pip commands you run now will be specific to this environment.
For a quick reference of activation commands for different shells, you can consult the table in this resource.
How to Create a Python Virtual Environment(Step-by-Step Guide)
This GeeksforGeeks article includes a helpful table summarizing the activation commands for different operating systems and shells.
Find the section Activate the Virtual Environment and look at the table. This is a useful reference if you switch between different terminal applications.
4. Manage Dependencies
With your environment active, you can install packages. Let's try installing the openai library we'll use later.
pip install openai
Now, check the installed packages:
pip freeze
The pip freeze command lists all installed packages and their exact versions. You'll see openai and its dependencies. This output is clean and specific to our project. To make your project reproducible, save this list to a file:
pip freeze > requirements.txt
This creates a requirements.txt file. Anyone else (or you, on a new computer) can now create a fresh virtual environment, activate it, and run pip install -r requirements.txt to install the exact same dependencies. This is the standard way to share Python projects.

5. Deactivate the Environment
When you are done working, simply run:
deactivate
Your command prompt will return to normal. The venv folder and all its packages remain, ready for the next time you activate it.
Conclusion
In this lesson, you have established a foundational skill for all your future Python work. You learned not just the "how" but also the "why" of using virtual environments. This practice moves you from beginner scripting to structured, professional software development.
Our key takeaways are the core commands:
python -m venv <name>: To create a new environment.source venv/bin/activateorvenv\Scripts\activate: To activate it.pip install -r requirements.txt: To install all project dependencies.pip freeze > requirements.txt: To save your project's dependencies.deactivate: To exit the environment.
Always create and activate a virtual environment before starting a new Python project.
In our next lesson, we will continue setting up our project. With our environment ready, we'll learn how to securely manage API keys. This is a critical step before we can start making our first calls to a large language model.