Hello and welcome to your third lesson!
In our last session, we took a "bird's-eye view" of the Fusion 360 interface, identifying the key areas: the Toolbar, Browser, Timeline, and View Cube. You now have a mental map of your digital workshop.
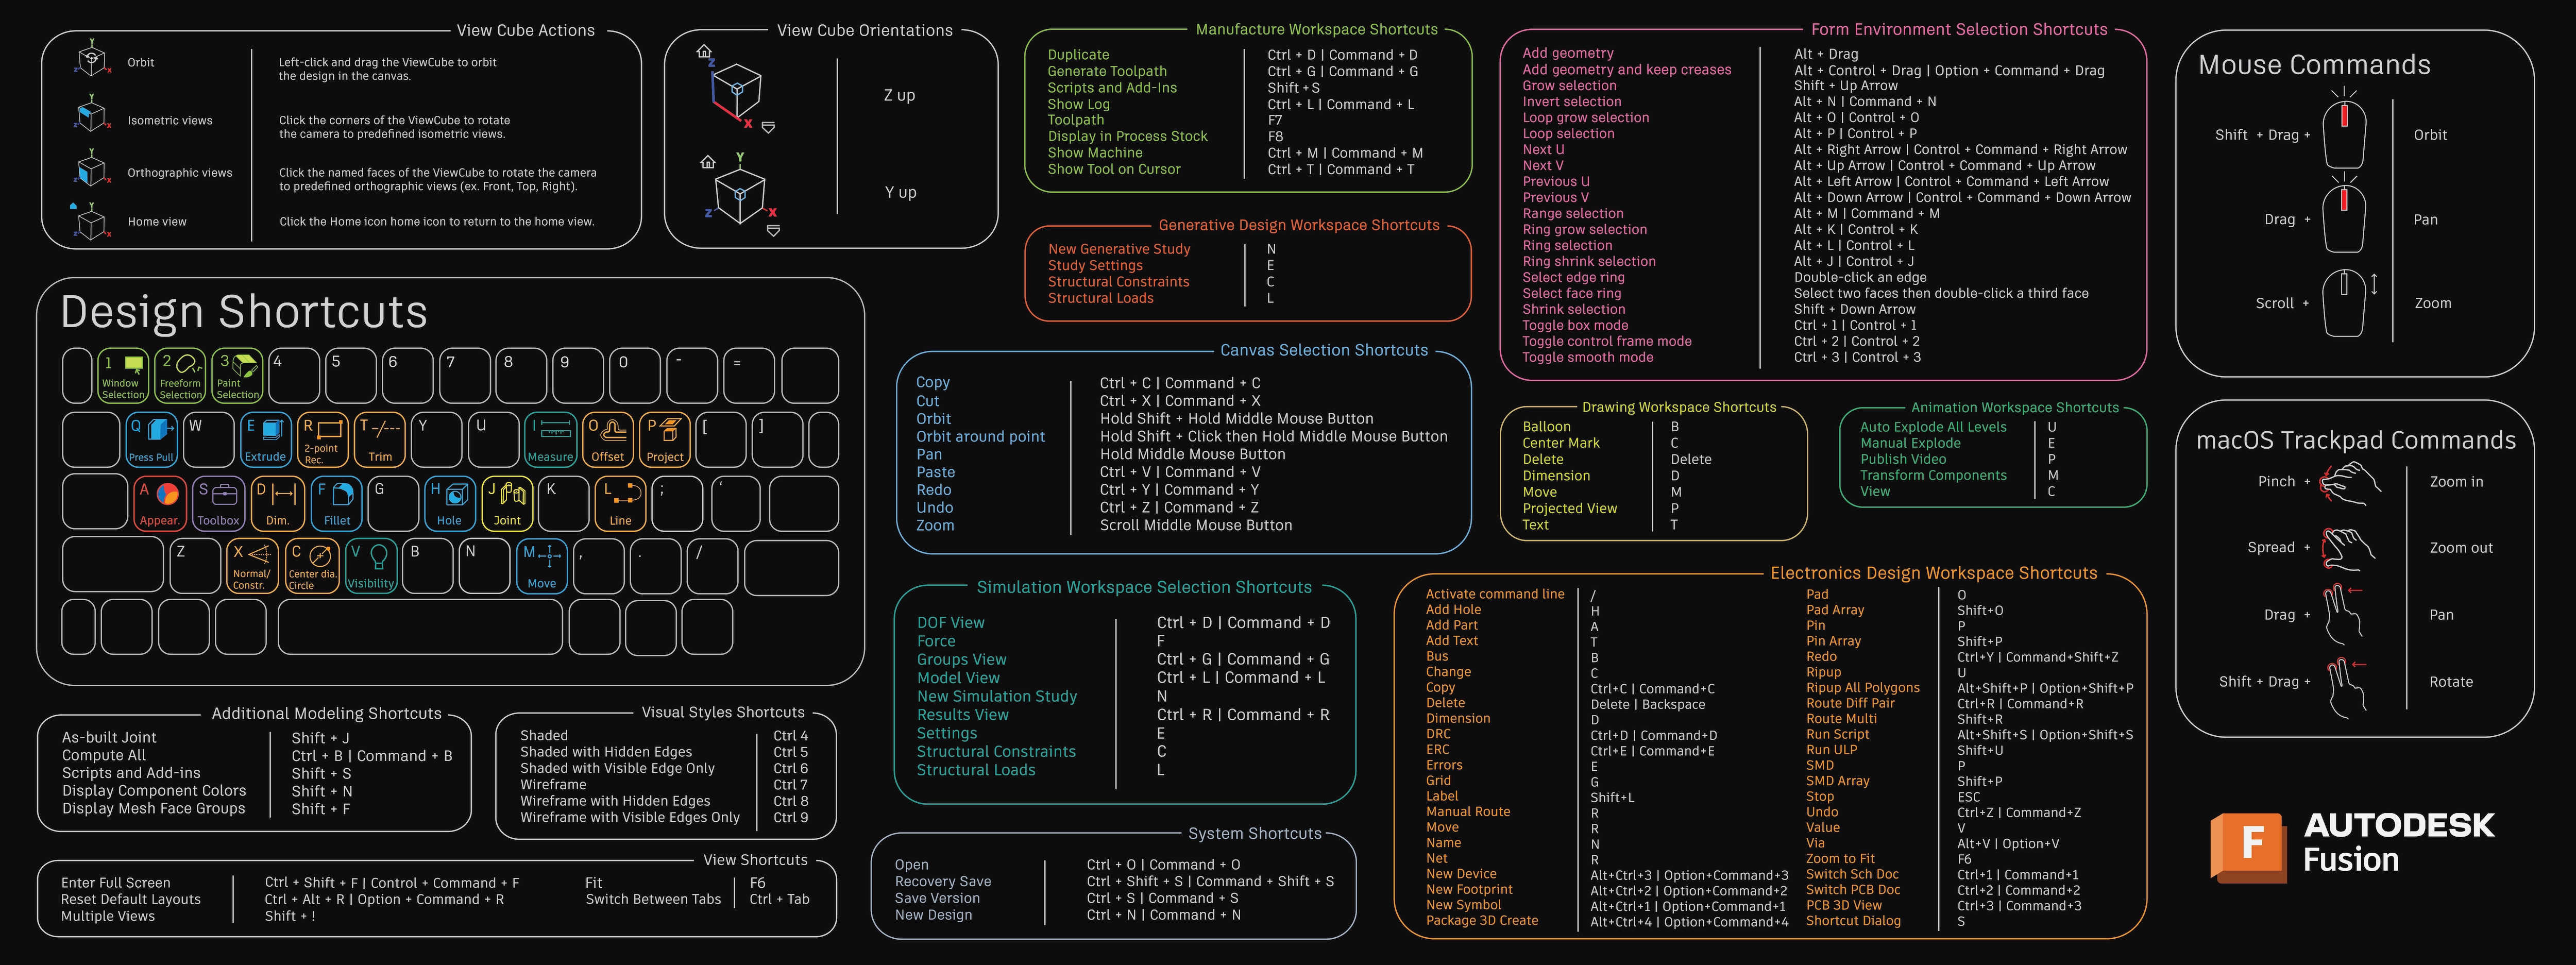
Today, we're going to learn how to move around within that workshop. The goal of this lesson is to master the fundamental skills of manipulating the 3D viewport using orbit, pan, and zoom controls. Being able to effortlessly inspect your model from any angle is a non-negotiable skill for efficient design. Think of it as developing the muscle memory to walk, crouch, and circle around a physical object you're building.
The Three Core Navigation Actions
Before we dive into the "how," let's clarify the "what." There are three essential ways you'll move your camera in the 3D space, which Fusion 360 calls the Canvas:
- Orbit: Rotating your viewpoint around the model, as if you were walking around it.
- Pan: Sliding your viewpoint up, down, left, or right without rotating. This is like crabbing sideways to get a different parallel view.
- Zoom: Moving your viewpoint closer to or further away from the model.
While you can perform these actions using on-screen icons, the most fluid and universally adopted method uses a three-button mouse (a mouse with a clickable scroll wheel). This is the standard for virtually all CAD software, and becoming proficient with it will dramatically speed up your workflow.
The Mouse: Your Primary Navigation Tool
Let's start by learning the most efficient method. The following text from Autodesk's official blog provides a perfect, concise summary of the mouse controls.
How to Navigate the Autodesk Fusion Interface: A Beginners Guide
This guide from the official Autodesk blog clearly explains the fundamental mouse controls for viewport navigation. It's the most common and efficient way to work in Fusion 360.
Please read the section titled 'Viewport navigation'. It's a short section that clearly lists the mouse actions for Pan, Zoom, and Orbit.
To summarize and reinforce what you just read:
- Zoom: Roll the mouse wheel forward and backward.
- Pan: Click and hold the middle mouse button (the scroll wheel) and drag your mouse.
- Orbit: Hold down the
Shiftkey, then click and hold the middle mouse button and drag your mouse.
Now, let's watch a short video that demonstrates these actions so you can see how they look in practice.
Navigate the Autodesk Fusion Interface Like a Pro! [UPDATED!!]
Seeing these controls in action makes them much easier to understand. This clip from the official Autodesk Fusion channel demonstrates the mouse shortcuts for panning and orbiting.
Watch from 04:24 to 05:01. Pay close attention to how the middle mouse button is used for panning, and how combining it with the Shift key enables orbiting.
Alternative Methods: The Navigation Bar & ViewCube
What if you don't have a three-button mouse or prefer using on-screen icons? Fusion 360 provides tools for that in the Navigation Bar and ViewCube.
-
The ViewCube: As we covered in the last lesson, you can click on the faces, edges, or corners of the ViewCube to snap to standard views. You can also click and drag the cube itself to perform a free orbit.
-
The Navigation Bar: This bar at the bottom of the canvas contains dedicated icons for Orbit, Pan, Zoom, and other display settings.
The video below quickly points out where to find the Navigation Bar.
Fusion 360 User Interface Tutorial | 2024 Interface
This brief clip will show you the location of the Navigation Bar, which holds the on-screen navigation tools.
Watch from 03:37 to 03:53. The video will highlight the Navigation Bar at the bottom of the canvas. To use these tools, you would click an icon (like Orbit) and then click and drag in the canvas.
While these on-screen tools are functional, I strongly encourage you to practice and commit the mouse shortcuts to memory. The efficiency gain is significant, especially as your designs become more complex.
Hands-On Practice
It's time to put this into practice. Theory is one thing, but muscle memory is built by doing. We'll create a simple object to navigate around.
The Autodesk blog post you read earlier (How to Navigate the Autodesk Fusion Interface: A Beginners Guide...) suggests a great first step. Follow these instructions in Fusion 360:
- From the Toolbar, go to Create > Box.
- Fusion 360 will show you three orange planes (the origin planes). Click on one of them (the "floor" plane is a good choice).
- Click once in the canvas to define the first corner of your box's base.
- Move your mouse to define the size of the base, then click a second time.
- Move your mouse up to define the height of the box. The dialog box also lets you type in exact dimensions, but for now, just click to set the height.
- Click OK in the Box dialog box.
You should now have a simple 3D box in your canvas. Now, use this box to practice the navigation controls. Try to perform each of the following actions:
- Zoom in on one of the top corners of the box.
- Pan your view so the box is on the other side of your screen.
- Orbit around the box to see its back side.
- Click the FRONT face on the ViewCube to look at the box head-on.
- Click the Home icon (🏠) next to the ViewCube to return to the default 3D view.
- Pro Tip: Double-click the middle mouse button. This performs a "Zoom Extents," automatically fitting your entire model perfectly within the canvas. This is an incredibly useful command when you get "lost" in your 3D space.
Spend at least 10-15 minutes on this. The goal is to make these actions feel natural, without having to stop and think about which button to press.
Conclusion
Excellent work. You've now learned the most fundamental skill for working in a 3D environment. Being able to navigate your viewport quickly and intuitively is the foundation upon which all your future design skills will be built.
Let's recap the key takeaways:
- The three essential navigation actions are Orbit, Pan, and Zoom.
- The most efficient way to navigate is with a three-button mouse:
- Orbit:
Shift+ Middle Mouse Button + Drag - Pan: Middle Mouse Button + Drag
- Zoom: Scroll Wheel
- Orbit:
- The ViewCube and Navigation Bar offer on-screen alternatives for these actions.
- Double-clicking the middle mouse button will fit your model to the screen (Zoom Extents).
In our next lesson, we will cover how to create, save, and organize your projects and files. Proper file management is a crucial habit to develop early, ensuring your projects stay organized as they grow in complexity.