Hello! Welcome to your first lesson in Mechanical Design for 3D Printing and DIY.
This course is designed to take you from the fundamentals of computer-aided design (CAD) to creating your own custom projects, culminating in the design of an integrated gaming PC desk. Today, we'll tackle the essential first step: getting our primary tool, Autodesk Fusion 360, installed and ready to go.
By the end of this lesson, you will have successfully installed Fusion 360 and activated the free personal use license, which is perfectly suited for the hobbyist and DIY projects you have in mind.
Let's begin.
1. Choosing the Right Tool: The Personal Use License
Before we jump into the installation, it's crucial to understand the type of license we'll be using. Autodesk offers several versions of Fusion 360. Many new users accidentally sign up for a 30-day free trial of the full commercial version. For our purposes—personal projects, learning, and non-commercial fabrication—the Personal Use License is the correct choice. It's free and renewable annually.
This license has a few key terms that are important to be aware of, especially given your background in finance and business. To understand these qualifications, please read the "License Qualifications" section in the following article.
How to Download and Install the Fusion 360 Personal Use License
This article from Product Design Online clearly lists the criteria for the Personal Use license. Focus on the bulleted list under the 'License Qualifications' heading.
Read the section titled 'License Qualifications' to understand the terms, such as the non-commercial use clause and the annual income limit for hobby businesses.
The key takeaways are that this license is for non-commercial projects and for hobby businesses generating less than $1,000 USD annually. This fits perfectly with your goal of designing gaming accessories and household items for personal use.
2. The Installation Process
Now, let's walk through the steps to create an account, download, and install Fusion 360. The process involves visiting the correct Autodesk webpage, creating an account, and then running the installer.
Step 1: Finding the Personal Use Download Page
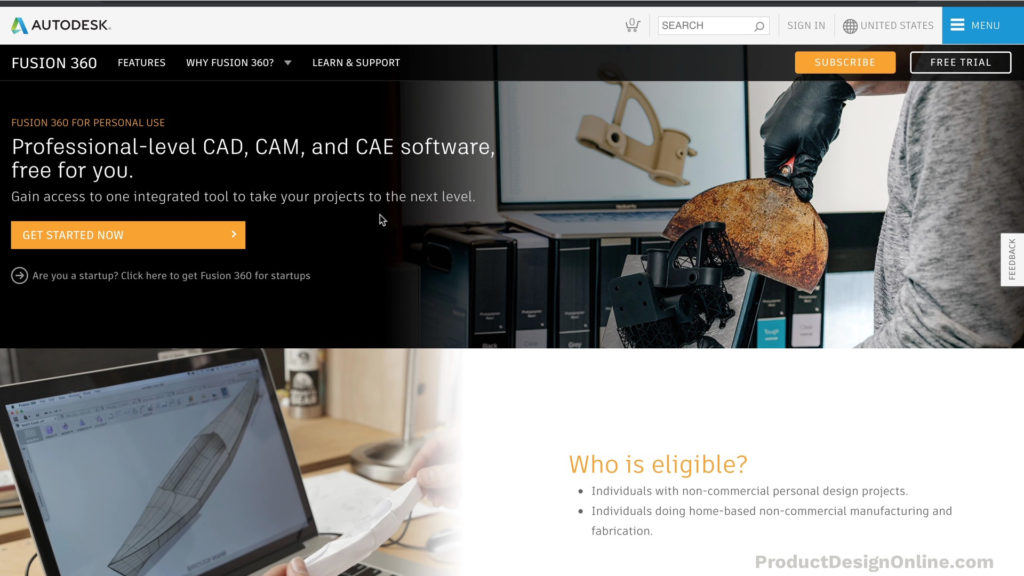
Your starting point is the specific Autodesk page for the personal license. It should look like the image below. Be sure to look for the "Fusion 360 for personal use" branding to ensure you're not on the commercial trial page.
Step 2: Creating an Account and Installing
The following video provides a clear, concise walkthrough of the entire sign-up and installation process. It covers creating your Autodesk account, downloading the installer, and launching the software for the first time.
Use Fusion with a Free Personal Use License: Easy Steps 💯🔥
Watch this video from HL ModTech to see the account creation and download process in action. It will guide you through the forms you need to fill out.
Watch the video from the beginning until the 2:10 mark. Pay attention to the steps for creating an account, downloading the installer, and signing in for the first time after installation. You can pause the video as you follow along with your own installation.
As the video and articles mention, the initial download is a small client that, once run, will download the full Fusion 360 application. The installation is automated from there. Depending on your internet connection, this may take several minutes.
3. First Launch and License Verification
Once the installation is complete, launch Fusion 360. You will be prompted to sign in with the Autodesk account credentials you just created.
After signing in, you can verify that your Personal Use license is active.

A "Quick Setup" panel may also appear, allowing you to set your default units and navigation preferences. I recommend setting the default units to Millimeters (mm), as it's the standard for 3D printing. We will cover navigation controls in the next lesson, so you can leave those at their default settings for now.
An Important Limitation: 10 Editable Documents
A key characteristic of the Personal Use license is a limit of 10 editable documents at any given time. This can be a source of confusion, but it doesn't mean you can only have 10 files. You can have an unlimited number of designs, but only 10 can be "active" or editable at once. The rest will be set to "read-only."
You can easily toggle a design between editable and read-only status. This video provides an excellent explanation of this system and how to manage your files.
Autodesk Fusion Beginners Guide (2025) + Example Project
This video from 3D Printer Academy clearly explains the 10-document limit and demonstrates the simple workaround. Understanding this now will prevent confusion as you start creating more designs.
Watch the segment from 01:00 to 03:07. The presenter explains how Fusion 360's data panel works and how to manage the editable/read-only status of your documents.
This is a manageable limitation, and by getting used to this workflow early, you'll have no trouble organizing the many projects you'll be creating.
Conclusion
Congratulations on completing the first and most critical setup step!
In this lesson, you have:
- Identified the correct Fusion 360 license for your personal and DIY goals.
- Created an Autodesk account and successfully installed the software.
- Verified that your free Personal Use license is active.
- Learned about the 10-editable-document limit and how to manage it.
You now have a powerful design tool installed and ready. In our next lesson, "Navigate the Fusion 360 interface," we will start exploring the software itself. You'll learn how to move around in the 3D space and get familiar with the main components of the user interface: the toolbar, browser, timeline, and view cube.