Hello! Welcome back to our module on developing solutions with Azure Cosmos DB.
In our last lesson, we explored the theory behind partition keys, understanding why they are the most critical design decision for building scalable, high-performance applications. We discussed best practices for choosing a key with high cardinality that evenly distributes data and request load.
Today, we transition from theory to practice. Our goal is to create a Cosmos DB account, database, and container with an appropriate partition key. This is a foundational skill for any developer working with Cosmos DB and a core competency tested in the AZ-204 exam. We'll accomplish this using two primary methods: first through the visual interface of the Azure Portal, and then programmatically using the .NET SDK, which will feel very familiar given your background in C# and .NET.
The Cosmos DB Resource Hierarchy
Before we start creating, let's quickly revisit the resource hierarchy. Everything starts with the Account, which is the unit of global distribution and high availability. Within an account, you create one or more Databases, which are logical units for managing Containers. The container is where your Items (your data, e.g., JSON documents) live, and it's the unit of scalability for throughput and storage.
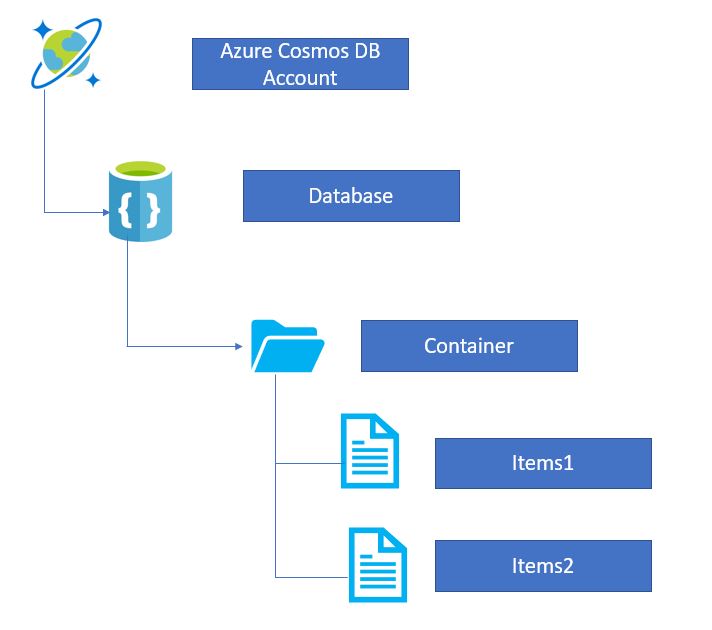
Our task today is to build out the first three levels of this hierarchy: Account, Database, and Container.
1. Creating Resources via the Azure Portal
The Azure Portal provides a web-based UI for creating and managing all your Azure resources. It's the perfect place to start when you're provisioning your first set of resources or need to visualize their configuration.
Step 1: Create the Azure Cosmos DB Account
The account is the top-level resource. When you create it, you make several key decisions that apply to the entire account.
To see how this is done, watch the following video. It will walk you through creating the account, selecting the API, and configuring the capacity mode.
AZ-204 - Develop for Azure Storage - Azure Cosmos DB
This video from Alan Rodrigues provides a clear, step-by-step walkthrough of creating an Azure Cosmos DB account in the Azure Portal.
Watch the section from 01:44 to 05:35. Pay close attention to these key configuration choices: API: We will use Core (SQL), as it's the most common for new applications and central to the AZ-204 exam. Capacity Mode: We'll use Provisioned Throughput. Free Tier Discount: Notice how to apply the free tier discount, which gives you a certain amount of storage and throughput for free each month—perfect for development and learning.
Step 2: Create a Database and Container
With the account in place, you can now create a database and a container. The container is where you'll define the partition key you learned about in our previous lesson.
Let's continue with the same video to see how to use the Data Explorer in the Azure Portal to create these resources.
AZ-204 - Develop for Azure Storage - Azure Cosmos DB
This segment demonstrates how to use the Data Explorer to create a database and a container, including the crucial step of specifying the partition key.
Watch from 05:35 to 08:48. Focus on how the Partition key is specified during container creation. In the video, /customerid is used. This directly implements the partitioning strategy we discussed previously.

Your Turn: Hands-on Practice
- Sign in to the Azure Portal.
- Follow the steps from the videos to create your own Azure Cosmos DB account.
- Give it a globally unique name (e.g.,
az204-cosmos-yourname-followed by today's date). - Select the Core (SQL) API.
- Choose a region near you.
- Select Provisioned throughput and apply the Free Tier Discount.
- Give it a globally unique name (e.g.,
- Once the account is deployed, navigate to the Data Explorer.
- Create a new container with the following settings:
- Database id: Create new, named
eCommerceDB - Container id:
products - Partition key:
/categoryId - Throughput: Manual, 400 RU/s (this is covered by the free tier).
- Database id: Create new, named
You have now provisioned a complete, ready-to-use Cosmos DB container.
2. Creating Resources with the .NET SDK
While the portal is great for one-off tasks, real-world development often requires creating and managing infrastructure as code. This ensures consistency, repeatability, and enables automated deployment pipelines. Your C# and .NET skills are directly applicable here.
A Note on Local Development: The Cosmos DB Emulator
Before we write code that targets Azure, it's worth knowing about the Azure Cosmos DB Emulator. This is a local application that simulates the Cosmos DB service on your Windows machine. It allows you to develop and test your application without an Azure subscription and without incurring any costs.
For your future projects, this is a highly recommended tool. You can find instructions on how to set it up in the resource below. For today's lesson, you can choose to either connect to your live Azure account or use the emulator if you install it.
Mastering Azure Cosmos DB: The Ultimate Guide for Developers
This article from Emerline's tech blog explains how to install and connect to the local Cosmos DB Emulator.
Briefly review the section 'Azure Cosmos DB Emulator installation' to understand what the emulator is and how to install it. You don't have to install it now, but it's a valuable tool to be aware of.
Step 3: Programmatic Creation with C#
Now, let's write a simple .NET console application to create a new database and container.
The process involves:
- Creating a console app and adding the
Microsoft.Azure.CosmosNuGet package. - Instantiating a
CosmosClientobject using your account's connection string. - Calling
CreateDatabaseIfNotExistsAsync()to create the database. - Calling
CreateContainerIfNotExistsAsync()on the database object, providing the container name and the partition key path.
This video provides a complete walkthrough of the code.
AZ-204 - Develop for Azure Storage - Azure Cosmos DB
Watch this final segment from Alan Rodrigues' video to see how to perform the same resource creation tasks using the .NET SDK.
Watch from 20:39 to 26:54. The code is straightforward and demonstrates the core methods for resource management. Notice how the partition key /customerid is passed as a string when creating the container.
Your Turn: Hands-on Practice
Now, let's write the code yourself.
-
In Visual Studio, create a new Console App targeting .NET Core or newer.
-
Install the
Microsoft.Azure.CosmosNuGet package. -
In your
Program.cs, replace the content with the following code. This is a slightly modified version of what you saw in the video, structured for clarity.using Microsoft.Azure.Cosmos; // --- Configuration --- // Replace with your account's endpoint and key from the Azure portal // Or use the emulator's default values: // Endpoint: "https://localhost:8081" // Key: "C2y6yDjf5/R+ob0N8A7Cgv30VRDJIWEHLM+4QDU5DE2nQ9nDuVTqobD4b8mGGyPMbIZnqyMsEcaGQy67XIw/Jw==" const string endpointUri = "YOUR_ENDPOINT_URI"; const string primaryKey = "YOUR_PRIMARY_KEY"; const string databaseId = "TasksDB"; const string containerId = "Items"; const string partitionKeyPath = "/category"; // Our chosen partition key private static CosmosClient cosmosClient; public static async Task Main(string[] args) { try { Console.WriteLine("Beginning operations...\n"); cosmosClient = new CosmosClient(endpointUri, primaryKey); // Create the database Database database = await cosmosClient.CreateDatabaseIfNotExistsAsync(databaseId); Console.WriteLine($"Database created or already exists: {database.Id}"); // Create the container ContainerProperties containerProperties = new ContainerProperties(containerId, partitionKeyPath); Container container = await database.CreateContainerIfNotExistsAsync(containerProperties, throughput: 400); Console.WriteLine($"Container created or already exists: {container.Id}"); } catch (CosmosException ex) { Console.WriteLine($"An error occurred: {ex.StatusCode} - {ex.Message}"); } finally { Console.WriteLine("\nEnd of operations."); Console.ReadKey(); } } -
Get your credentials:
- Navigate to your Cosmos DB account in the Azure Portal.
- Under Settings, click on Keys.
- Copy the
URIandPRIMARY KEYand paste them into theendpointUriandprimaryKeyconstants in your code.
-
Run the application. The console output should confirm that the database and container were created. You can verify this by refreshing the Data Explorer in the Azure Portal.
Conclusion
Congratulations! You have successfully provisioned a complete Azure Cosmos DB environment, both visually through the portal and programmatically using the .NET SDK. You've taken the theoretical concept of a partition key and applied it in a practical, hands-on way.
Key Takeaways:
- Azure Cosmos DB resources (Account, Database, Container) can be created through the Azure Portal or programmatically using the .NET SDK.
- The API choice (e.g., Core SQL) and uniqueness of the account name are key configurations at the account level.
- The partition key is a mandatory setting defined at the container level, solidifying its role as a fundamental design choice.
- The
Microsoft.Azure.Cosmoslibrary is the gateway to interacting with Cosmos DB in .NET, withCosmosClientbeing the main entry point. - Methods like
CreateDatabaseIfNotExistsAsyncandCreateContainerIfNotExistsAsyncprovide an idempotent way to ensure your infrastructure is correctly provisioned.
Next Steps
Now that you have a container ready, the next logical step is to start working with data inside it. In our next lesson, we will focus on the learning outcome: "Perform create, read, update, and delete (CRUD) operations on Cosmos DB items using the .NET SDK." We will build on the console application you created today to bring your TasksDB to life.