Hello! Welcome back to your AZ-204 certification journey.
In our last session, we established the "why" behind Bicep—it's a modern, developer-friendly language that provides a "transparent abstraction" over ARM JSON, making Infrastructure as Code (IaC) in Azure much more pleasant. You learned that Bicep transpiles into the native ARM template format that Azure understands.
Introduction
Today, we move from the "why" to the "how." This lesson is designed to get you writing your first Bicep code. Our goal is to achieve the learning outcome: Author a simple Bicep file to define an Azure resource like a Storage Account.
We will cover:
- The basic syntax and structure of a Bicep file.
- How to define an Azure resource using the
resourcekeyword. - How to use
paramto make your templates flexible and reusable. - Leveraging Bicep functions and string interpolation to generate dynamic values.
Given your background in C# and .NET development, you'll find many concepts like parameters, variables, and strongly-typed definitions feel very familiar. We are essentially defining the "class" for an Azure resource, specifying its properties and behavior.
Part 1: The Anatomy of a Bicep Resource
At its core, a Bicep file is a text file with a .bicep extension that declares a set of Azure resources. The primary keyword you'll use is resource.
Let's watch a segment from a Microsoft Learn Live session that clearly breaks down the syntax for defining a resource.
Learn Live - Build your first Bicep template
In this video, the presenter walks through the different components of a Bicep resource definition, explaining each keyword and its purpose.
Watch from 08:42 to 13:25. Pay close attention to the breakdown of the syntax: the resource keyword, the symbolic name, the resource type, the API version, and the resource properties (name, location, sku, etc.).
As you saw, the structure is clean and declarative. Here is a complete example of a simple Bicep file that defines a storage account, taken from the official Microsoft documentation.
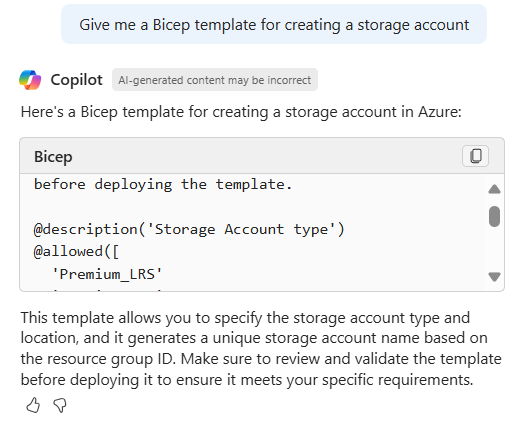
Let's break down the resource block from this example:
resource storageAccount 'Microsoft.Storage/storageAccounts@2023-05-01' = {
  name: storageAccountName
  location: location
  sku: {
    name: 'Standard_LRS'
  }
  kind: 'StorageV2'
  properties: {
    accessTier: 'Hot'
  }
}
resource: The keyword that indicates you are defining a resource.storageAccount: This is the symbolic name. It's used within this Bicep file to refer to this resource, much like a variable name in C#. It is not the name of the resource in Azure.'Microsoft.Storage/storageAccounts@2023-05-01': This string is the resource type and API version. The Bicep extension in VS Code provides IntelliSense to help you find and select these.= { ... }: The body of the resource definition, containing its properties.name,location,sku,kind: These are the properties of the storage account. The VS Code extension will tell you which properties are required.
Authoring this in VS Code is a smooth experience, thanks to the rich tooling. The IntelliSense and snippets are a significant improvement over raw JSON.

Part 2: Making Templates Flexible with Parameters and Expressions
Hardcoding values like names and locations in your templates makes them rigid and non-reusable. To solve this, Bicep uses parameters, which allow you to pass in values at deployment time.
Furthermore, you often need to generate values dynamically. For instance, a storage account name must be globally unique. Bicep provides built-in functions and string interpolation to handle these scenarios.
This video clip demonstrates how to use parameters and expressions to create flexible and robust templates.
Learn Live - Build your first Bicep template
This segment explains how to use parameters for values like location and how to use the uniqueString() function with string interpolation to create meaningful, unique resource names.
Watch from 37:28 to 44:16. This is a crucial part of creating reusable templates. Notice the use of resourceGroup().location as a default value and how uniqueString(resourceGroup().id) is combined with a prefix to create a valid, unique name.
Let's look at the parameter definitions from the storage account example again:
param location string = resourceGroup().location
param storageAccountName string = 'toylaunch${uniqueString(resourceGroup().id)}'
param location string = ...: Defines a string parameter namedlocation. It has a default value set to the location of the resource group you're deploying to, using theresourceGroup()function.param storageAccountName string = ...: Defines the storage account name. It uses:- String Interpolation: The
toylaunch${...}syntax will feel very familiar from C#. uniqueString()function: This function generates a deterministic hash based on a "seed" value. Using the resource group's ID as the seed ensures that the generated name is consistent for deployments to the same resource group but unique across different resource groups.
- String Interpolation: The
Part 3: Hands-On: Authoring Your First Bicep File
Now it's time to put this together. You will create a main.bicep file in Visual Studio Code and define a storage account, complete with parameters for flexibility.
For this exercise, please follow the excellent quickstart guide from Microsoft Learn. It will walk you through each step, from creating the file to using the VS Code extension's features.
Quickstart: Create Bicep files with Visual Studio Code
This quickstart is a practical, step-by-step guide to authoring your first Bicep file. It covers everything we've discussed so far, from parameters to defining a resource with IntelliSense.
Open VS Code and create a new file named main.bicep. Follow the guide starting from the section 'Add parameter'. Define the location and storageAccountName parameters as shown. Continue to the 'Add resource' section and define the storageAccount resource. Make sure to use the IntelliSense (Ctrl+Space) and the required-properties snippet as suggested. You can skip the parts related to the virtual network (res-vnet snippet) for now, as our focus is solely on the storage account.
By the end of this exercise, you will have a complete, well-structured Bicep file ready for deployment. Your final code should look very similar to the one presented in the guide.
Conclusion
Congratulations! You've successfully authored your first piece of Infrastructure as Code using Bicep. You now have a repeatable, version-controllable definition of an Azure Storage Account.
Key Takeaways:
- The
resourcekeyword is the foundation for defining any Azure resource in Bicep. - A resource definition includes a symbolic name (for use in the file), a resource type, an API version, and a body of properties.
- The Bicep extension for VS Code provides invaluable IntelliSense, validation, and snippets.
- Parameters (
param) make your templates reusable by allowing you to provide values at deployment time. - Bicep functions (
resourceGroup(),uniqueString()) and string interpolation enable you to create dynamic and compliant resource configurations.
Next Steps
You've written the blueprint for your resource. The next logical step is to give that blueprint to Azure and have it build the resource. In the next lesson, we will deploy the Bicep file you just created to Azure using the Azure CLI.