Hello! Welcome back to your AZ-204 preparation course.
In our first lesson, we explored the foundational architecture of Azure, covering the physical concepts of regions and availability zones, and the logical concepts of resource groups and subscriptions. With that theoretical groundwork in place, it's time to roll up our sleeves and set up your local machine for Azure development.
Introduction
Today's lesson is all about tooling. To interact with the Azure platform, create resources, and deploy your applications, you need the right set of tools. This lesson is dedicated to installing and configuring the essential software for any .NET developer working with Azure.
Our learning outcome is to install and configure the Azure CLI and set up a local development environment with Visual Studio and the Azure SDK for .NET. We will cover:
- The purpose and benefits of the Azure Command-Line Interface (CLI).
- How to install the Azure CLI on your Windows machine and connect it to your Azure account.
- The role of the Azure SDK for .NET in your C# projects.
- How to configure Visual Studio with the necessary 'Azure development' workload.
By the end of this lesson, your local machine will be fully equipped for the hands-on labs throughout this course.
Part 1: The Azure CLI - Your Command-Line Control Panel
While the Azure Portal is great for visualizing resources, a command-line interface is indispensable for automation, scripting, and performing quick, repetitive tasks. For Azure, the primary tool for this is the Azure CLI.
Given your experience leading development teams, you can appreciate how scripting infrastructure setup and management tasks can lead to more consistent and efficient environments. The Azure CLI is the key to enabling that.
To understand why a developer or DevOps engineer would choose the CLI over the graphical interface, please watch the following segment.
Day-10 | Automate Azure Resources using Azure CLI | Command Line Interface | #freeazurecourse
This video from Abhishek.Veeramalla explains the key motivations for using the Azure CLI, focusing on the advantages of automation and performing quick actions, which are often more efficient than navigating the Azure Portal.
Watch the segment from the beginning until 09:55. Focus on the distinction between using the console for single tasks and using the CLI for automation, repeatability, and reducing errors.
Installing the Azure CLI
Now, let's get the CLI installed on your system. The official Microsoft Learn documentation provides the most up-to-date and direct instructions.
Install the Azure CLI on Windows
This document is the official guide for installing the Azure CLI on Windows. We will use the recommended MSI installer method.
Follow the instructions in the 'Microsoft Installer (MSI)' section to download and run the 64-bit installer. Since you're using a modern development machine with Visual Studio, the 64-bit version is appropriate. After installation, remember to close and reopen your terminal (PowerShell or Command Prompt) for the changes to take effect.
Configuring the Azure CLI
Once the installation is complete, the final step is to connect the CLI to your Azure account. This is done via a simple login command that opens a browser window for you to authenticate.
The following video demonstrates this configuration process.
Day-10 | Automate Azure Resources using Azure CLI | Command Line Interface | #freeazurecourse
This video segment visually walks you through verifying the CLI installation and, most importantly, the az login command, showing how it connects your local terminal to your Azure subscription.
Watch the clip from 13:15 to 15:09. You'll see how to use az version to check the installed version and az login to authenticate. Please run these commands yourself in PowerShell or a new Windows Terminal.
After running az login and successfully authenticating, your CLI is ready. It will now execute commands against the default subscription associated with your account.
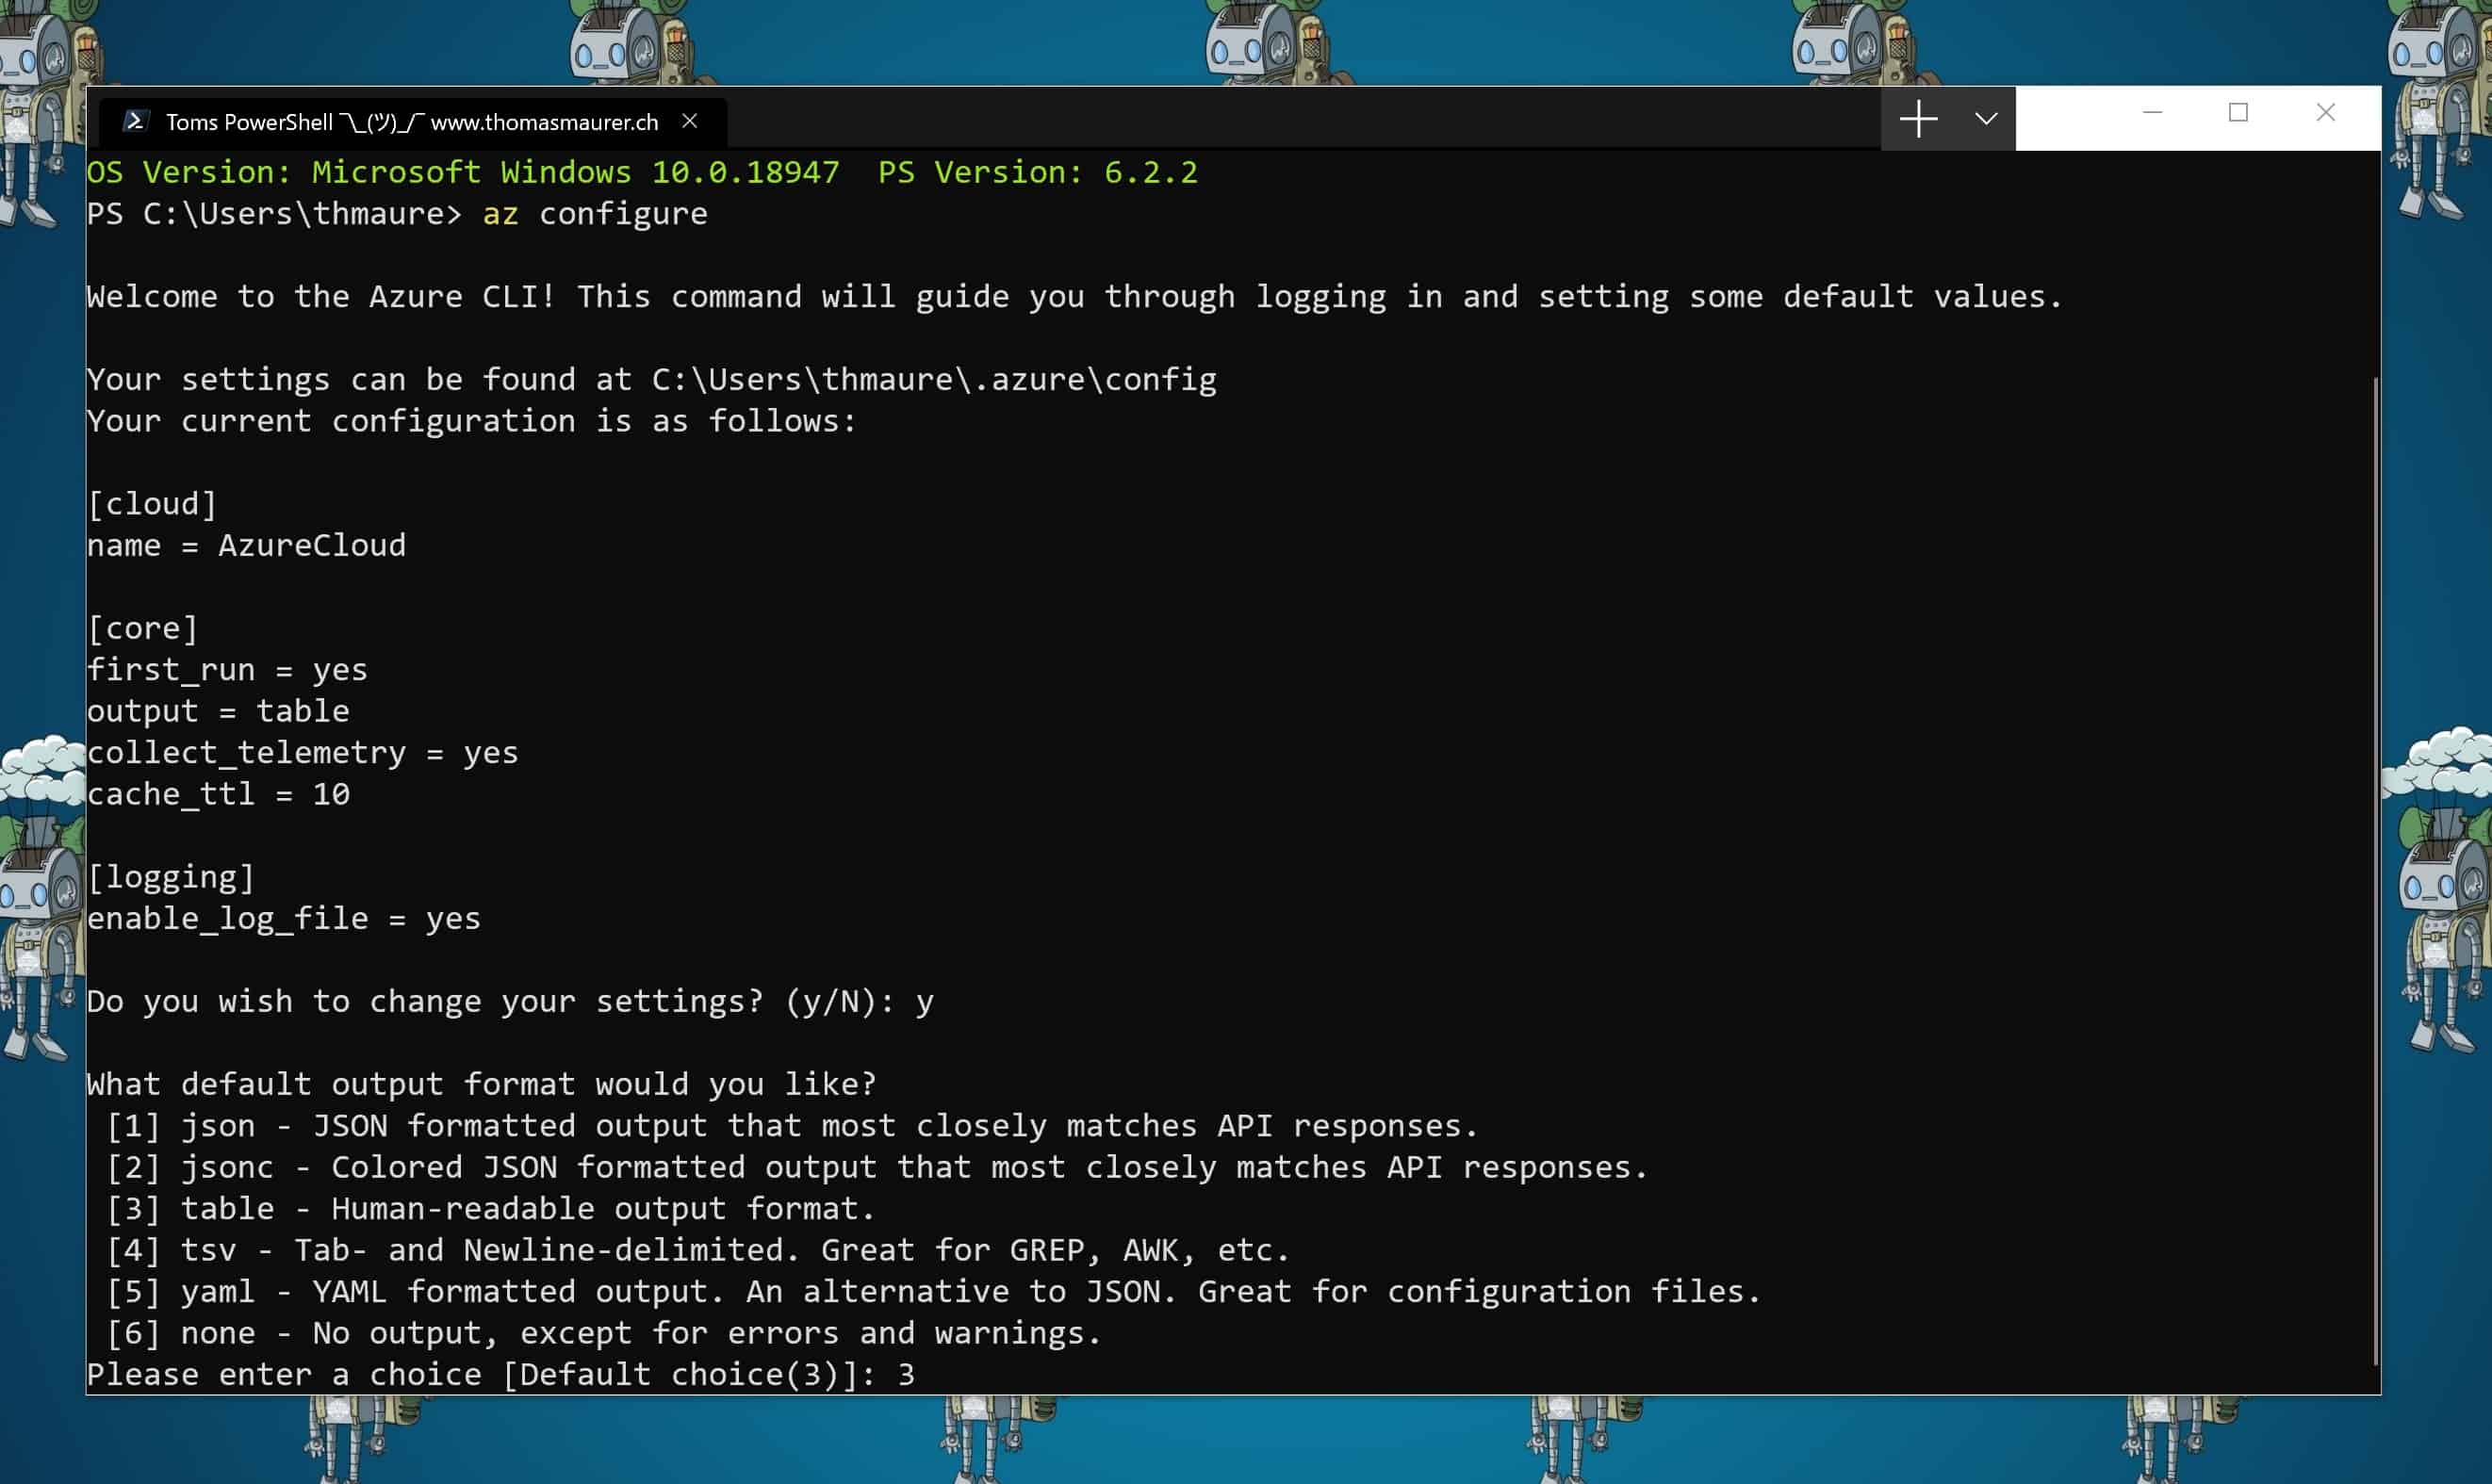
As a quick tip, you can use the az configure command to set default values, such as your default output format. For example, running az configure will prompt you to choose between formats like json, table, or yaml. This can make the output more readable for your specific needs.
Part 2: Visual Studio & the Azure SDK for .NET
The Azure CLI is for managing Azure itself. For building applications that use Azure services, you'll be working in Visual Studio and leveraging the Azure SDK for .NET.
Your extensive background in the .NET ecosystem will make this part feel very natural. The Azure SDK for .NET is essentially a collection of NuGet packages, with each package providing classes to interact with a specific Azure service (e.g., Blob Storage, Cosmos DB, Key Vault).
This short video provides a great overview of the .NET developer tooling for Azure.
Getting Started [1 of 8] | .NET on Azure for Beginners
This clip from the official .NET channel introduces the key tools for .NET on Azure, including the SDK, Visual Studio, and the CLI, putting them into context.
Watch the segment from 09:46 to 12:11. It will introduce the toolset and specifically clarify that the Azure SDK for .NET consists of NuGet packages designed with a consistent feel across different services.
Setting up Visual Studio
To ensure Visual Studio is equipped with all the necessary templates, server connections, and publishing profiles for Azure development, you need to install the Azure development workload.
If you already have Visual Studio installed, you can modify your installation using the "Visual Studio Installer".

Please take a moment to:
- Open the Visual Studio Installer.
- Click Modify on your Visual Studio installation.
- Go to the Workloads tab.
- Ensure that Azure development is checked. If it's not, check the box and proceed with the modification.
This single workload installs everything you need to start building and deploying Azure applications directly from your IDE. It streamlines tasks like publishing a web app to App Service or connecting to a SQL database in Azure.
Conclusion
Congratulations, your local development environment is now fully configured for the AZ-204 journey! You have established a complete toolchain for both managing the Azure platform and developing applications for it.
Key Takeaways:
- The Azure CLI is a powerful command-line tool for automating and scripting Azure management tasks. You've installed it and connected it to your account using
az login. - The Azure SDK for .NET is a set of NuGet packages that you will use in your C# code to programmatically interact with Azure services.
- The Azure development workload in Visual Studio provides the necessary templates, tools, and SDKs to build, debug, and deploy .NET applications to Azure.
Next Steps
Now that our tools are ready, we will put them to use. In the next lesson, you will learn how to create and manage a resource group using both the Azure Portal and Azure CLI commands. This will be your first hands-on experience in creating and managing live Azure resources, directly applying the concepts from our first two lessons.