Welcome to the next step in our journey through LangChain. In our previous lessons, we focused on controlling the output of an LLM, forcing it to return structured data that conforms to a Pydantic schema using methods like .with_structured_output() and JsonOutputParser. We've successfully made the model speak in a language our application can understand. Now, we're going to flip the script and give the model the ability to take structured actions.
This lesson marks a shift from data extraction to functional empowerment. You will learn how to wrap your own Python functions into "tools" that an LLM can understand and decide to use. This is the foundation for building agents and more autonomous systems that can interact with external environments, execute code, and query APIs. Our specific goal is to master the @tool decorator, the simplest and most direct way to expose a function's capabilities to a large language model.
From Data Schemas to Actionable Tools
A "tool" in LangChain is an interface that allows an LLM to perform an action. This could be anything from searching the web, querying a database, calling an internal company API, or even just running a simple calculation. By defining tools, you give the model a set of capabilities beyond its built-in knowledge.
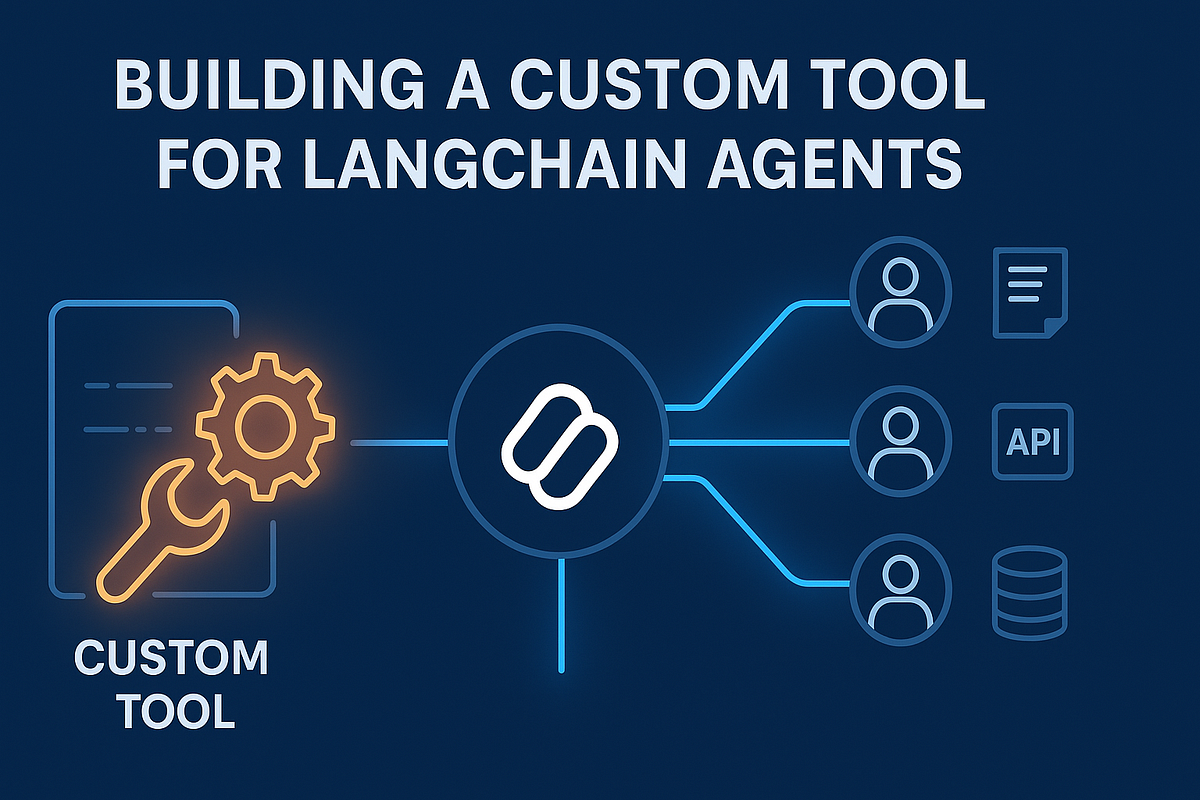
This diagram illustrates the core concept of today's lesson. We are building a "Custom Tool" (a decorated Python function) that plugs into the LangChain ecosystem, allowing the LLM to interact with external resources or execute specific logic.
The most straightforward method for creating a tool is the @tool decorator. It's a clever piece of engineering that inspects a standard Python function and automatically generates the necessary schema and description for the LLM. It relies on two standard Python features you are already familiar with:
- Type Hints: These define the input schema for the tool. The model uses this to understand what arguments are required and what their data types are.
- Docstrings: This becomes the tool's description. The model reads the docstring to understand what the tool does and when to use it. A clear, descriptive docstring is crucial for the model to make correct decisions.
To get a quick overview of this concept, the following article provides a concise introduction.
Module 9 Lesson 2: Defining Custom Tools (The @tool Decorator ...
This blog post from shshell.com offers a clear and direct explanation of the @tool decorator.
Read the first three short sections: The Basic Implementation, "The Docstring is Documentation," and "Sophisticated Arguments with Pydantic." Pay special attention to the emphasis on the docstring—it is not just for human developers but is the primary instruction for the LLM.
Hands-On: Building Your First Tools
Let's apply this concept. Given your interest in algorithmic trading, we'll create a couple of mock financial tools. Create a new file in your project: src/lcel_quickstart/tools.py.
Add the following code to this file. We'll define two functions: one to get a mock stock price and another to calculate a simple moving average. Notice how they are just regular Python functions, but the @tool decorator, type hints, and docstrings give them superpowers within the LangChain framework.
# src/lcel_quickstart/tools.py

from dotenv import load_dotenv
from langchain_core.tools import tool

# Load environment variables from .env file
load_dotenv()

@tool
def get_stock_price(symbol: str) -> str:
    """
    Get the current stock price for a given ticker symbol.

    Args:
        symbol: The stock ticker symbol (e.g., AAPL, GOOGL, MSFT).

    Returns:
        A string with the current stock price or an error message.
    """
    # In a real application, this would call a financial data API.
    # We use mock data here for demonstration purposes.
    print(f"--- Calling get_stock_price tool with symbol: {symbol} ---")
    mock_prices = {
        "AAPL": 190.50,
        "GOOGL": 175.25,
        "MSFT": 420.75,
        "TSLA": 180.90,
    }
    symbol_upper = symbol.upper()
    if symbol_upper in mock_prices:
        return f"The current price of {symbol_upper} is ${mock_prices[symbol_upper]}"
    else:
        return f"Could not find price data for symbol {symbol_upper}"

@tool
def calculate_simple_moving_average(symbol: str, window_size: int = 20) -> str:
    """
    Calculates the simple moving average (SMA) for a stock.

    Args:
        symbol: The stock ticker symbol.
        window_size: The number of periods for the moving average (default: 20).

    Returns:
        A string containing the calculated SMA.
    """
    # This is a mock implementation. A real one would fetch historical data.
    print(f"--- Calling calculate_simple_moving_average tool for {symbol} with window {window_size} ---")
    mock_sma = {
        "AAPL": 185.30,
        "GOOGL": 172.10,
        "MSFT": 415.00,
        "TSLA": 175.50,
    }
    symbol_upper = symbol.upper()
    if symbol_upper in mock_sma:
        return f"The {window_size}-day SMA for {symbol_upper} is ${mock_sma[symbol_upper]}"
    else:
        return f"Could not calculate SMA for symbol {symbol_upper}"


if __name__ == '__main__':
    print("--- Inspecting the 'get_stock_price' tool ---")
    print(f"Name: {get_stock_price.name}")
    print(f"Description: {get_stock_price.description}")
    print(f"Arguments Schema: {get_stock_price.args}\n")

    print("--- Inspecting the 'calculate_simple_moving_average' tool ---")
    print(f"Name: {calculate_simple_moving_average.name}")
    print(f"Description: {calculate_simple_moving_average.description}")
    print(f"Arguments Schema: {calculate_simple_moving_average.args}\n")

    print("--- Testing the tools directly as Runnables ---")
    # A decorated tool is a Runnable, so we can .invoke() it
    print(get_stock_price.invoke({"symbol": "AAPL"}))
    print(calculate_simple_moving_average.invoke({"symbol": "TSLA", "window_size": 50}))
Now, run this script from your terminal:
uv run python -m src.lcel_quickstart.tools
Your output should look similar to this:
--- Inspecting the 'get_stock_price' tool ---
Name: get_stock_price
Description: Get the current stock price for a given ticker symbol.

    Args:
        symbol: The stock ticker symbol (e.g., AAPL, GOOGL, MSFT).

    Returns:
        A string with the current stock price or an error message.
Arguments Schema: {'symbol': {'title': 'Symbol', 'type': 'string'}}

--- Inspecting the 'calculate_simple_moving_average' tool ---
Name: calculate_simple_moving_average
Description: Calculates the simple moving average (SMA) for a stock.

    Args:
        symbol: The stock ticker symbol.
        window_size: The number of periods for the moving average (default: 20).

    Returns:
        A string containing the calculated SMA.
Arguments Schema: {'symbol': {'title': 'Symbol', 'type': 'string'}, 'window_size': {'title': 'Window Size', 'type': 'integer', 'default': 20}}

--- Testing the tools directly as Runnables ---
--- Calling get_stock_price tool with symbol: AAPL ---
The current price of AAPL is $190.5
--- Calling calculate_simple_moving_average tool for TSLA with window 50 ---
The 50-day SMA for TSLA is $175.5
This output reveals exactly what LangChain does behind the scenes. It has automatically:
- Used the function name for the tool's
name. - Copied the entire docstring for the
description. - Generated a JSON schema for the arguments (
args) from the Python type hints, correctly identifyingsymbolas a string andwindow_sizeas an integer with a default value. - Turned the function into a
Runnableobject that fits into the LCEL ecosystem, which is why we can call.invoke()on it.
The following article from OneUptime provides another example of this pattern and lists some excellent best practices.
How to Implement LangChain Tools - OneUptime
This article dives deeper into creating custom tools, providing clear code examples and a helpful summary of best practices.
First, read the introduction on creating custom tools. Then, review the section Basic Tool Creation, which contains the get_stock_price example we adapted. Finally, read the Best Practices Summary at the end. Points like "Use descriptive docstrings" and "Define explicit schemas" directly reinforce what we've just implemented.
The Importance of Tool Descriptions and Signatures
To drive this point home, watch the following clip. The presenter is building a more complex agent but pauses to explain precisely why the type annotations and docstrings are not just good practice, but absolutely essential for the LLM to function correctly.
Build Your Own AI Agent with LangChain, LangGraph, Streamlit + Custom Tools using Python!
In this video, Abraham E. Tavarez builds an AI agent and explains the critical role of custom tools.
Watch the segment from this timestamp. He emphasizes that all the information from type hints and docstrings is passed to the model so it knows what the tool does, what arguments it needs, and how to use it. A vague description will lead to the model ignoring your tool, even if it's the perfect one for the job.
Conclusion
In this lesson, you've learned how to bridge the gap between abstract LLM reasoning and concrete, executable code. By wrapping a standard Python function with the @tool decorator, you create a powerful new capability that an LLM can leverage.
Here are the key takeaways:
- The
@tooldecorator is the simplest way to convert a Python function into a LangChain tool. - Type hints in the function signature are automatically converted into an input schema that the LLM uses for argument validation.
- The function's docstring serves as the primary description for the LLM, guiding its decision on when and how to use the tool. Clarity and detail are paramount.
- A decorated tool is a
Runnable, fitting seamlessly into the LangChain Expression Language (LCEL) you are already familiar with.
We have now defined a tool. The next logical question is: how do we make a model actually use it? In our next lesson, we will do just that. You will learn how to bind one or more tools to a chat model, enabling it to call your custom functions in response to a user's prompt.