Hello! Welcome back to our course on building a production-grade rate limiter.
In our last lesson, we dove into the core of the Spring framework, understanding how it manages components through Dependency Injection and Spring Beans. You now know how to declare a class as a Spring-managed bean (e.g., with @Service) and how to inject it into another component using constructor injection.
Today, we'll put that knowledge into practice by building the "front door" to our application: a web-facing API. We will create the actual HTTP endpoints that users will interact with, and which our rate limiter will eventually protect.
Your learning outcome for this lesson:
Create REST API endpoints using @RestController and @RequestMapping annotations.
1. The Role of a Controller
In a web application, some component must be responsible for listening to incoming HTTP requests, processing them, and sending back a response. In Spring, this component is the controller.
For the REST APIs we're building, we'll use a specialized type of controller that returns data (like JSON) directly to the client, rather than rendering a user interface on the server.
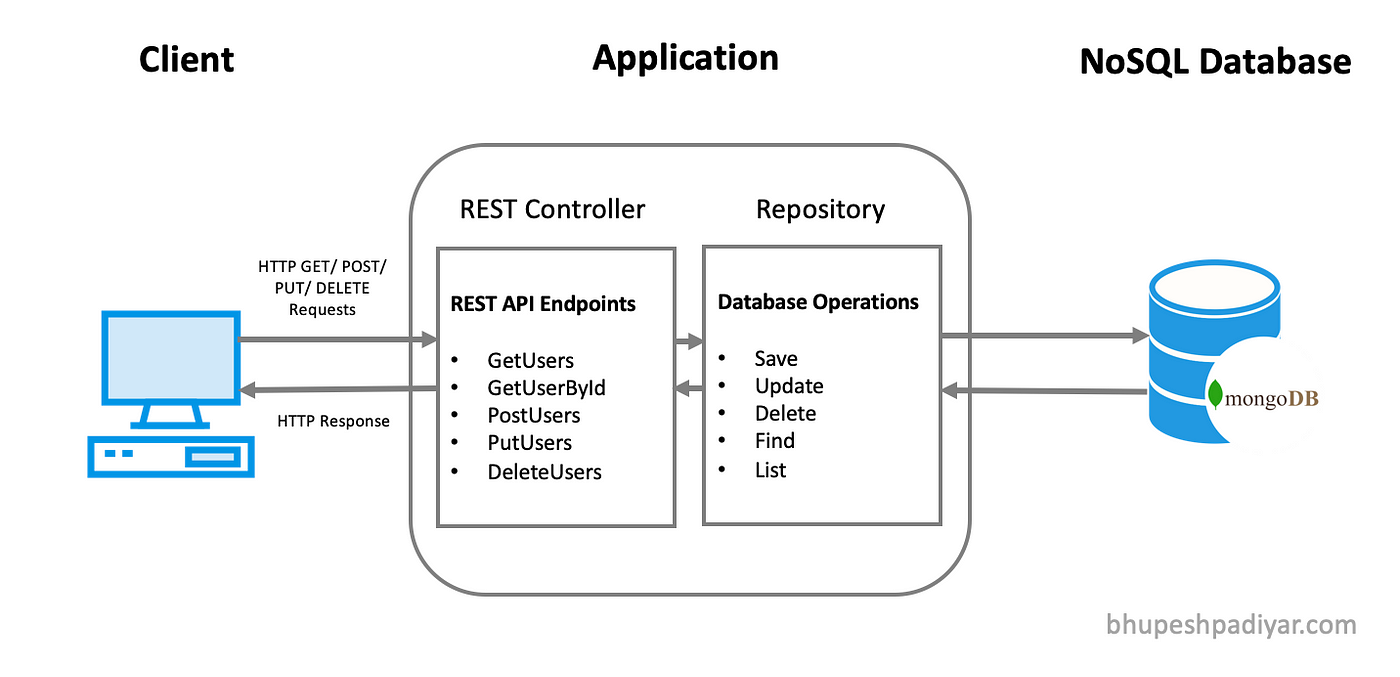
The diagram below shows where a REST controller fits into a typical application architecture. It's the entry point that receives requests from a client.
2. Creating a REST Controller with @RestController
To create a REST controller in Spring Boot, you use the @RestController annotation. As we learned in the last lesson, this is a stereotype annotation, similar to @Component or @Service. It tells the Spring IoC container two things:
- This class is a Spring Bean and should be managed by the container.
- This class is a web controller, and its methods will handle incoming HTTP requests.
A key feature of @RestController is that it combines two other annotations: @Controller and @ResponseBody.
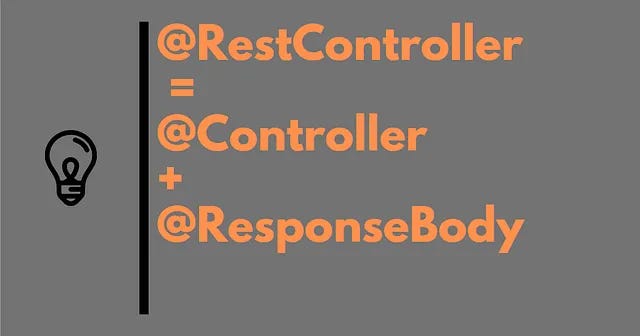
The @ResponseBody part is crucial: it instructs Spring to automatically serialize the object returned from your method into a suitable format (by default, JSON) and write it directly into the body of the HTTP response. This frees you from manually converting your Java objects to JSON strings.
To see a quick walkthrough of this concept, please watch the following video.
Spring & Spring Boot Annotations Series - #12 - @RestController Annotation
The video 'Spring & Spring Boot Annotations Series - #12 - @RestController Annotation' from Java Guides clearly explains the role of @RestController and how it simplifies the creation of RESTful web services.
Watch from the beginning to 03:04. Pay close attention to how @RestController replaces the need to use both @Controller and @ResponseBody on every method.
3. Mapping Requests with @RequestMapping
Now that you have a controller class, you need to specify which method should handle which request. For example, a GET request to /api/v1/status should be handled differently from a POST request to /api/v1/users.
This is done using the @RequestMapping annotation. You can use it at both the class level and the method level:
- Class-level: Defines a base path for all endpoints within that controller. This is excellent for versioning and grouping your API (e.g.,
@RequestMapping("/api/v1")). - Method-level: Defines the specific path and HTTP method for a single endpoint.
@RequestMapping has several useful attributes, but the most common are path (or value) and method. Because specifying the HTTP method is so common, Spring provides convenient shortcut annotations that are more readable:
@GetMapping@PostMapping@PutMapping@DeleteMapping@PatchMapping
These are the annotations you will use most often. For instance, @GetMapping("/users") is simply a shorthand for @RequestMapping(path = "/users", method = RequestMethod.GET).
The following video provides a great overview of how to use @RequestMapping and its various attributes.
Spring & Spring Boot Annotations Series - #13 - @RequestMapping Annotation
This video, '#13 - @RequestMapping Annotation' from the same Java Guides series, covers how to map requests to your controller methods.
Watch the following sections: Introduction (00:00 - 00:24): A quick overview of the annotation's purpose. Class-Level Mapping (00:58 - 03:06): Learn how to define a base URI for your controller. Specifying HTTP Methods (04:47 - 06:18): See how to define which HTTP verb an endpoint responds to.
4. Practical Exercise: Build Your First API Endpoint
It's time to apply these concepts in your project. We will follow the official Spring guide to build a simple "Hello, World" REST service. This will create the first tangible piece of our application, which we will later secure with our rate limiter.
The guide is an excellent, self-contained walkthrough. I'll break it down into steps for you.
Building a RESTful Web Service
The official Spring guide 'Building a RESTful Web Service' is the definitive starting point for creating APIs with Spring Boot. We will follow its structure to build our first controller.
You'll be working with this guide for the rest of this section. For now, just have it open and ready. I will direct you to the specific parts as we go.
Step 1: Create the Resource Representation Class
First, we need a Java class that defines the structure of the JSON data we will send back. In modern Java, a record is a perfect and concise way to do this.
Following the section "Create a Resource Representation Class" in the guide, create the Greeting record in your project. Place it in a new package, for example, com.example.ratelimiter.dto (Data Transfer Object).
package com.example.ratelimiter.dto;

public record Greeting(long id, String content) { }
Spring's web starter includes the Jackson library, which will automatically convert instances of this Greeting record into JSON format for the HTTP response.
Step 2: Create the Resource Controller
Now, create the controller that will handle requests and return a Greeting.
Following the section "Create a Resource Controller" in the guide, create the GreetingController class. Place it in a new package com.example.ratelimiter.controller.
Let's analyze the code from the guide:
package com.example.ratelimiter.controller;

import java.util.concurrent.atomic.AtomicLong;
import org.springframework.web.bind.annotation.GetMapping;
import org.springframework.web.bind.annotation.RequestParam;
import org.springframework.web.bind.annotation.RestController;
import com.example.ratelimiter.dto.Greeting; // Make sure to import your Greeting record

@RestController
public class GreetingController {

    private static final String template = "Hello, %s!";
    private final AtomicLong counter = new AtomicLong();

    @GetMapping("/greeting")
    public Greeting greeting(@RequestParam(value = "name", defaultValue = "World") String name) {
        return new Greeting(counter.incrementAndGet(), String.format(template, name));
    }
}
Key points to notice:
@RestController: Marks this class as a request handler.@GetMapping("/greeting"): Maps HTTPGETrequests for/greetingto thegreeting()method.@RequestParam: Binds the value of the URL query parameternameto thenamemethod parameter. If thenameparameter is missing from the URL, it will use thedefaultValue"World".- The method returns a
Greetingobject. Spring and Jackson handle the conversion to JSON automatically.
Step 3: Run and Test the Service
Your main application class, created by Spring Initializr, is already set up to scan for components like our new @RestController.
Run your application's main method from your IDE. Once it starts, you can test your new endpoint.
Follow the instructions in the "Test the Service" section of the guide.
- Open your web browser or an API client like Postman and navigate to
http://localhost:8080/greeting. You should see:{"id":1,"content":"Hello, World!"} - Now, try it with the query parameter:
http://localhost:8080/greeting?name=User. You should see:{"id":2,"content":"Hello, User!"}
You have successfully created and tested your first REST API endpoint with Spring Boot!
Key Takeaways
- A controller is a Spring-managed component that handles incoming web requests.
- The
@RestControllerannotation marks a class as a controller and ensures its methods' return values are written directly to the HTTP response body, typically as JSON. - The
@RequestMappingannotation and its shortcuts (@GetMapping,@PostMapping, etc.) are used to map specific URL paths and HTTP methods to your controller methods. - You can use
@RequestParamto easily access URL query parameters in your endpoint methods.
Next Steps
You've built a working API endpoint. However, a real-world API needs to do more than just send back data with a default "200 OK" status. For our rate limiter, we'll critically need to send a "429 Too Many Requests" status when a client exceeds their limit.
In the next lesson, we will focus on handling HTTP requests and responses in more detail, including how to return different HTTP status codes to the client. This will be a vital skill for implementing the core logic of our rate limiter.