Hello! Welcome to the final implementation lesson of our course.
In the last lesson, you made the rate limiter significantly more resilient by implementing a graceful fallback to an in-memory limiter when Redis is unavailable. Your service now correctly blocks excessive traffic with an HTTP 429 status code, even during a partial infrastructure outage. This is a huge step toward production readiness.
However, simply telling a client "no" with a 429 error isn't the most helpful response. A well-behaved, production-grade API should also guide the client on what to do next. That's the focus of this lesson. Your learning outcome is to implement the Retry-After HTTP header in 429 responses to guide clients. This turns a hard rejection into a cooperative signal, improving the behavior of the entire ecosystem your API operates in.
1. The Importance of the Retry-After Header
When a client receives an HTTP 429 "Too Many Requests" error, it knows it has been rate-limited. But it doesn't know for how long. Should it wait one second? Ten seconds? A minute? Without guidance, clients might:
- Retry immediately: This creates a tight loop that wastes resources for both the client and your server, prolonging the rate-limited state.
- Wait for a fixed, long duration: This can be inefficient if the actual wait time is much shorter.
- Give up: The user experience suffers if the client application can't recover gracefully.
The Retry-After header solves this ambiguity. It's a standard HTTP response header that tells the client how long to wait before making a follow-up request. It can be specified in two ways:
- An integer number of seconds (e.g.,
Retry-After: 15). - An HTTP-date representing when the client can retry (e.g.,
Retry-After: Wed, 21 Oct 2026 07:28:00 GMT).
We will focus on implementing the first form, which is more common and simpler for rate-limiting contexts.
2. Calculating the Wait Time
Before we can add the header, we need to calculate a meaningful wait time. This value depends on the specific rate-limiting algorithm in use.
- For Token Bucket: The wait time is the duration required for one token to be replenished. If your bucket has a refill rate of
Rtokens per second, the time to wait is1/Rseconds. For simplicity, we can often round this up to the nearest whole second. - For Sliding Window: The wait time is the duration until the oldest requests that are contributing to the current count expire. A simple and effective strategy is to return the number of seconds remaining until the current time window resets. For instance, in a 60-second window, if a request is denied at the 42nd second, the
Retry-Aftervalue would be60 - 42 = 18seconds.
To accommodate this, our RateLimiter interface needs a small but significant change. A simple boolean isAllowed(...) is no longer sufficient; we need to return more information when a request is denied.
Let's refactor our RateLimiter interface to return a structured object. We can create a simple Plain Old Java Object (POJO) or a record for this.
// A new class to hold the decision
public record RateLimitDecision(boolean allowed, long retryAfterSeconds) {
    public static RateLimitDecision allowed() {
        return new RateLimitDecision(true, 0);
    }

    public static RateLimitDecision denied(long retryAfterSeconds) {
        // Ensure we always suggest waiting at least 1 second.
        return new RateLimitDecision(false, Math.max(1, retryAfterSeconds));
    }
}

// Your updated RateLimiter interface
public interface RateLimiter {
    RateLimitDecision isAllowed(String key, RateLimitRule rule);
}
You will need to update your TokenBucket and SlidingWindow implementations (both in-memory and the Redis Lua scripts) to return this new object with the calculated wait time upon rejection.
3. Adding the Header to the HTTP Response
Now that we have a mechanism to calculate retryAfterSeconds, how do we add it to the HTTP response? There are two common patterns in Spring Boot.
Approach A: Direct Modification in the HandlerInterceptor
The most direct approach is to modify the response object right inside your RateLimitingInterceptor.
Building a Per-Endpoint Rate Limiter Using the Token Bucket ...
The article 'Building a Per-Endpoint Rate Limiter...' demonstrates this simple approach. The code directly sets the status and header on the HttpServletResponse object within the preHandle method.
Review the code snippet for RateLimitingInterceptor.java. Notice how the if (!allowed) block manipulates the response object directly to set the status, header, and write a message.
Your preHandle method would look something like this:
@Override
public boolean preHandle(HttpServletRequest request, HttpServletResponse response, Object handler) throws Exception {
    // ... logic to resolve key and find rule ...

    RateLimitDecision decision = rateLimiter.isAllowed(key, rule);

    if (!decision.allowed()) {
        response.setStatus(HttpStatus.TOO_MANY_REQUESTS.value());
        response.setHeader("Retry-After", String.valueOf(decision.retryAfterSeconds()));
        response.getWriter().write("Too many requests");
        return false; // Block the request
    }

    return true; // Allow the request
}
This is simple and works, but it mixes the concern of rate-limiting logic with the concern of formatting an HTTP error response.
Approach B: The @ControllerAdvice Pattern (Recommended)
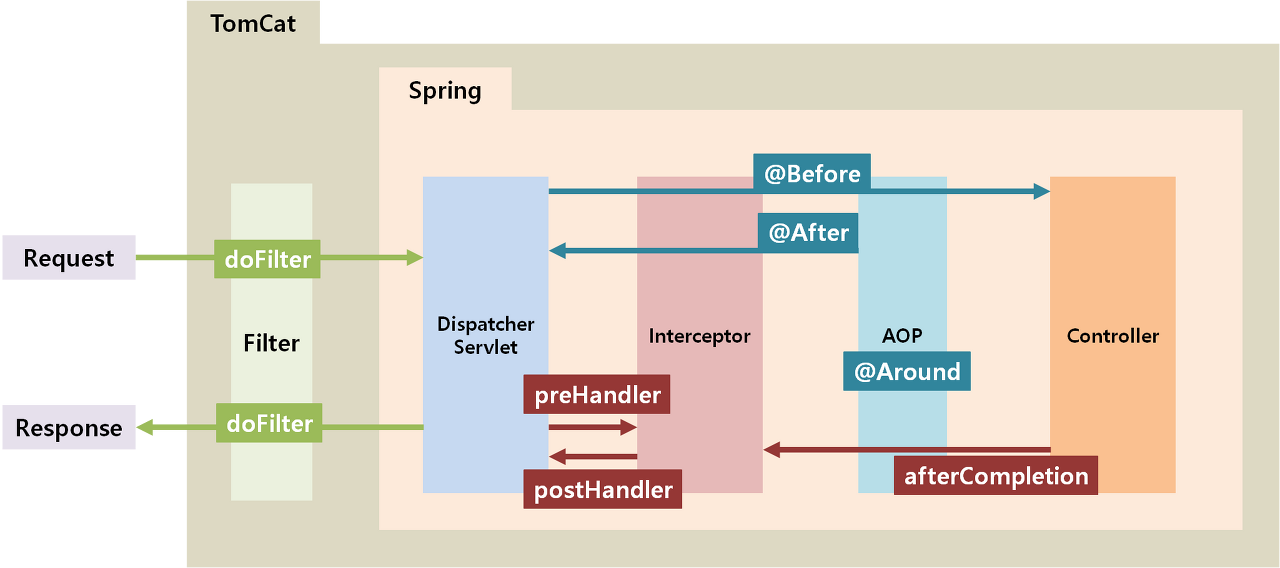
A cleaner, more idiomatic Spring approach is to separate these concerns using a custom exception and a global exception handler. This pattern keeps your interceptor clean and centralizes error response generation.
The flow is:
- The interceptor throws a custom
RateLimitExceededExceptionwhen a request is denied. This exception carries theretryAfterSecondsvalue. - A class annotated with
@ControllerAdvicecatches this specific exception. - The handler method constructs and returns a
ResponseEntitywith the 429 status and theRetry-Afterheader.
Let's see how this is structured.
Mastering Rate Limiting in Spring Boot: A Complete Guide to ...
The article 'Mastering Rate Limiting in Spring Boot' provides a complete example of this robust pattern. It defines a custom exception and a GlobalExceptionHandler to manage the 429 response.
Read the 'Exception Handling' section. Pay close attention to the definitions of RateLimitExceededException and GlobalExceptionHandler. See how the handler method constructs a ResponseEntity and adds multiple headers.
The video below also explains the power of ResponseEntity for customizing both the status code and headers, which is exactly what our exception handler needs to do.
Spring ResponseEntity - How to customize the response in Spring Boot
This video by Dan Vega clarifies why ResponseEntity is the right tool for creating dynamic responses. It shows how to add headers and set status codes programmatically.
Watch from 06:08 to 08:02 to see how to add custom headers. The segment from 09:13 to 09:49 reinforces why this is better than static annotations for conditional logic.
4. Implementation Steps
Let's implement the recommended @ControllerAdvice pattern.
Step 1: Create a Custom Exception
Create a RateLimitExceededException that extends RuntimeException. It should store the retryAfterSeconds.
public class RateLimitExceededException extends RuntimeException {
    private final long retryAfterSeconds;

    public RateLimitExceededException(long retryAfterSeconds) {
        super("Rate limit exceeded.");
        this.retryAfterSeconds = retryAfterSeconds;
    }

    public long getRetryAfterSeconds() {
        return retryAfterSeconds;
    }
}
Step 2: Update the RateLimitingInterceptor
Modify your interceptor to throw this exception when a request is denied.
@Override
public boolean preHandle(HttpServletRequest request, HttpServletResponse response, Object handler) throws Exception {
    // ... logic to get key, rule, and rateLimiter instance ...

    RateLimitDecision decision = rateLimiter.isAllowed(key, rule);

    if (decision.allowed()) {
        return true; // Proceed to controller
    } else {
        throw new RateLimitExceededException(decision.retryAfterSeconds());
    }
}
Notice how much cleaner this is. The interceptor's job is simply to enforce the rule, not to build an HTTP response.
Step 3: Create the GlobalExceptionHandler
This class will catch the exception and build the final HTTP 429 response.
import org.springframework.http.HttpHeaders;
import org.springframework.http.HttpStatus;
import org.springframework.http.ResponseEntity;
import org.springframework.web.bind.annotation.ControllerAdvice;
import org.springframework.web.bind.annotation.ExceptionHandler;

@ControllerAdvice
public class GlobalExceptionHandler {

    @ExceptionHandler(RateLimitExceededException.class)
    public ResponseEntity<String> handleRateLimitExceeded(RateLimitExceededException ex) {
        HttpHeaders headers = new HttpHeaders();
        headers.add("Retry-After", String.valueOf(ex.getRetryAfterSeconds()));

        return new ResponseEntity<>(
            "You have exhausted your API request quota. Please try again later.",
            headers,
            HttpStatus.TOO_MANY_REQUESTS
        );
    }
}
This approach elegantly separates the business logic (in the interceptor) from the presentation logic (in the exception handler), making your code more modular and maintainable—a key principle for a portfolio-quality project.
Conclusion
You have now implemented one of the most important features for a production-ready rate limiter. By providing the Retry-After header, your API is no longer just a gatekeeper; it's a cooperative participant in the web ecosystem, guiding clients to interact with it more efficiently.
Key Takeaways:
- The
Retry-Afterheader is crucial for guiding clients on how to behave when they are rate-limited. - The wait time should be calculated based on the specific algorithm's parameters (e.g., refill rate for Token Bucket, window duration for Sliding Window).
- Refactoring your
RateLimiterinterface to return a detailedRateLimitDecisionobject is a clean way to pass the wait time information up the call stack. - Using a custom exception combined with a
@ControllerAdviceis the recommended Spring pattern for handling application-specific errors and generating custom HTTP responses. It promotes a clean separation of concerns.
Next Steps
Your rate limiter is now functionally complete! It implements multiple algorithms, supports distributed state with an in-memory fallback, is configurable via YAML, exposes metrics, and now provides helpful client feedback.
The final piece of the puzzle is to make your project understandable and usable by other developers (or your future self!). In the very last lesson of this course, you will document the rate limiter's configuration options and usage patterns, preparing your project for its place in your portfolio.