Hello! Welcome to the final module of our course on the "Basics of Spring Framework."
In our last lesson, we put the finishing touches on our microservice architecture by implementing an API Gateway with Spring Cloud Gateway. We saw how it provides a single, unified entry point to our system, which is a crucial pattern for managing complexity. Now that we have fully functional services, our focus shifts from development to deployment. How do we package our applications so they can be run in different environments?
This lesson addresses that question. Our learning outcome is to build a self-contained, executable JAR file using Maven or Gradle. We will explore one of Spring Boot's most powerful features: the ability to create a single, runnable artifact that contains your application, its dependencies, and even the web server.
For someone with your experience in system design, the value of a self-contained, portable, and independently deployable unit is clear. This concept is a cornerstone of modern microservices and cloud-native application delivery.
1. The "Fat JAR": A Self-Contained Application
In the Java ecosystem, a JAR (Java Archive) file is a standard way to package compiled code. Traditionally, these were "thin" JARs containing only the application's own code. To run the application, you had to manually provide all its dependencies (third-party libraries) on the "classpath," a list of locations where the Java runtime should look for classes. This process was often cumbersome and error-prone.
Spring Boot revolutionizes this with the concept of a "fat JAR" (or "uber JAR"). This is a single, executable JAR file that bundles everything needed to run the application.
Fat JAR vs Normal JAR in Spring Boot: A Complete Guide
To start, let's get a clear definition of these two types of JARs. This article provides a concise comparison.
Please read the sections 'What is a Normal JAR?' and 'What is a Fat JAR (Uber JAR)?'. Focus on the key characteristic of each: a normal JAR does not include its dependencies, while a fat JAR is a standalone, executable archive.
The primary benefit is simplicity. Instead of managing a complex classpath, you can run your entire web application with a single command: java -jar myapp.jar.
2. Under the Hood: How Executable JARs Work
Your preference for understanding underlying design principles is key here. A Spring Boot fat JAR isn't just a simple zip file of other JARs; it has a specific, clever structure that makes it executable.
The magic lies in two components:
- A special JAR layout.
- A custom class loader provided by Spring Boot.
The following resources will walk you through this internal structure. You'll see how dependencies are nested inside BOOT-INF/lib/, your application's code is in BOOT-INF/classes/, and how a special JarLauncher class in the manifest file kicks everything off.
First, read the article for a textual and structural explanation.
Fat JAR vs Normal JAR in Spring Boot: A Complete Guide
This section of the 'Fat JAR vs Normal JAR' article explains the internal structure and the role of the Spring Boot loader.
Read the section titled 'Deep Dive: How Fat JAR Works in Spring Boot'. Pay close attention to the file structure diagram and the contents of the MANIFEST.MF file. This explains what the Java Virtual Machine (JVM) does when you execute the JAR.
Now, let's see this in action. The following video provides an excellent visual demonstration, unzipping both a normal JAR and a fat JAR to compare their contents side-by-side.
The Coolest SRPING BOOT Feature - Executable Jar (FAT JAR) | Introducing Spring Boot Maven Plugin
This video from Selenium Express offers a deep dive into the practical differences between a normal JAR and a Spring Boot fat JAR.
Watch the segment from 22:33 to 35:28. The presenter will build the same project twice: once without the Spring Boot plugin (creating a tiny, non-executable JAR) and once with it (creating a large, executable fat JAR). He then inspects the contents of both, showing you exactly where the dependencies and manifest information are located.
3. Building an Executable JAR with Maven
Now for the practical part. If you've created a Spring Boot project with Maven (as we have in this course), producing this fat JAR is straightforward. It's handled by the spring-boot-maven-plugin. This plugin is automatically included when you generate a project from Spring Initializr.
Its primary goal is repackage, which takes the standard JAR produced by Maven and wraps it into the executable fat JAR structure we just learned about.
The official Spring Boot documentation provides the definitive, concise configuration for this plugin.
Read the short section 'Create an Executable JAR with Maven'. It shows the XML snippet for the pom.xml file that enables this functionality.
With that plugin in place, you can build the JAR using a standard Maven command from your project's root directory:
mvn clean package
clean: Deletes thetargetdirectory to ensure a fresh build.package: Compiles your code, runs tests, and packages the result into a JAR file.
After the build succeeds, you will find the executable JAR in the target directory.
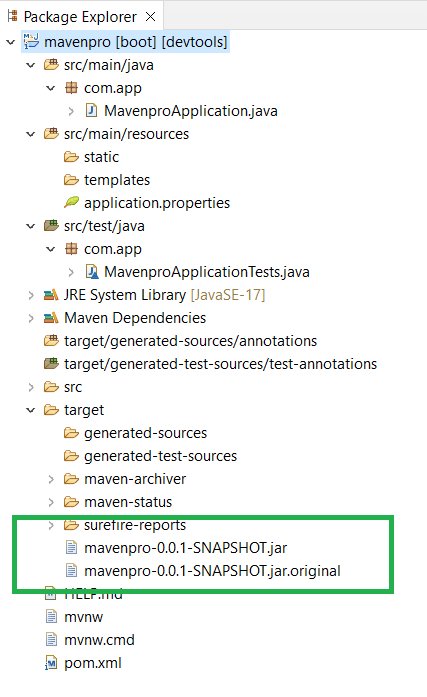
The following video demonstrates this entire process.
The Coolest SRPING BOOT Feature - Executable Jar (FAT JAR) | Introducing Spring Boot Maven Plugin
Let's return to the Selenium Express video to see the Maven build and execution process.
Watch from 13:46 to 20:07. This will show you: How to add the spring-boot-maven-plugin to pom.xml. How to run the Maven build. How to run the resulting JAR from the command line using java -jar.
Once running, you can access your application's endpoints just as you did from your IDE.
4. Building an Executable JAR with Gradle
Maven is not the only build tool in the Java world. Gradle is a modern alternative that is gaining widespread adoption. It uses a Groovy or Kotlin-based Domain Specific Language (DSL) for its build scripts instead of XML, which many developers find more readable and powerful.
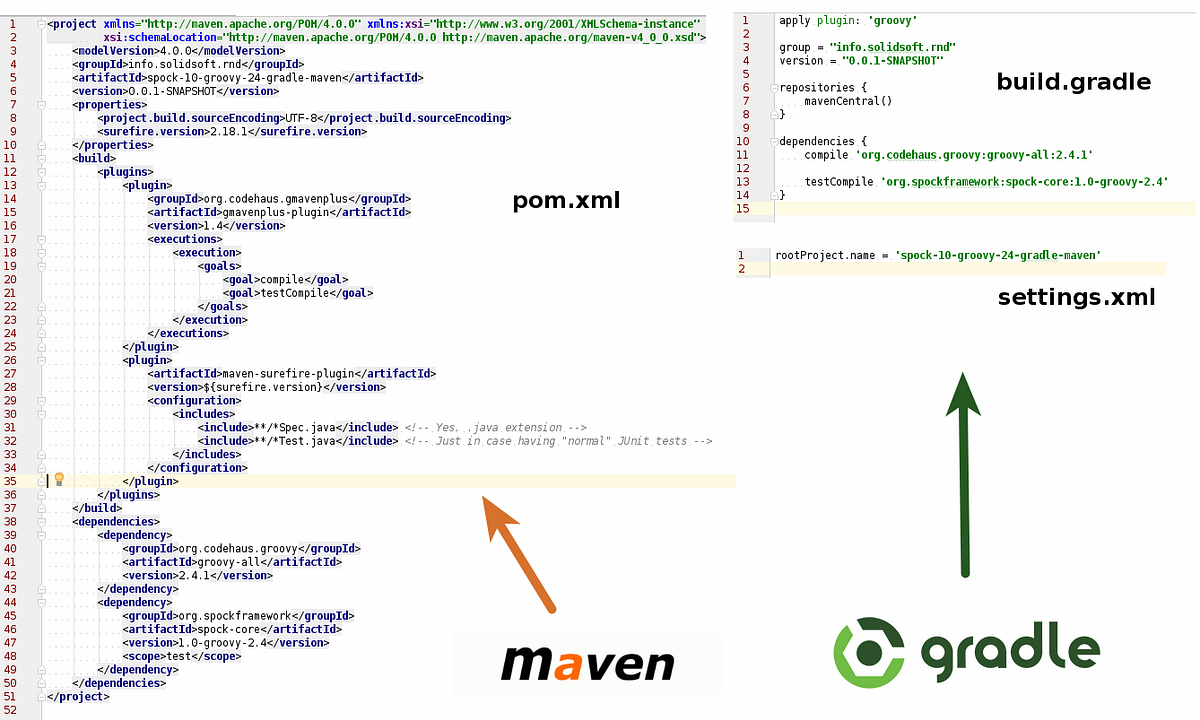
Just like Maven, Gradle has a Spring Boot plugin (spring-boot-gradle-plugin) that handles the creation of the executable JAR. The core concepts are the same, but the commands and file names are different.
A key feature of Gradle is the Gradle Wrapper (gradlew for Linux/macOS, gradlew.bat for Windows). This is a script included in the project that automatically downloads and uses the correct Gradle version for the build. This means you don't need to install Gradle manually to build a Gradle project.
Let's watch a video that demonstrates the entire lifecycle of a Spring Boot project with Gradle.
Gradle Tutorial for Java and Spring Boot
This video from Telusko will walk you through creating, building, and running a Spring Boot application using Gradle.
Watch the segment from 24:29 to 30:09. Pay attention to the following steps: The build command is gradle build (or ./gradlew build). The output JAR is located in the build/libs directory. Customizing the final JAR name in the build.gradle file. Running the application using java -jar with the path to the generated JAR.
The Gradle command to build is:
./gradlew clean build
clean: Deletes thebuilddirectory.build: Compiles code, runs tests, and assembles the artifacts, including the executable JAR.
Conclusion
In this lesson, we covered the essential final step in the development lifecycle: packaging. You learned how to create a self-contained, executable "fat JAR," which is the standard way to package and distribute Spring Boot applications.
Key Takeaways:
- A Fat JAR is a self-contained archive that includes your application code, all its dependencies, and an embedded web server.
- This portability is achieved through a special JAR structure and a custom
JarLaunchermanaged by Spring Boot. - In Maven, the
spring-boot-maven-pluginrepackages the application into an executable JAR. The build command ismvn clean package, and the output is intarget/. - In Gradle, the
spring-boot-gradle-pluginperforms the same function. The build command is./gradlew clean build, and the output is inbuild/libs/. - In both cases, the application is run with a simple command:
java -jar <path-to-your-jar-file>.
Now that we can package our application, a new question arises: how do we change configurations like database connections or server ports for different environments (dev, staging, production) without rebuilding the JAR?
Our next lesson, Externalize configuration at runtime using environment variables or command-line arguments, will answer exactly that.