Welcome to the third module of our course, where we move from theory and assessment into the core practice of darkroom printing. In the last lesson, you learned to analyze a negative and predict the necessary adjustments for exposure time and contrast. You now have a solid strategic plan before even switching on the enlarger. This lesson is about executing the first part of that plan: finding the precise base exposure for your print.
We will achieve this by creating a test strip. However, instead of using arbitrary time intervals, we will employ a systematic and mathematically robust method known as f-stop printing. This approach treats time in the darkroom with the same proportional logic as aperture and shutter speed on your camera, ensuring your results are consistent and reproducible. Mastering this technique is the foundational skill for producing a high-quality work print and is essential for calibrating the Ilford EM10 meter we will cover in a later module.
The Problem with "Counting Seconds"
In your industrial engineering studies, you know that a controlled, repeatable process is key to a quality output. The common darkroom method of making a test strip using constant time increments—for example, 5, 10, 15, 20, and 25 seconds—is fundamentally flawed from a process control perspective.
Why? Because the effect of each 5-second increment is not constant.
- The jump from 5 to 10 seconds is a 100% increase in exposure—a doubling of light, or a full "stop."
- The jump from 20 to 25 seconds is only a 25% increase in exposure—less than a third of a stop.
This arithmetic progression creates test strips where the steps are widely spaced in the highlights (short exposure times) and bunched up in the shadows (long exposure times), making it difficult to accurately judge the ideal exposure.
F-Stop Timing: The Geometric Advantage
The solution is to use a geometric progression, where each time increment represents a constant proportional change in light. This is the principle behind f-stops on your camera lens, and we can apply the exact same logic to our enlarger timer. Doubling the time (e.g., from 10s to 20s) is a +1 stop change. Halving it (e.g., from 10s to 5s) is a -1 stop change.
This ensures that every step on your test strip represents an equal perceptual change in tone, making evaluation far more intuitive and accurate. The following document provides an excellent technical breakdown of this concept.
This PDF by Ralph W. Lambrecht, from the book Way Beyond Monochrome, is one of the definitive guides to f-stop printing. It contrasts the traditional method with the f-stop approach and provides the necessary data to implement it.
First, read the section "Traditional Timing". It perfectly illustrates the weakness of using arithmetic (e.g., 5-second) increments. Pay attention to fig.4, the traditional test strip. Next, read the section "Timing in Stops". This section introduces the f-stop method and fig.5, which you can see is much more evenly spaced. Finally, locate the table in fig.6, titled "The f/stop timing table". This table is your most important tool for this method. It translates f-stop increments into concrete seconds. I highly recommend printing this table and keeping it in your darkroom.
As the article explains, this system allows you to think in terms of stops, just as you do with your camera. A decision to "add half a stop" has a precise, predictable meaning, regardless of whether your base exposure is 8 seconds or 30 seconds.
The Practical Workflow: A Two-Stage Process
Making an f-stop test strip is a two-stage process: first, a wide-ranging test to find the approximate exposure, and second, a fine-tuned test to pinpoint the exact time.
Stage 1: The Full-Stop Test Strip
Your goal in this stage is to find the two full stops that bracket your ideal exposure. A good starting sequence for many negatives is 5, 10, 20, and 40 seconds. These correspond to four sequential full stops.
Before you begin, remember the guiding principle from our last lesson: "Expose for the highlights." Your primary goal with this first test is to find the exposure time that renders your important highlights with just the right amount of detail and texture—not pure, blank white.
The following video demonstrates this entire process, from planning to execution. We'll watch it in two parts. First, let's see how to plan the test strip and execute the initial full-stop version.
F-Stop Printing - Complete Guide
This "Complete Guide" to F-Stop printing from Pictorial Planet provides an excellent real-world demonstration.
First, watch the segment on planning your strategy. The presenter correctly identifies the critical highlight area on the negative that he wants to get right. You should do the same, placing your test strip across the most important highlight area of your projected image. Next, watch from 11:05 to 12:24, where he makes and evaluates a 5, 10, 20 second test strip. Notice his analysis: 5 is too light, but 10 is getting close, and 20 looks promising, if perhaps a bit dark. He has successfully bracketed the correct exposure between 10 and 20 seconds.
To create a strip like this, you expose the paper in cumulative steps:
- Place a strip of RC paper over the critical highlight area.
- Expose the entire strip for 5 seconds.
- Cover the first quarter of the strip with an opaque card. Expose for another 5 seconds. (The uncovered portion has now received a total of 10s).
- Cover the second quarter. Expose for 10 seconds. (The uncovered portion has now received a total of 20s).
- Cover the third quarter. Expose for 20 seconds. (The final portion has now received a total of 40s).
After developing the strip, you should have four distinct bands of exposure: 5s, 10s, 20s, and 40s.
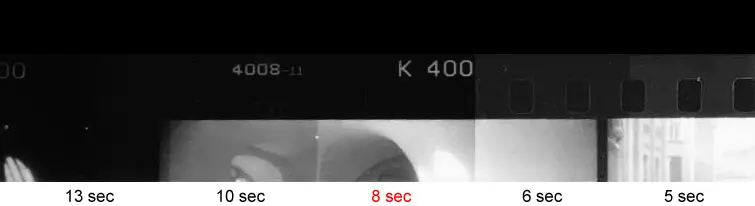
Stage 2: The Partial-Stop Test Strip
Now that you have a range (e.g., "it's between 10 and 20 seconds"), you can create a second, more precise test strip using the f-stop timing table. You'll make a strip with exposures corresponding to, for instance, quarter-stop or third-stop increments within that range.
Let's say you've determined the ideal exposure is between 10 and 20 seconds. Looking at the f-stop table from the LINK resource, the third-stop increments between those values are 10.1s, 12.7s, and 16s. You would then make a new test strip using these more precise times to find the perfect highlight rendering.
Let's return to the video to see this refinement in action.
F-Stop Printing - Complete Guide
We'll now watch the second part of the test strip process from the "Complete Guide."
Please watch from 12:43 to 14:11. The presenter determines that 20 seconds is too dark and that the correct exposure lies between 10 and 20. He then uses his f-stop chart to test 14.2 seconds (a half-stop between 10 and 20) and 11.9 seconds (a quarter-stop above 10). By comparing these fine increments, he confidently selects 14.2 seconds as his base exposure time—the time that gives him the highlight detail he wants.
This two-stage method is both efficient and highly precise. You use one strip of paper to find the rough range, and a second strip to find the exact value, avoiding the waste and ambiguity of the arithmetic method.
Conclusion
In this lesson, you've learned a systematic, engineering-minded approach to determining print exposure. By replacing arbitrary time intervals with the logical, proportional system of f-stops, you gain a level of control and repeatability that is essential for refined printing.
Key Takeaways:
- F-stop timing is based on a geometric progression (a constant ratio), where each "stop" doubles or halves the amount of light. This is more consistent and logical than an arithmetic progression (a constant difference).
- The process involves two stages: a wide-ranging, full-stop test strip (e.g., 5, 10, 20, 40s) to find the approximate range, followed by a fine-tuned, partial-stop test strip to pinpoint the exact time.
- The primary goal of the test strip is to determine the base exposure: the minimum time required to render meaningful detail in the most important highlights of the image.
Next Lesson Preview:
You now have a robust method for finding the correct exposure for your highlights. But what about the other end of the scale—the shadows? In the next lesson, we will perform another crucial calibration: determining the 'time for maximum black' (TMB). This will tell us the absolute maximum exposure your paper-developer combination can handle before becoming pure, featureless black, giving us the full tonal range we have to work with.