Welcome back. In our previous lesson, you mastered the final wet-side processing steps, ensuring your resin-coated prints are properly washed and dried for archival stability and a professional finish. You now have a technically complete photograph. However, perfection in the darkroom is a relentless pursuit. Inevitably, despite our best efforts, tiny specks of dust on the negative get projected by the enlarger, leaving small, distracting white spots on the final print.
This lesson addresses that final imperfection. We will delve into the meticulous art of print spotting, a retouching technique to make those blemishes vanish. Your goal is to create a "refined print," and this is the last hands-on skill needed to elevate your work from a good print to a flawless one. We will cover the necessary tools, the fundamental technique of applying dye, how to handle different tonal areas, and the specific challenges—and solutions—for working with the RC paper you prefer.
The Tools for Precision
Spotting is a delicate process that requires specialized tools. The goal is to apply a microscopic amount of dye precisely to a tiny white area, so the quality of your tools, especially your brush, is paramount.
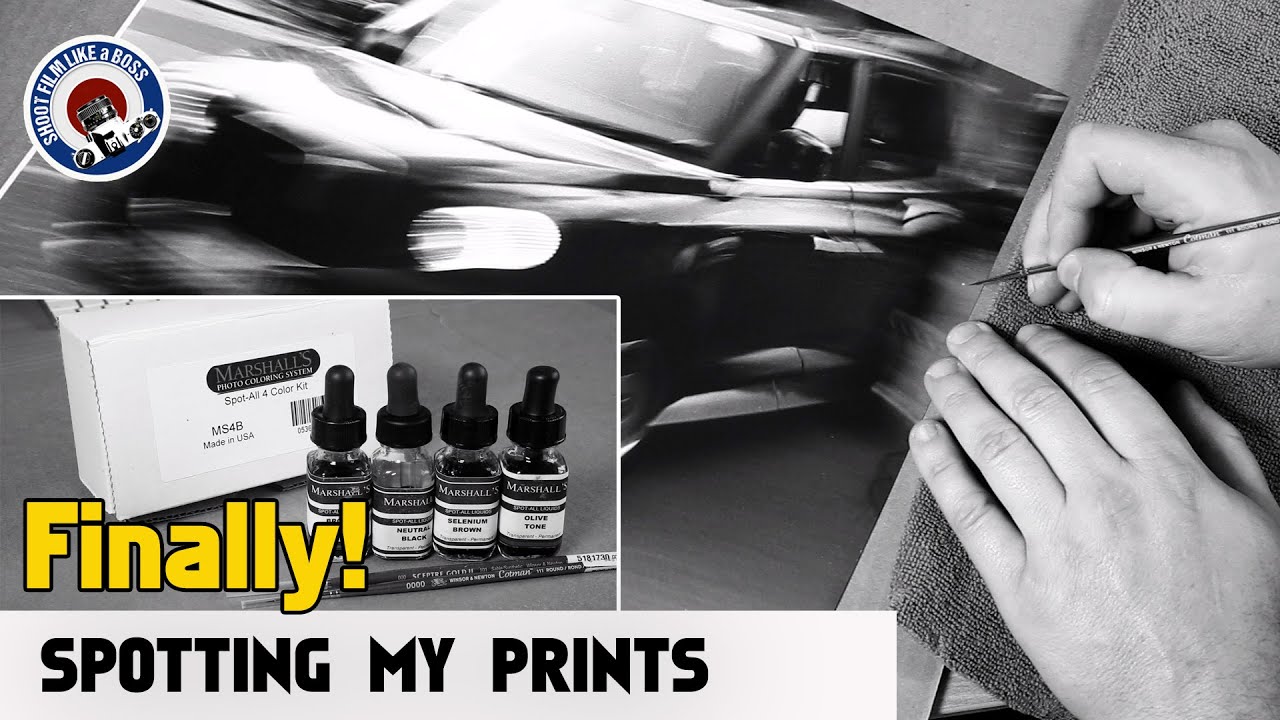
The video below provides an excellent overview of the materials you will need.
Retouching the Old Way! Spotting a B&W Darkroom Print
This video, "Retouching the Old Way!" from The Naked Photographer, begins with a clear and concise introduction to the tools of the trade.
Watch the segment from the beginning to get acquainted with the essential equipment. Pay close attention to these key items: Brush: A natural hair, red sable brush is recommended. The size is critical; a "triple zero" (000) brush provides the ultra-fine point needed for this work. Dyes: The presenter shows several types, including liquid dyes like Spotone and Marshall's (which has largely replaced Spotone), as well as dry dye sets from Kodak and Peerless. Palette: A simple porcelain or plastic palette is used. Notice the technique of putting a few drops of liquid dye in the palette and letting them dry. Working from a dried cake of dye offers far greater control over the amount you pick up.
In short, your spotting kit will consist of:
- A set of spotting dyes (e.g., Marshall's Spot-All kit).
- A high-quality, fine-tipped round brush (size 000 or smaller).
- A palette for your dyes.
- A small container of water.
- Good, bright lighting and possibly a magnifier.
The Fundamental Technique: Stippling, Not Painting
The most common mistake beginners make is to treat spotting like painting, attempting to cover the white spot with a single brushstroke. This almost always results in a dark, obvious blotch that is more distracting than the original spot.
The correct approach is stippling. The idea is to build up the tone slowly by applying a series of near-microscopic dots of dye that blend in with the grain structure of the photographic emulsion.
Tips on Printing - Unblinking Eye
This article from Unblinking Eye provides a superb written description of the spotting process, articulating the core philosophy of the technique.
Please read section 13, labeled "Spotting prints". The most important concept is found in this sentence: "The idea is to create a dot pattern akin to the grains of the photographic emulsion". Also note the advice to work with a "nearly-dry brush at all times" and to always build up the dye area slowly.
This theoretical understanding is best complemented by seeing it in action. The following clip demonstrates this "building up" process on a dark area of a print, where the technique is most forgiving.
Retouching the Old Way! Spotting a B&W Darkroom Print
Let's return to the "Retouching the Old Way!" video to see the stippling technique applied.
Watch the demonstration from spotting a dark area. Notice how the presenter repeatedly dabs the brush, tests the density on the border, and applies the dye in multiple, light layers until the spot disappears. He correctly states, "It is easier to put it on in small layers and build up to the density you need rather than try to do it all at once."
The Challenge of Highlights
Spotting a white dust mark in a dark or mid-tone area is relatively straightforward. The real test of your skill and patience comes when you must spot a mark in a bright, delicate highlight, like an open sky or a white wall. Here, even the slightest excess of dye will create a dark spot that is impossible to ignore.
The key is extreme dilution. You need to thin the dye on your palette and test it on a scrap print until it seems like there is almost no pigment on the brush at all.
Retouching the Old Way! Spotting a B&W Darkroom Print
The same video provides a perfect illustration of the care required for spotting highlights.
Watch the segment from spotting light tones. The presenter emphasizes how he thins the dye "until there's almost nothing left" on the brush. This is the level of subtlety required to successfully match a very light tone without overshooting.
Special Considerations for RC Paper
As you've likely discovered, your preferred RC paper presents a unique challenge. Unlike fiber-based paper where the dye can soak into the paper's fibers, RC paper has a plastic coating. The dye has nowhere to go but to sit on the surface of the emulsion. This is why spotting can feel like the dye is being "repelled."
Your background in engineering will appreciate the physics at play. The water used as a carrier for the dye cannot be absorbed by the paper base. It can only air-dry. This means more time is needed between applications for the spot to dry fully. Furthermore, the non-porous surface makes it harder for the dye to "grab on."
Fortunately, experienced printers have developed a specific technique to overcome this.
The secret to spotting RC Prints [Archive] - Large Format Photography
This forum thread on Large Format Photography contains a wealth of practical wisdom. We will focus on two key posts that explain both the "how" and the "why" of spotting RC paper.
First, read the post by user DanK, which reveals the critical technique. Focus on the paragraph starting here. The secret is to pre-wet the spot with a tiny drop of pure water to soften the gelatin surface before applying any dye. Next, read the post by Mick Fagan for the scientific explanation. Read his sixth paragraph, beginning "To the best of my knowledge". This explains that with RC paper, the water in the dye can only evaporate, necessitating a longer drying time between applications.
To further aid adhesion, you can add a single drop of a wetting agent, such as Kodak Photo-Flo, to the water you use for spotting. This reduces the surface tension and helps the dye flow evenly onto the pre-moistened spot.
Correcting Mistakes and Dealing with Black Spots
What happens when you apply too much dye? Don't panic.
- Immediate fix: Quickly take a clean brush, dampen it with water, and gently touch the dark spot. The clean brush will wick away the excess dye. You can repeat this a few times to lighten the area.
- Stubborn fix: As demonstrated in the "Darkroom Print Spotting and Etching" video by DistPhoto, a very dilute solution of household ammonia and water (e.g., 6 drops in 15ml of water) can be dabbed on to lift the dye.
- Last resort: If all else fails, you can re-wash the entire print. As we learned in the last lesson, washing removes processing chemicals, and it will also remove all the water-based spotting dye, giving you a clean slate.
Finally, while dust on the negative creates white spots, dust on the paper during exposure or a pinhole in the negative's emulsion creates a black spot. These cannot be covered with dye. Instead, they must be removed, typically by carefully scraping away the emulsion with a scalpel, a technique called etching.
Darkroom Print Spotting and Etching
The "Darkroom Print Spotting and Etching" video demonstrates this advanced technique.
Watch the section from on print etching. The key takeaway here is the relationship between the two techniques: after the presenter carefully etches away the black speck, he is left with a white mark. He then uses the exact spotting skills we've been discussing to fill in that white mark, bringing the process full circle.
Etching requires extreme care and is best reserved for when you cannot easily remake the print. For now, focus on mastering the art of spotting white blemishes.
Conclusion
Print spotting is the final, meditative step in crafting a perfect photograph. It bridges the gap between a technically proficient print and a work of art free from distractions. While it demands patience and a steady hand, the principles are straightforward.
Key Takeaways:
- Spotting is a retouching technique to conceal white dust spots by applying dye with a fine-tipped brush.
- The proper technique is stippling—building up tone with tiny dots—not painting. Always work from a nearly-dry brush and build density slowly.
- Spotting light-toned areas is significantly more difficult and requires extreme dilution and patience.
- RC paper repels dye due to its plastic coating. To succeed, pre-wet the spot with water to soften the emulsion, and allow more time for drying between applications.
- Mistakes can be corrected by lifting excess dye with a damp, clean brush or, as a last resort, by re-washing the print.
- Black spots are handled by etching, which creates a white spot that must then be spotted with dye.
Next Lesson Preview:
Your print is now developed, washed, dried, and spotted. It is complete. In our final lesson of the course, we will step back from the technical processes and learn how to critically evaluate a final print for its overall impact, tonal balance, and technical excellence, and how to document your process for future reproducibility.