Welcome back! In our previous lesson, we established a robust, stateless authentication system using Spring Security's oauth2ResourceServer module. We now have a secure way to verify a user's identity via a JWT. However, knowing who a user is (authentication) is only half the story. The other, equally important half is determining what they are allowed to do (authorization).
This lesson bridges that gap. We will move beyond simply protecting endpoints from unauthenticated access and start implementing fine-grained, role-based access control. You'll learn how to secure individual methods within your services and controllers, ensuring that only users with the appropriate roles can execute sensitive business logic. Your prior experience with JWT authentication in your MERN project provides a solid foundation, as we'll now be using the claims within the token to make these authorization decisions.
By the end of this lesson, you will be able to secure service methods with role-based access control using the powerful @PreAuthorize annotation, a cornerstone of modern Spring Security.
From URL Matching to Method-Level Security
So far, our security rules have been defined centrally in our SecurityConfig class using requestMatchers. This is an excellent approach for applying broad rules, like "all endpoints under /api/v1/admin/** require authentication." However, it has its limits. What if two methods share the same base URL but require different levels of access? Or what if you want to secure a method in the service layer, completely bypassing the controller?
This is where method-level security shines. It allows us to place authorization rules directly on the methods that need protection. This co-locates the security logic with the business logic, often making the code easier to read and maintain.
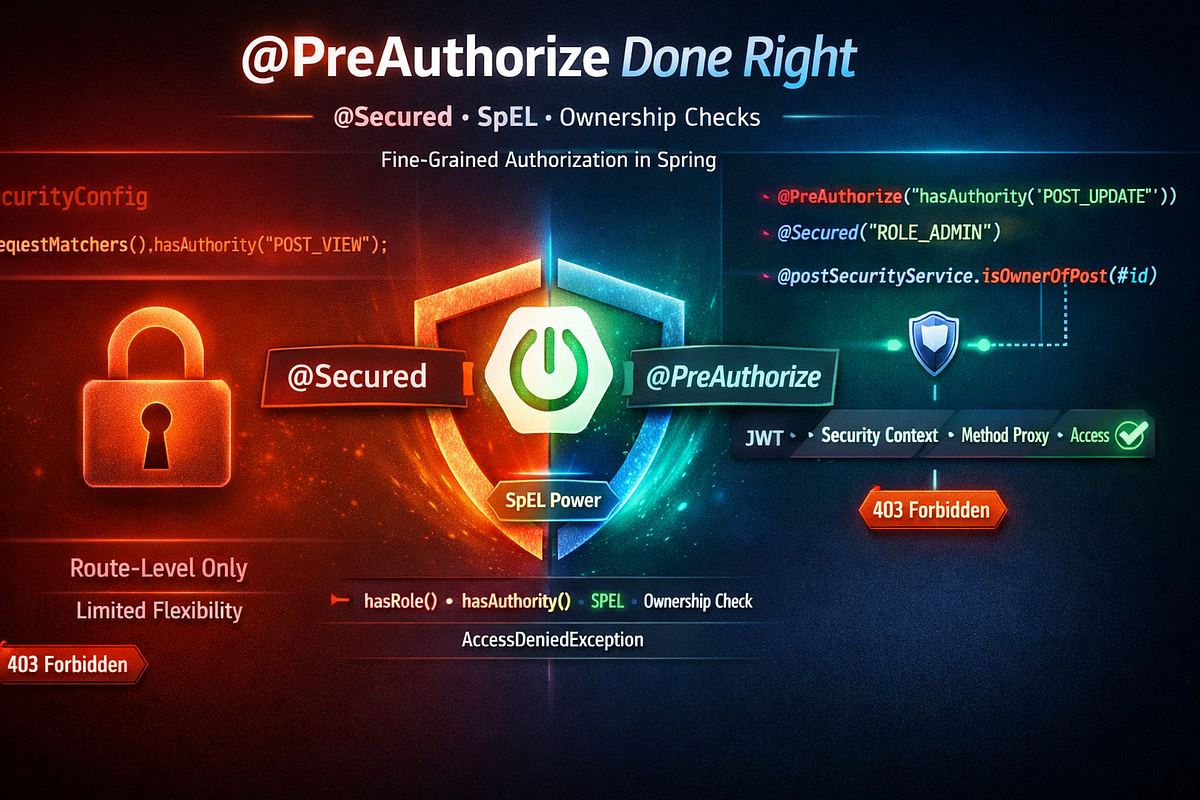
To enable this capability, our first step is to tell Spring we intend to use method-level security annotations.
Enabling Method Security
In your SecurityConfig.java file, add the @EnableMethodSecurity annotation to the class definition.
@Configuration
@EnableWebSecurity
@EnableMethodSecurity // Add this annotation
public class SecurityConfig {
    // ... your existing configuration
}
This annotation enables Spring's pre-post annotations, most notably @PreAuthorize. It works by using Aspect-Oriented Programming (AOP) to wrap the annotated methods with security checks.
The following resources provide excellent explanations for this crucial first step.
Build a Role-based Access Control in a Spring Boot 3 API
This article provides a complete walkthrough of implementing role-based access control. We'll be following its structure for much of this lesson.
Start by reading the section "Enable the method security". This section clearly explains the purpose of the @EnableMethodSecurity annotation.
Spring boot 3 & Spring security 6 - Roles and Permissions Based Authorization Explained!
This video offers a comprehensive explanation of roles and permissions. The segment below specifically covers enabling method security and the evolution from older Spring versions.
Watch from this segment to understand how @EnableMethodSecurity works and how it simplifies configuration in Spring Security 6 compared to its predecessors.
Setting Up the Data Model for Roles
Before we can authorize based on roles, our application needs a concept of what a role is and how it's assigned to a user. We will now update our data model to include this. The process involves three main parts:
- Defining the
Roleentity. - Associating the
Userentity with aRole. - Exposing the user's role to Spring Security.
The blog post "Build a Role-based Access Control in a Spring Boot 3 API" provides a perfect, step-by-step guide for this.
Build a Role-based Access Control in a Spring Boot 3 API
This guide will walk you through modifying your application to support user roles, from the database entity all the way to the Spring Security context.
Please follow these sections of the article carefully: Create the role entity: Follow the instructions under this heading to create the RoleEnum enum, the Role JPA entity, and the RoleRepository. This defines what roles are possible in your system. You can find the content in this part. Store the pre-defined roles: Implement the RoleSeeder component as described in this section. This ensures your roles (USER, ADMIN, etc.) exist in the database when the application starts. Update the User entity: As shown in the section "Update the User entity", add a relationship from your User entity to the Role entity and update your user creation logic to assign a default role. Access the user role: This is a critical step. In the section "Access the user role", modify the getAuthorities() method in your User entity. This method is part of the UserDetails interface and is how Spring Security discovers a user's roles and permissions. The ROLE_ prefix is a convention that Spring Security uses to distinguish roles from other permissions.
After completing these steps, your application will have a proper data model for roles, and more importantly, the Authentication object in Spring's SecurityContext will be populated with the correct authorities for the logged-in user.
Securing Methods with @PreAuthorize
With our roles set up and method security enabled, we can now protect our methods. The @PreAuthorize annotation is incredibly flexible, using Spring Expression Language (SpEL) to define access rules.
Let's say you have a UserController with two methods: one to fetch the current user's profile (/me) and another to list all users.
/meshould be accessible by any authenticated user./usersshould only be accessible by users with anADMINrole.
Here’s how you would apply @PreAuthorize:
@RestController
@RequestMapping("/users")
public class UserController {

    // ... constructor and other fields

    @GetMapping("/me")
    @PreAuthorize("isAuthenticated()") // Any authenticated user can access this
    public ResponseEntity<User> authenticatedUser() {
        Authentication authentication = SecurityContextHolder.getContext().getAuthentication();
        User currentUser = (User) authentication.getPrincipal();
        return ResponseEntity.ok(currentUser);
    }

    @GetMapping
    @PreAuthorize("hasRole('ADMIN')") // Only users with the 'ADMIN' role
    public ResponseEntity<List<User>> allUsers() {
        List<User> users = userService.allUsers();
        return ResponseEntity.ok(users);
    }
}
Common @PreAuthorize Expressions:
isAuthenticated(): Returnstrueif the user is not anonymous.hasRole('ROLE_NAME'): Returnstrueif the current user has the specified role. Note that you don't include theROLE_prefix here; Spring adds it automatically.hasAnyRole('ROLE_1', 'ROLE_2'): Returnstrueif the user has any of the roles in the list.hasAuthority('PERMISSION_NAME'): Checks for a specific permission (authority).hasRole('ADMIN')is largely equivalent tohasAuthority('ROLE_ADMIN').
The following image illustrates this flow conceptually. A request comes in, Spring Security authenticates the user and identifies their role, and then it checks if that role has permission to access the requested resource.

The article from Teco Tutorials provides code examples for applying these annotations.
Build a Role-based Access Control in a Spring Boot 3 API
This reading will show you how to apply the @PreAuthorize annotation to your controller methods to enforce the access rules we've discussed.
Read the sections "Protect the API routes" and "Protect the API route for super admin" to see isAuthenticated(), hasAnyRole(), and hasRole() in action.
How Does it Work? The Magic of AOP
You might be wondering how simply adding an annotation can enforce such complex security logic. The answer lies in Aspect-Oriented Programming (AOP).
When you add @EnableMethodSecurity, Spring creates a proxy object around your controller (or any bean with a security annotation). When a call is made to a secured method like allUsers(), the call is first intercepted by a special component, the AuthorizationManagerBeforeMethodInterceptor.
This interceptor reads the SpEL expression from your @PreAuthorize("hasRole('ADMIN')") annotation. It then evaluates this expression against the current user's Authentication object. If the expression returns true, the interceptor passes the call along to your actual allUsers() method. If it returns false, the interceptor throws an AccessDeniedException, which Spring translates into an HTTP 403 Forbidden response, stopping the method from ever being executed.
This video from CodeSnippet provides a fantastic visual and technical breakdown of this interception mechanism.
🔐 Spring Security - Method Security Explained | @PreAuthorize, @PostAuthorize
This video explains the internal workings of method security in Spring.
First, watch the overview of the internal mechanism from this segment. It explains the role of AOP and the AuthorizationManagerBeforeMethodInterceptor. Next, see a demonstration of how to apply @PreAuthorize with hasAuthority and hasRole from this part. The example is very similar to what we are building.
Conclusion
Today, you have moved from authentication to authorization, adding a critical layer of security to your application. By defining roles and using method-level security, you can now enforce the principle of least privilege with precision, ensuring users can only perform actions they are explicitly permitted to.
Key Takeaways:
- Method-level security provides fine-grained control by placing authorization rules directly on Java methods.
- You must add
@EnableMethodSecurityto your security configuration to activate this feature. - The
@PreAuthorizeannotation uses Spring Expression Language (SpEL) to check permissions before a method is executed. - Common expressions include
isAuthenticated(),hasRole(), andhasAnyRole(). - Your
UserDetailsimplementation must correctly expose roles via thegetAuthorities()method, typically by returningSimpleGrantedAuthorityobjects prefixed withROLE_. - This mechanism is powered by Spring AOP, which intercepts method calls to perform security checks.
In our next and final module, we will shift our focus to ensuring the quality and reliability of the code you've written. Our first lesson will cover how to write unit tests for your service layer components using JUnit 5 and Mockito, two essential tools in the Java ecosystem.