Hello! Welcome to the next lesson in our module on timers and interrupts.
In our previous session, we successfully implemented a timer interrupt service routine (ISR). We learned how to use IRAM_ATTR to place the ISR in RAM, the volatile keyword to ensure correct access to shared variables, and critical sections to prevent race conditions. We now have a working ISR, but there's a crucial difference between a working ISR and a good ISR.
This lesson focuses on exactly that, addressing the learning outcome: Apply best practices for ISR implementation, including minimizing processing and avoiding blocking calls. Building a responsive and stable embedded system hinges on writing efficient ISRs. We will explore the "golden rules" of ISR design and learn the standard professional technique for achieving them: deferred interrupt processing.
1. Why ISRs Must Be Kept Short and Fast
When an interrupt occurs, the CPU drops everything to execute the ISR. This gives interrupts their power, but it also comes with a major responsibility. While the ISR is running, other parts of the system are on hold. A long or inefficient ISR can have severe consequences.
- Increased Latency for Other Interrupts: The ESP32, like most microcontrollers, can prioritize interrupts. However, an ISR for a given interrupt level will typically prevent other interrupts of the same or lower priority from running until it completes. If your timer ISR takes too long, you might miss a time-critical event from another peripheral, like a data-ready signal on a communication bus.
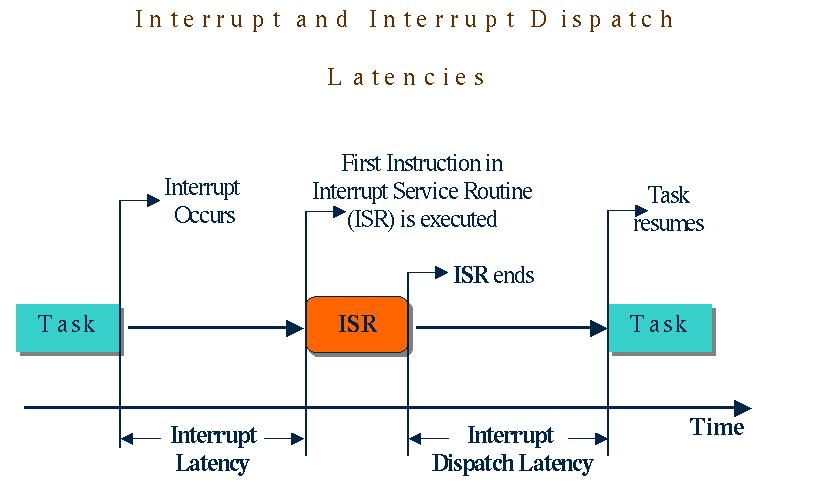
- Reduced System Responsiveness: Since an ISR preempts your main application tasks, a lengthy ISR will make your whole system feel sluggish or unresponsive. Imagine a device where pressing a button takes a noticeable fraction of a second to register because the CPU is stuck inside a slow ISR.
To avoid these problems, we follow a simple, strict principle: keep your ISR as short and fast as humanly possible.
2. The "Golden Rules" of ISR Design
So, what does "short and fast" mean in practice? It means adhering to a set of rules about what you can and, more importantly, cannot do inside an ISR.
Let's look at an article that provides a great summary of these rules.
How interrupts work and how to implement them with ...
The article 'How interrupts work...' provides a concise and excellent summary of best practices for writing safe ISRs. We'll refer to these as our 'Golden Rules'.
Read the section titled 'Golden rules for writing safe ISRs'. Then, jump down to 'Details for different boards' and read the short paragraph on the ESP32/ESP8266.
Based on that reading and our ESP32 context, here is a summary of the most critical rules:
- Do the Absolute Minimum: The ISR's only job is to handle the urgent part of the event. This usually means capturing a value, setting a flag, or signaling another part of the program. Defer all other logic to your main code.
- NEVER Use Blocking Calls: A blocking call is any function that waits for an event to complete. This is the cardinal sin of ISR programming.
vTaskDelay()ordelay(): An ISR is not a task and cannot be put to sleep. Calling a delay function will likely crash the system.
Serial.print()/printf()/ESP_LOGI(): These functions are deceptively slow. They have to wait for the UART hardware's buffer to have space, which can take milliseconds—an eternity in ISR terms. Printing from an ISR is a common cause of instability.- File I/O or network operations: These are complex, slow, and blocking.
- No Dynamic Memory Allocation: Avoid
malloc,new, and C++ classes that use them implicitly (like theStringclass). Memory allocation can have non-deterministic timing and is not considered safe to use within an ISR. - Use
IRAM_ATTR: As we learned, this ensures your ISR code runs from fast and always-accessible RAM, not flash. - Use
volatile: This is a reminder from our last lesson. Any variable shared between an ISR and another task must be declaredvolatile.
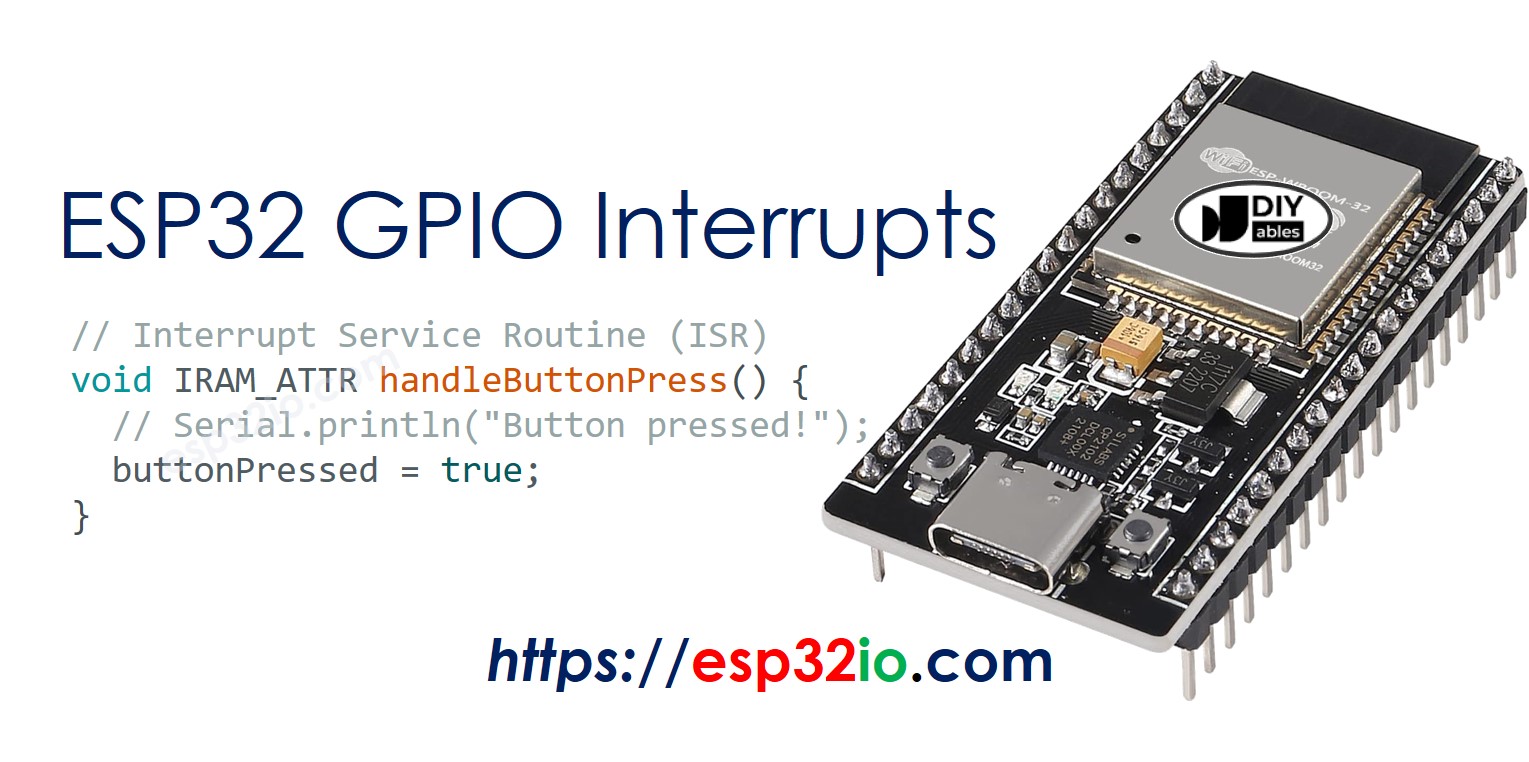
This image perfectly illustrates some of these rules in action. Notice the IRAM_ATTR and the fact that the Serial.println call is commented out—the developer correctly identified that it should not be in an ISR.
Test your understanding!
Imagine you are writing firmware for a CNC machine. An ISR is triggered by a sensor that detects when the cutting tool has broken. Which of the following is the most appropriate action for the ISR to take?
- Stop the spindle motor, stop the axis motors, and log an error message to the serial console.
- Increment a
volatile uint8_t g_tool_broken_flag;and do nothing else. - Use
vTaskDelay(100)to wait for vibrations to settle, then read the sensor again to confirm.
Show answer
Option 2 is the best choice. The ISR's sole responsibility is to record the critical event as quickly as possible. Stopping motors and logging messages are complex operations that should be handled by a dedicated, lower-priority task that is signaled by this flag. Option 1 performs blocking I/O and complex logic. Option 3 uses a blocking delay, which is forbidden.
3. Deferred Interrupt Processing: The Professional Approach
If we can't do any significant work inside the ISR, how do we get anything done? The answer is a standard design pattern called Deferred Interrupt Processing.
The work is split into two parts:
- The "Top Half" (The ISR): Executes immediately at the time of the interrupt. It performs the absolute minimum, time-critical work (e.g., reading a sensor value, clearing the interrupt flag) and then passes data or a signal to the "bottom half."
- The "Bottom Half" (A FreeRTOS Task): This is a normal, lower-priority task. It waits for the signal from the ISR. Once signaled, it wakes up and performs all the longer, non-critical processing (e.g., filtering the data, printing to the console, updating a display, controlling a motor).
This pattern keeps the ISR extremely short and fast, ensuring the system remains responsive to other interrupts, while still allowing for complex logic to be executed in response to the event.
4. Implementing Deferred Processing with a Binary Semaphore
The volatile flag we used in the last lesson is a simple form of deferred processing. However, it requires the "bottom half" task to constantly poll the flag, which wastes CPU cycles. A more efficient, event-driven approach is to use a binary semaphore.
The task can "take" (wait on) the semaphore, which puts it into a blocked state where it consumes no CPU time. The ISR can "give" the semaphore, which immediately unblocks the task and makes it ready to run.
A critical rule when using FreeRTOS objects in an ISR is that you must use the special ...FromISR version of the API call. These functions are designed to be safe for use within an interrupt context.
Let's watch a video that explains and demonstrates this pattern.
Introduction to RTOS Part 9 - Hardware Interrupts | Digi-Key Electronics
This video segment from Digi-Key provides an excellent conceptual and practical demonstration of the 'deferred interrupt' pattern using a binary semaphore.
Watch from 7:57 to 11:44. Focus on the core idea: the ISR's job is reduced to simply giving a semaphore, and a separate task waits on that semaphore to do the real work. Pay close attention to the use of xSemaphoreGiveFromISR and the xHigherPriorityTaskWoken parameter.
As the video explained, xSemaphoreGiveFromISR() takes a second parameter, pxHigherPriorityTaskWoken. If giving the semaphore unblocks a task that has a higher priority than the currently running task, this variable will be set to pdTRUE. We must then manually request a context switch at the end of the ISR by calling portYIELD_FROM_ISR(). This ensures the high-priority task runs immediately.
Let's see this in a complete code example. Here, we attach an interrupt to a GPIO pin connected to a button. When the button is pressed, the ISR simply gives a semaphore. A separate task waits for this semaphore and then prints a message to the console.
#include <stdio.h>
#include "freertos/FreeRTOS.h"
#include "freertos/task.h"
#include "freertos/semphr.h"
#include "driver/gpio.h"
#include "esp_log.h"

#define BUTTON_GPIO GPIO_NUM_4

// Handle for the semaphore
SemaphoreHandle_t g_button_sem;

// The "Bottom Half" task
static void button_processing_task(void *arg)
{
    ESP_LOGI("TASK", "Button processing task started.");
    while(1) {
        // Wait forever for the semaphore to be given by the ISR.
        // This task consumes no CPU while it is waiting.
        if (xSemaphoreTake(g_button_sem, portMAX_DELAY) == pdTRUE) {
            ESP_LOGI("TASK", "Button pressed! Deferred processing is happening now.");
            // Here you would do longer processing, e.g., send a network request,
            // update a display, etc. We will just add a small delay to simulate work.
            vTaskDelay(pdMS_TO_TICKS(50));
        }
    }
}

// The "Top Half" ISR
static void IRAM_ATTR gpio_isr_handler(void *arg)
{
    // A context switch might be caused by giving the semaphore, so we must
    // declare a variable to pass to the ...FromISR function.
    BaseType_t xHigherPriorityTaskWoken = pdFALSE;

    // Give the semaphore to unblock the task.
    xSemaphoreGiveFromISR(g_button_sem, &xHigherPriorityTaskWoken);

    // If xHigherPriorityTaskWoken is now set to pdTRUE, we should yield.
    if (xHigherPriorityTaskWoken) {
        portYIELD_FROM_ISR();
    }
}

void app_main(void)
{
    // Create the binary semaphore.
    g_button_sem = xSemaphoreCreateBinary();

    if (g_button_sem != NULL) {
        // Create the processing task
        xTaskCreate(button_processing_task, "button_task", 2048, NULL, 10, NULL);

        // Configure the GPIO pin
        gpio_config_t io_conf = {
            .pin_bit_mask = (1ULL << BUTTON_GPIO),
            .mode = GPIO_MODE_INPUT,
            .pull_up_en = GPIO_PULLUP_ENABLE,
            .intr_type = GPIO_INTR_NEGEDGE // Interrupt on falling edge (button press)
        };
        gpio_config(&io_conf);

        // Install the GPIO ISR service
        gpio_install_isr_service(0);

        // Attach our ISR to the GPIO pin
        gpio_isr_handler_add(BUTTON_GPIO, gpio_isr_handler, NULL);

        ESP_LOGI("MAIN", "Setup complete. Waiting for button press.");
    } else {
        ESP_LOGE("MAIN", "Failed to create semaphore.");
    }
}
This example is the blueprint for robust interrupt handling in an RTOS. The ISR is instantaneous, and all "real" work is deferred to a task that can safely block and take as much time as it needs without affecting the system's real-time responsiveness.
Conclusion
You've now moved beyond simply making interrupts work to understanding how to make them work well. Mastering these best practices is non-negotiable for writing professional, stable firmware.
Key Takeaways:
- The fundamental principle of ISR design is to keep them as short and fast as possible.
- Never use blocking calls (like delays, serial printing, or network functions) or dynamic memory allocation inside an ISR.
- The Deferred Interrupt Processing pattern is the standard solution. The ISR ("top half") captures the event and signals a normal task ("bottom half") to do the heavy lifting.
- Binary semaphores are an efficient, event-driven way for an ISR to signal a task.
- Always use the
...FromISRvariant of FreeRTOS functions inside an ISR (e.g.,xSemaphoreGiveFromISR). - Check the
xHigherPriorityTaskWokenparameter and callportYIELD_FROM_ISR()to ensure immediate execution of a newly-awakened high-priority task.
In our next lesson, we will put all of this together in a very practical context: implementing a debouncing algorithm for a GPIO input using a hardware timer. This will require us to coordinate a GPIO interrupt with a timer interrupt, providing a perfect exercise to apply these best practices.