Hello! Welcome back.
In our last lesson, we explored the fundamentals of FreeRTOS multitasking. You learned how to create multiple tasks and assign priorities, which allowed us to see preemption in action as a high-priority task interrupted a lower-priority one. We used the function vTaskDelay() to pause tasks, but we didn't dive into how it works or why it's so fundamental to writing good RTOS code.
This lesson focuses on mastering vTaskDelay(). You will learn how it enables true non-blocking delays, allowing the ESP32 to perform other work instead of wasting CPU cycles. This is a critical skill for building responsive and efficient embedded systems.
By the end of this lesson, you will be able to:
- Differentiate between blocking and non-blocking delays.
- Explain how
vTaskDelay()uses task states to yield CPU time. - Convert time in milliseconds to FreeRTOS ticks.
- Implement
vTaskDelay()to allow multiple tasks to run concurrently and cooperatively.
1. The Problem with Blocking Delays
In standard single-threaded programming, like a simple Arduino sketch, using a function like delay(1000) to wait for one second is common. This approach is called a blocking delay or "busy-waiting." While the delay() function is running, the processor is stuck in a loop, unable to do anything else.
In a multitasking environment like FreeRTOS, this is disastrous. If a task calls delay(), it monopolizes the CPU core it's running on. The FreeRTOS scheduler can't switch to other tasks, even those with higher priorities. Everything grinds to a halt.
FreeRTOS Timing Explained on Arduino
The article 'FreeRTOS Timing Explained on Arduino' clearly explains why the standard delay() function is problematic in an RTOS context.
Read the section titled 'Why delay() Is Bad in an RTOS Environment'. It's a short but crucial explanation.
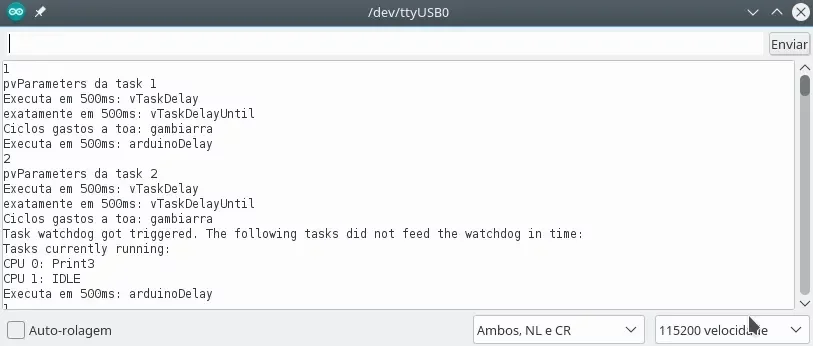
This issue can even cause the system to crash. The ESP32 has a "Task Watchdog Timer" (TWDT) that monitors tasks to ensure they don't get stuck. If a task blocks the CPU for too long without yielding, the watchdog will trigger a system reset.
2. The Solution: Non-Blocking Delays with vTaskDelay
FreeRTOS provides a much smarter way to wait: vTaskDelay(). This function tells the scheduler that the current task has nothing to do for a specified period.
When a task calls vTaskDelay(), two things happen:
- The scheduler moves the task from the Running state to the Blocked state.
- The scheduler immediately looks for another task in the Ready state and gives it the CPU.
A task in the Blocked state consumes no CPU time. Once the delay period expires, the scheduler moves the task back to the Ready state, making it eligible to run again when it becomes the highest-priority ready task.

Introduction to RTOS Part 3 - Task Scheduling | Digi-Key Electronics
To see this concept in action, let's watch a short clip from Digi-Key's 'Introduction to RTOS' series.
Please watch the following segments: 02:01 - 02:31: This animation shows a task calling vTaskDelay and entering the Blocked state, allowing the system to idle (or run another task). 05:02 - 05:34: This segment reinforces the definition of the Blocked state and lists vTaskDelay as a primary way to enter it.
This is the essence of cooperative multitasking. By using vTaskDelay(), your tasks yield control of the processor, allowing other tasks to do useful work.
3. Ticks, Not Milliseconds
A crucial point about FreeRTOS is that its internal timekeeping is based on ticks, not milliseconds. A "tick" is a periodic interrupt generated by a hardware timer. The rate of these ticks (configTICK_RATE_HZ) determines the "granularity" of time in the OS.
The vTaskDelay() function takes one argument: the number of ticks to delay.
void vTaskDelay(const TickType_t xTicksToDelay);
Hardcoding a delay in ticks (e.g., vTaskDelay(100)) is not good practice because the actual time will depend on the tick rate configuration. A better approach is to specify the delay in milliseconds and convert it to ticks.
FreeRTOS provides a handy macro for this: pdMS_TO_TICKS().
// Delay for 500 milliseconds, regardless of the tick rate.
vTaskDelay(pdMS_TO_TICKS(500));
There is also a constant, portTICK_PERIOD_MS, which tells you how many milliseconds are in one tick. You will sometimes see code like vTaskDelay(1000 / portTICK_PERIOD_MS), which is an older way of achieving the same thing as pdMS_TO_TICKS(1000). Using the macro is now the recommended practice for clarity and portability.
The ESP-IDF documentation provides a detailed explanation of vTaskDelay() and the tick system.
Read the section titled vTaskDelay(). Focus on the 'API Prototype', the parameter explanation, and the two 'Note' boxes that explain system clock ticks and the pdMS_TO_TICKS() macro.
4. Demonstrating Blocking vs. Non-Blocking Behavior
Let's see the practical difference. We'll set up two tasks:
blinkerTask: A low-priority (Priority 1) task that toggles an LED.serialTask: A higher-priority (Priority 2) task that prints a message to the serial monitor every second.
Version 1: With a Blocking delay()
In blinkerTask, we'll use Arduino's delay(500).
#include <Arduino.h>

const int LED_PIN = 2; // On-board LED on many ESP32 boards

void blinkerTask(void *pvParameters) {
  pinMode(LED_PIN, OUTPUT);
  for (;;) {
    digitalWrite(LED_PIN, !digitalRead(LED_PIN));
    delay(500); // Bad! Blocking delay
  }
}

void serialTask(void *pvParameters) {
  for (;;) {
    Serial.println("Serial task is running...");
    vTaskDelay(pdMS_TO_TICKS(1000));
  }
}

void setup() {
  Serial.begin(115200);
  delay(1000);

  xTaskCreate(blinkerTask, "Blinker", 2048, NULL, 1, NULL);
  xTaskCreate(serialTask, "Serial", 2048, NULL, 2, NULL);
}

void loop() {}
Expected Result: The LED will blink, but you will never see the "Serial task is running..." message. The blinkerTask calls delay(), which blocks the CPU. Even though serialTask has a higher priority, the scheduler never gets a chance to run it because the blinkerTask never yields.
Version 2: With a Non-Blocking vTaskDelay()
Now, let's make one small but critical change in blinkerTask.
// ... (serialTask, setup, loop are the same)

void blinkerTask(void *pvParameters) {
  pinMode(LED_PIN, OUTPUT);
  for (;;) {
    digitalWrite(LED_PIN, !digitalRead(LED_PIN));
    vTaskDelay(pdMS_TO_TICKS(500)); // Good! Non-blocking delay
  }
}
Expected Result: Both tasks now work perfectly! The LED blinks every 500ms. Once per second, you will see the message "Serial task is running..." appear. When blinkerTask calls vTaskDelay(), it enters the Blocked state, allowing the scheduler to run other tasks. Since serialTask has a higher priority, it will run whenever it's ready. The rest of the time, blinkerTask will run.
Test your understanding!
You are building a robotic arm controller.
motorControlTask(priority 3) must update the motor positions every 20ms.sensorReadTask(priority 2) needs to read a temperature sensor. The sensor library has aread()function that takes 100ms to complete.
If the read() function is a blocking delay (like Arduino's delay()), what is the impact on the motor control? What should be done to fix this (conceptually)?
Show answer
If the read() function blocks for 100ms, the motorControlTask will be starved of CPU time. It needs to run every 20ms, but the lower-priority sensorReadTask will be holding the CPU for 100ms at a time, causing the motors to update at a much slower rate (at best, once every 100ms) and become jerky or unstable.
Conceptually, the read() function in the sensor library should be rewritten to be non-blocking. It should start the sensor reading, and then use vTaskDelay() or another RTOS mechanism (like a semaphore, which we'll see later) to wait for the result without blocking the CPU. This would allow the high-priority motorControlTask to preempt it and run every 20ms as required.
5. A Note on Periodic Accuracy: vTaskDelay vs. vTaskDelayUntil
While vTaskDelay is excellent for yielding time, it has a subtle drawback for tasks that need to run at a precise, fixed frequency. vTaskDelay is a relative delay—it pauses for a set duration from the moment it is called.
Consider this loop:
while(1) {
  // 1. Do some work (e.g., takes 5ms)
  do_work();

  // 2. Delay for 100ms
  vTaskDelay(pdMS_TO_TICKS(100));
}
The total time for one loop iteration is execution_time + delay_time, so 5ms + 100ms = 105ms. If do_work() sometimes takes 10ms, the period becomes 110ms. This variation is called jitter, and the gradual lengthening of the period is called timing drift.
For applications like sensor sampling or control loops where a constant frequency is vital, FreeRTOS provides vTaskDelayUntil. This function calculates the delay needed to wake up at an absolute time, correcting for the task's own execution time.
FreeRTOS Timing Explained on Arduino
The article 'FreeRTOS Timing Explained on Arduino' has a fantastic section with diagrams and code that contrasts these two functions.
Read the sections 'vTaskDelay(): Relative Delay Explained', 'vTaskDelayUntil(): Absolute and Periodic Delay', and 'Hands-On Demo: Measuring Timing...'. Pay close attention to the serial monitor output images, which clearly show the timing drift with vTaskDelay and the stability with vTaskDelayUntil.
For now, it's enough to know this distinction exists. We will continue to use vTaskDelay for general-purpose yielding, but keep vTaskDelayUntil in mind for future projects requiring high periodic accuracy.
Conclusion
You now have a solid understanding of one of the most important functions in FreeRTOS. By using vTaskDelay instead of blocking functions, you can build responsive, efficient, and stable multitasking applications.
Key Takeaways:
- Blocking delays like Arduino's
delay()monopolize the CPU and prevent other tasks from running. vTaskDelay()is a non-blocking function that puts the calling task into the Blocked state, yielding the CPU to the scheduler.- FreeRTOS timing is based on ticks. Use the
pdMS_TO_TICKS()macro to convert milliseconds to ticks for portable and readable code. vTaskDelay()implements a relative delay, which can lead to timing drift in periodic tasks. For precise timing,vTaskDelayUntil()is the better choice.
In this lesson, our tasks ran independently on timers. But what if one task needs to signal another? For example, what if a task that reads sensor data needs to tell a motor control task that a new value is ready? In the next lesson, we will explore semaphores, a powerful tool for task synchronization and communication.