Hello! Welcome back to your audio post-production training.
In the last lesson, you mastered the art of creating smooth transitions between individual audio clips using crossfades and level adjustments with keyframes. You learned how to guide the listener seamlessly from one moment to the next.
Today, we're tackling a new, crucial challenge: what happens when you have multiple dialogue recordings in the same scene? This could be two different actors, or even the same actor recorded with different microphones (like a boom mic and a lavalier). If their volumes are inconsistent, the audience will be distracted, and the story's impact will be lost.
This lesson is designed to teach you how to mix multiple dialogue tracks to consistent and clear levels. This is a cornerstone of professional sound design, ensuring your dialogue is always balanced, intelligible, and serves the narrative.
1. The Goal: Invisible and Intelligible Dialogue
The objective of dialogue mixing is to make different audio sources sound like they belong in the same world. When done well, the audience shouldn't notice your work at all; they should simply be absorbed in the story.
Dialogue Mixing Tutorial with Matt Yocum
Let's begin with a short introduction from professional sound designer Matt Yocum. In his tutorial, he explains the philosophy behind dialogue mixing.
Watch the first minute and a half (from 00:02 to 01:32). Pay close attention to his point about the best dialogue mixing being unnoticeable and its role in keeping the viewer immersed.
Your job is to remove any technical distractions—like sudden volume jumps or tonal shifts—that could pull the viewer out of the story. You want the dialogue to be consistently clear and balanced, so the focus remains on the characters and their performances.
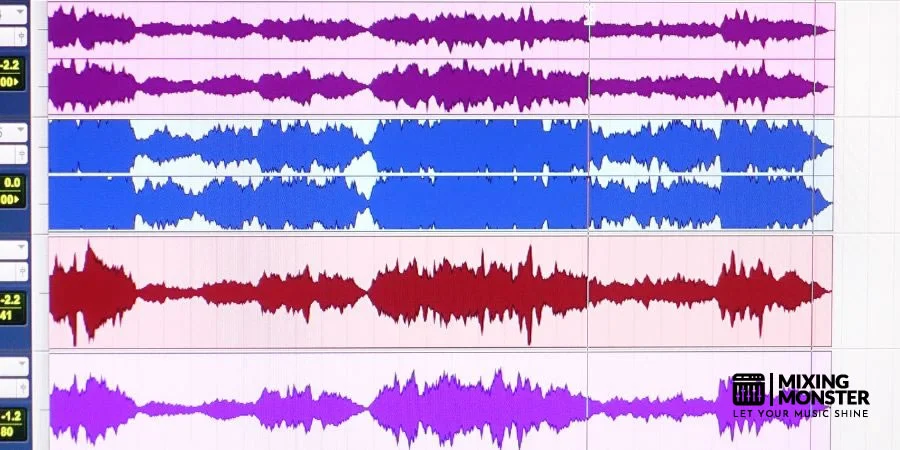
2. Step 1: Organization and Gain Staging
A clean mix starts with a clean workspace. Before you even touch a volume fader, it's essential to organize your tracks and set your initial levels correctly—a process known as gain staging.
Professional Techniques For Mixing Dialogue For Picture
The article 'Professional Techniques For Mixing Dialogue For Picture' by Damian Kearns outlines a fantastic professional workflow. Let's look at his first two steps.
First, read 'Step 1: Get It In, Get It Organized,' focusing on the practice of moving different speakers to their own dedicated tracks. Then, read 'Step 2: Level Up,' paying close attention to the difference between clip gain (pre-processing) and volume automation (post-processing).
Here's a breakdown of that crucial initial process:
- Organize: Place the dialogue for each character on its own track. If you have multiple mics for one character (e.g., a boom and a lavalier), you can stack them on separate tracks, color-code them, and choose the best-sounding one for each line.
- Initial Leveling (Gain Staging): The goal is to get all your dialogue clips into the same general loudness ballpark before you apply creative effects. You have two primary tools for this:
- Clip Gain: This adjusts the volume of the audio clip itself, before it gets to any effects like EQ or compression. This is your main manual tool for turning down a loud line or boosting a quiet one. Most editors, including CapCut and Shotcut, allow you to adjust the volume of an individual clip.
- Loudness Matching/Normalization: Some software offers automated tools to match the perceived loudness of different clips. This can be a great time-saver for your first pass.
How to Get Volume Levels the Same - Adobe Audition Tutorial
Let's see one of these automated tools in action. This video from Mike Russell shows how to use the 'Match Clip Loudness' feature in Adobe Audition. The specific tool may differ from your software, but the concept is the same.
Watch from the beginning to 02:20. Notice how the two clips have very different volume levels initially, and how the matching function brings them much closer together.
After this step, your dialogue tracks should be much more even, but you'll still hear variations within each person's performance. That's where our next tool comes in.
3. Step 2: Compression for Dynamic Consistency
Even after you've balanced the overall level between tracks, a single line of dialogue can have a wide dynamic range—the difference between the loudest and quietest parts. An actor might whisper one moment and shout the next. A compressor is the tool used to reduce this dynamic range, making the overall performance more consistent.
A compressor works by automatically turning down the volume whenever the audio exceeds a certain level (the threshold).
How to Get Volume Levels the Same - Adobe Audition Tutorial
Let's return to Mike Russell's tutorial, where he gives an excellent, simple demonstration of how to use a compressor on speech.
Watch from 02:20 to 05:22. Focus on these key concepts: Threshold: The point at which the compressor kicks in. Ratio: How much the volume is reduced (for speech, a 2:1 or 3:1 ratio is a good starting point). Makeup Gain: Used to boost the overall volume back up after the loudest parts have been turned down.
By applying a compressor to each of your dialogue tracks, you can tame the loudest peaks and then raise the overall level, making the quiet parts more audible without the loud parts becoming overwhelming. This is the single most important technique for achieving that polished, professional, and consistent dialogue sound.
4. Step 3: EQ and Panning for Cohesion and Clarity
Now that your tracks have a consistent volume, the final step is to make them sound like they exist in the same space and are tonally balanced.
Equalization (EQ)
Different microphones and recording positions can result in very different tonal qualities. A lavalier mic might sound thin, while a boom mic might sound full but have some low-end room rumble. EQ helps you shape the frequency content of each track to make them blend better.
- Corrective EQ: Use a high-pass filter to cut out low-frequency rumble from things like air conditioners or traffic. This instantly cleans up a track.
- Tonal Matching: Subtly adjust the frequencies of each track so they sound more alike. For example, if one mic sounds too "nasally," you can cut some of the mid-range frequencies. If another sounds muffled, you might boost the high frequencies slightly to add clarity.
Dialogue Mixing Tutorial with Matt Yocum
In the 'Dialogue Mixing Tutorial,' Matt Yocum demonstrates this process of using EQ to match different microphones.
Watch from 16:19 to 18:00 to see him use a clip effect EQ to make an off-camera voice sound less 'thin.' Then, watch from 27:30 to 28:30, where he identifies a mid-range resonance in a voice and uses EQ to reduce it, making it sound more natural.
Panning
Panning places a sound in the stereo field (left, right, or center). For film and video, on-screen dialogue is almost always kept in the center. However, if a character is speaking from off-screen, you can pan their dialogue slightly to the left or right to match their position. This adds to the spatial realism of your scene.
Test your understanding!
You are mixing a scene with two characters.
- Character A was recorded with a lavalier mic. Their audio is clear but sounds a bit thin and is quieter overall.
- Character B was recorded with a boom mic. Their audio sounds full-bodied but is much louder and has some very loud peaks when they get excited.
Describe the sequence of steps and the tools you would use to make their dialogue sound balanced and consistent.
Show answer
Here is a professional workflow to address this:
- Organization: Place Character A's audio on Track 1 and Character B's audio on Track 2.
- Gain Staging: Use Clip Gain on Character A's clips to manually boost their overall volume to be closer to Character B's. Conversely, use Clip Gain to lower any extremely loud lines from Character B.
- Compression: Apply a Compressor to Character B's track to control their loud, excited peaks and even out their performance. You would then apply a separate compressor to Character A's track to ensure their volume is also consistent.
- EQ: Use an Equalizer on Character A's track to add a little bit of low-mid frequency to give it more body and make it sound less thin. Use an EQ on Character B's track, perhaps with a high-pass filter, to remove any unnecessary low-end rumble from the room. The goal is to make their tonal qualities feel more similar.
5. Step 4: Monitoring with a Master Track
As you mix your individual tracks, you need a way to monitor the combined, cumulative level of everything. This is done using a master track (also known as a master bus or submix).
All your individual dialogue tracks feed into a single "Dialogue Bus," and then that bus, along with your music and sound effects tracks, feed into the final Master Track.
The producer's handbook to mixing audio stories
The NPR article 'The producer's handbook to mixing audio stories' has a great, simple explanation of why this is so important.
Please read the short section titled 'Use a master track!' This explains its function clearly.
The master track is where you watch your final output meter to ensure the total volume doesn't exceed 0 dB (which causes digital clipping and distortion) and that it meets the loudness standards for your delivery platform (like YouTube).
Conclusion
You've now walked through the fundamental workflow for mixing multiple dialogue tracks. By balancing levels and tonality, you ensure the audience can focus on the performance and story, not the technical flaws.
Key Takeaways:
- The Goal: A good dialogue mix is invisible; it provides consistency and clarity without drawing attention to itself.
- Organization is Key: Start by placing each speaker on their own track.
- Gain Staging First: Use clip gain and/or loudness matching to get all tracks to a similar overall volume before applying effects.
- Compress for Consistency: Use a compressor on each individual dialogue track to reduce the dynamic range and even out the performance.
- EQ for Cohesion: Use EQ to correct problems (like rumble) and to tonally match audio from different microphones.
- Monitor the Whole Mix: Always use a master track to watch your final, cumulative levels to prevent clipping.
Next Lesson Preview:
With your dialogue now clean, clear, and consistent, you have a solid foundation. In our next lesson, we will begin to build the sonic world around that dialogue. You will learn how to layer ambient sounds to create believable environments, a key step in immersing your audience in your story's setting.