Hello! Welcome to your next lesson in our module on "Visual Polish: Color Correction and Grading."
In our last lesson, we explored the artistic side of color—how to use it to create mood, build worlds, and support genre conventions. You learned the "why" behind color grading. Today, we're focusing on the "how," specifically how to achieve those complex looks efficiently.
This lesson is all about a powerful tool used by everyone from indie YouTubers to Hollywood colorists: the Look-Up Table, or LUT. Your learning outcome is to use Look-Up Tables (LUTs) to achieve a desired visual style efficiently. Mastering LUTs is a huge step toward speeding up your workflow and giving your short films and videos a professional, cinematic quality.
1. What is a Look-Up Table (LUT)?
At its core, a LUT is simply a file containing a set of mathematical instructions. It tells your editing software how to change an input color value to a different output color value.
Think of it like a preset filter in a photo app, but for video, and with much more precision and control. By applying a LUT, you can instantly transform the colors of your footage to create a specific look or correct for a particular camera profile.
To get a solid definition, let's start with a short article.
What are LUTs? The Ultimate Guide to Color Grading
The article 'What are LUTs? The Ultimate Guide to Color Grading' from StudioBinder provides a clear and concise introduction to the concept.
Please read the first two main sections of the article: Start from the top and read through the 'Why use LUTs on footage?' section. Continue with the '1D LUTs vs. 3D LUTs' section. Focus on understanding the basic definition and the primary reasons filmmakers use LUTs.
The key takeaways from the article are:
- LUTs are a shortcut. They speed up the grading process immensely.
- They provide a predetermined look to create a specific mood.
- They come in different forms, with 3D LUTs (.cube files) being the standard for color grading because they offer more precise control over hue, saturation, and brightness combined.
2. The Two Main Jobs of a LUT: Correction and Creation
This is the most important concept to grasp: not all LUTs are designed to make your footage look "cinematic." They generally fall into two categories with very different purposes.
The following video does an excellent job of explaining the difference between color correction and color grading, which sets the stage for understanding the two types of LUTs.
Color Grading 101 - Everything You Need to Know
The 'Color Grading 101' video from the Film Riot channel is a fantastic resource. This first clip will clarify the two stages of color work.
Watch from 00:49 to 02:16. Pay close attention to the distinction between color correction (creating a neutral, harmonized base) and color grading (giving the image character and atmosphere).
As the video explained, you first correct, then you grade. LUTs are designed to help with both stages.
A. Technical LUTs (for Correction)
A Technical LUT (also called a Conversion or Utility LUT) is used in the color correction stage. Its job is to translate footage from one color space to another.
The most common use is to convert Log footage. Many professional cameras can shoot in a "Log" profile. This footage looks flat, gray, and washed-out, but it contains a huge amount of information in the highlights and shadows (high dynamic range).
To work with this footage, you must first use a technical LUT to convert it to a standard viewing format (like Rec. 709). This brings back normal contrast and saturation, giving you a correct, neutral starting point.
Let's return to the Film Riot video to see this explained.
Color Grading 101 - Everything You Need to Know
This next clip explains what Log footage is and why it requires a conversion, often done with a technical LUT.
Watch from 05:27 to 07:06. Focus on what a Log image looks like and the necessity of converting it to something usable like Rec. 709.
B. Creative LUTs (for Grading)
A Creative LUT (or "look" LUT) is used in the color grading stage. This is the fun part! These LUTs are designed to apply a specific style or mood to your footage, drawing on all the color theory we discussed in the last lesson. You can find LUTs that emulate the look of classic films, create a gritty sci-fi feel, or give your video a warm, nostalgic glow.
This next clip from the same video defines both technical and creative LUTs and explains how to use them.
Color Grading 101 - Everything You Need to Know
Here, Film Riot clarifies the roles of technical vs. creative LUTs and gives a crucial piece of advice about not overdoing it.
Watch from 09:29 to 11:14. Note how creative LUTs can be a starting point for your grade and the importance of adjusting their intensity.
3. The Correct Workflow: Order Matters!
You can't just slap a LUT on your footage and expect good results. Applying them in the wrong order can crush details or produce strange colors. Here is the standard, professional workflow:
- Primary Correction: Before any LUTs, do basic corrections on your raw clip. Adjust exposure and white balance to create a balanced image.
- Apply Technical LUT (if needed): If you shot in Log, apply your camera-specific conversion LUT now (e.g., S-Log3 to Rec.709). Your footage should now look "normal."
- Secondary Corrections: Make any further small tweaks to contrast, saturation, or specific colors after the technical LUT but before the creative one.
- Apply Creative LUT: Now, apply your "look" LUT to add the desired style.
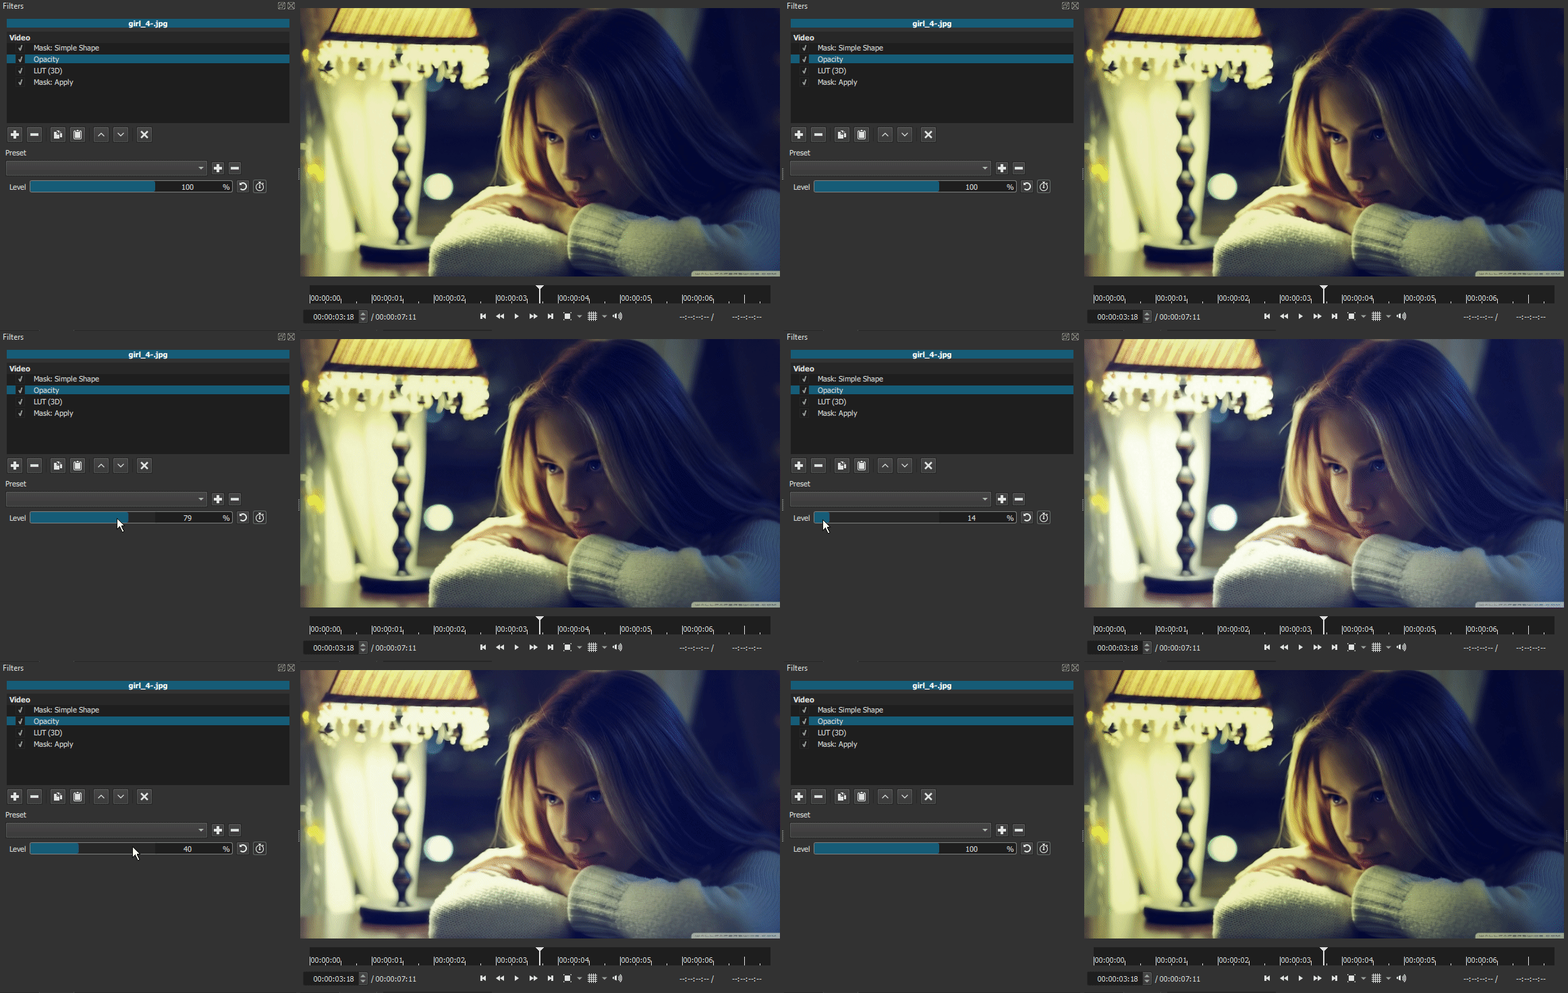
- Final Adjustments: A LUT is a starting point, not the end. Almost always, you'll need to dial back the intensity/opacity of the creative LUT to make it blend more naturally with your footage.
The Film Riot video provides a perfect demonstration of this entire process.
Color Grading 101 - Everything You Need to Know
Let's watch the full workflow in action. This clip ties everything together, from Log conversion to applying and adjusting a creative LUT.
Watch from 15:45 to 17:06. Notice the order of operations: he applies the Log conversion, makes some corrections, and then adds the creative LUT at 50% intensity as a final touch.
For your goal of creating YouTube content efficiently, some editors use an even faster workflow.
How To Color Grade // Fast, Easy & Cinematic
Creator Matti Haapoja has a workflow optimized for speed, which is great for YouTube content. He uses adjustment layers to apply LUTs to his whole timeline at once.
Watch from 03:28 to 05:51 and then from 07:19 to 09:29. Notice how he uses an adjustment layer to apply the conversion LUT first, then the creative LUT, and does his corrections on the clips underneath. This is a very common and efficient method.
4. Practical Application in Your Software
Since you have experience with CapCut and Shotcut, let's see how this applies directly to you. Both programs support 3D LUTs (.cube files).
In CapCut: As the image above showed, you can go to Adjustment > LUT and import your own .cube or .3dl files. You can apply this to an individual clip or place it on an adjustment layer over your whole timeline.
In Shotcut: You can add a LUT by going to Filters, searching for LUT (3D), and loading your .cube file. The GIF below shows the dramatic change a LUT can make.
Test your understanding!
You've just finished shooting a scene for your short film using a friend's camera that was set to a Log profile. You have a creative LUT called "Vintage_Film.cube" that you want to use to give the scene a nostalgic feel. What are the essential steps you need to take to apply this look correctly?
Show answer
- Primary Correction: First, import the Log footage into your editor. Make initial adjustments to exposure to ensure no parts are completely black or white (crushed or clipped).
- Apply a Technical LUT: Find the correct technical LUT for the specific camera and Log profile used (e.g., if it was a Sony camera in S-Log3, you'd need an S-Log3 to Rec.709 LUT). Apply this to convert the footage to a standard, normal-looking color space.
- Apply the Creative LUT: Now, apply your "Vintage_Film.cube" LUT.
- Adjust Intensity: The effect will likely be too strong. Lower the intensity/opacity of the creative LUT until it looks natural and fits the mood you want, rather than overpowering the image.
For a great summary of pro-tips on using LUTs, check out the following resource.
What is a LUT? | A Beginner's Guide to Color Grading with ...
The article 'A Complete Guide to Understanding Look-Up Tables' by Pixflow offers excellent advice for getting the most out of your LUTs.
Read the section 'Advanced Tips for Using LUTs Effectively'. These five tips are a perfect summary of best practices.
Conclusion
You've now added a critical and efficient tool to your color grading toolkit. LUTs bridge the gap between the color theory you've learned and the practical need to produce great-looking video quickly.
Key Takeaways:
- A LUT is a file that maps input colors to output colors, acting as a powerful color preset.
- Technical LUTs are for correction (e.g., converting Log to Rec. 709).
- Creative LUTs are for grading and applying a specific style or mood.
- The correct workflow is crucial: Correction -> Technical LUT -> Creative LUT -> Adjust Intensity.
- A LUT is a tool, not a magic fix. It works best on well-exposed, properly corrected footage.
Next Lesson Preview:
We've learned how to create a consistent look within a scene and how to apply a grade efficiently with LUTs. But what happens when you're cutting between footage from an iPhone and a DSLR, or from a morning shoot and an afternoon shoot? The lighting and colors will be completely different. Our next lesson will address this challenge by focusing on how to match the color and exposure of shots from different cameras or lighting conditions.